Demonstrations
Home
Sliding Motion
Materials
- 2 wooden boards, approximately 10" by 10" by 1"
- 12 thin wooden beams, approximately 0.33" by 0.25" by 3"
- Wood glue
- Thin breakable sticks or spaghetti
Construction
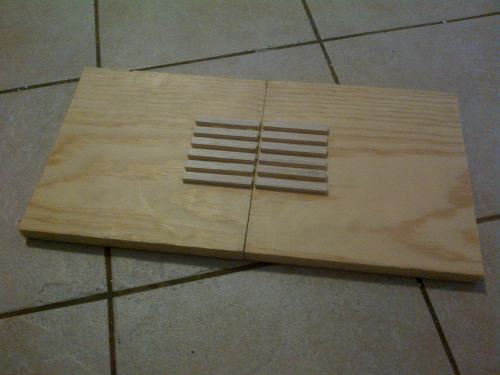
- Attach half the thin wooden beams parallel to each other along the edge of one of the wooden boards using wood glue.
- Attach the other half of the wooden beams to the edge of the other wooden board so the two boards are mirror images of each
other, as shown below.
Use
This demonstration shows how plates slide against each other.
By putting spaghetti or some other easily breakable stick between the wooden beams across both boards,
you can show how it takes force to make the plates move, thus showing that plates do not move smoothly against each other.

Convergent Motion
Materials
- 1 block of wood or strong foam
- Tin foil (optional)
Construction
- Cut the block through the middle at a diagonal so you get two pieces as shown below.
- The two parts of the block can be covered to be more esthetically pleasing or to create more friction between the two
instead of having them slide smoothly.
Use
This is used to show the motion between two convergent plates where one is a continent plate and one is an oceanc plate.
The ocean plate is pushed underneath the continent one.
Tension Between Plates
Materials
- Bag of heavy objects (eg. sand, rocks)
- Square box
- Paper clip
- Elastic band
- Pencil or needle
Construction
- Put the bag of material into the box.
- Using the end of a pencil or a needle, make two small holes half an inch apart in the center of one side of the box.
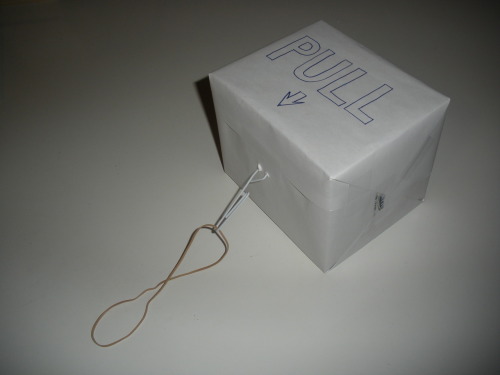
- Unbend the paper clip, leaving the innermost loop intact.
- Stick one end of the paper clip through one of the holes and bend it back through the second hole so it is attached to the box,
as shown in the picture below.
- Put the elastic band through the remaining loop in the paper clip.
Use
By pulling horizontally and slowly on the elastic band, you can show that although you are using a force to pull on the elastic band,
the box is not moving because the force building up isn't as strong as the friction force.
When the applied force is strong enough, the box moves in a jump, just like how the tectonic plates move in jumps.

Waves
Materials
No construction needed
Use
Have two people hold the ends of the slinky.
When they are far enough apart that the slinky is in almost a straight line, they can show different wave motion.
To show transverse waves, one personn holds their end still while the other person mves their end side to side.
To show longitudinal waves, one person again holds their end still while the other person moves their end toward and away from
themselves (motion parallel to the slinky).
Seismograph
Materials
- 1 crate or box
- Disposable cup
- String
- Small heavy objects
- Marker
- Tape
Construction
- Make two small holes on opposite sides of the cup near the rim.
- Make a larger hole (just big enough to fit the marker) in the bottom of the cup at the center.
- Make two small holes about a half inch apart on the side of the box (if there aren't holes already, such as with a crate).
- Put the marker through the hole in the bottom of the cup and secure it in place using tape.
- Fill the cup with the heavy objects.
- Lay the box on its side. Put the string through the two holes near the rim of the cup and use the string to hang the cup from the box or crate.
When hanging, the tip of the marker should just reach the bottom of the box.
Use
This simple seismograph can be used to show how scientists detect wave from ground motion.
By shaking the box and moving a pience of paper under the marker at the same time, the marker shows waves on the paper.


