Using Gravity Home How Does It Work Construction Instructions
To Generate
Electricity
Home
Ever wondered how to turn on a light bulb without having to pay your electricity bills? This website provides you with all the necessary information enabling you to create your own device that generates electricity simply by letting a mass fall for a certain period of time.
As a physics student at University of British Columbia, this webpage is created with respect to the course, PHYSICS 420C- Demonstrations in physics with the main aim to portray real life applications of physics and its importance in our everyday lives. You will also find an explanation of the physics behind this demonstration and how it works. Finally, you can find a set of instructions on how to operate the device once its construction is complete. Hope you will enjoy!
How Does It Work
The main physics concept that is focused on for this demonstration is the law of conservation of energy. As we know, energy cannot be destroyed nor created; it only changes its form from one to another. Therefore, this demonstration plays on the idea that if energy is conserved, then it is possible to convert the gravitational potential energy of a mass, at a certain height above ground, to electrical energy. Finally, we need a medium for converting this gravitational potential energy to electrical energy. To solve this problem, we use a generator (in the form of a reversed motor) to transform the mechanical energy of the now falling (initially stationary) mass into electrical energy.
Stationary Mass Mass in motion + spinning wheel Generator
- Gravitational Potential Energy - Translational + Rotational Kinetic Energy - Mechanical to Electrical Energy
Light bulb
- Light Energy
Construction + Materials
Materials:
Click here to see how to put the device together
Putting the Structure Together:
First we need to build a structure on which we can mount our motor. Check Instructions + Operation section of this website for more instructions regarding this structure.
Step 1
Take the two 1.73 meter long pieces of wood. Use the square piece of wood (0.5 meter x 0.5 meter) as a base and drill the two pieces of wood parallel to one another on opposite ends of the base. You now have an upside-down table.
Step 2
Next, drill the 0.5 meter long piece of wood to each one of the legs perpendicular to the length of the leg. Furthermore, drill another 0.5 meter long piece of wood diagonally between the table legs. This will provide a rigid structure and prevents your device to wobble too much once the weight is falling.
Step 3
Take the final 0.5 meter long piece of wood and drill it to the top of your structure between the two legs. This will serve as the platform that holds the motor.
Click here to see how to attach the motor
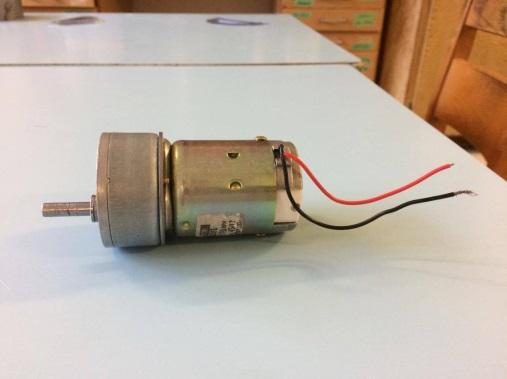
Attaching the Generator
Once we have our platform ready, we can now attach the motor to complete the device.
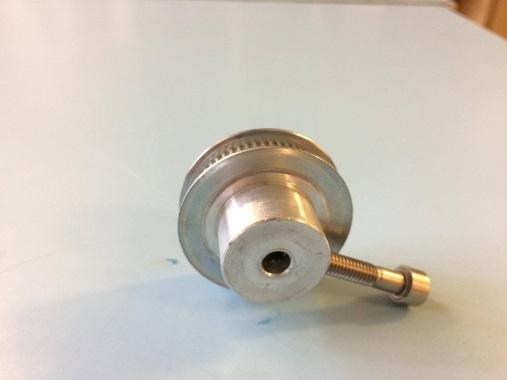
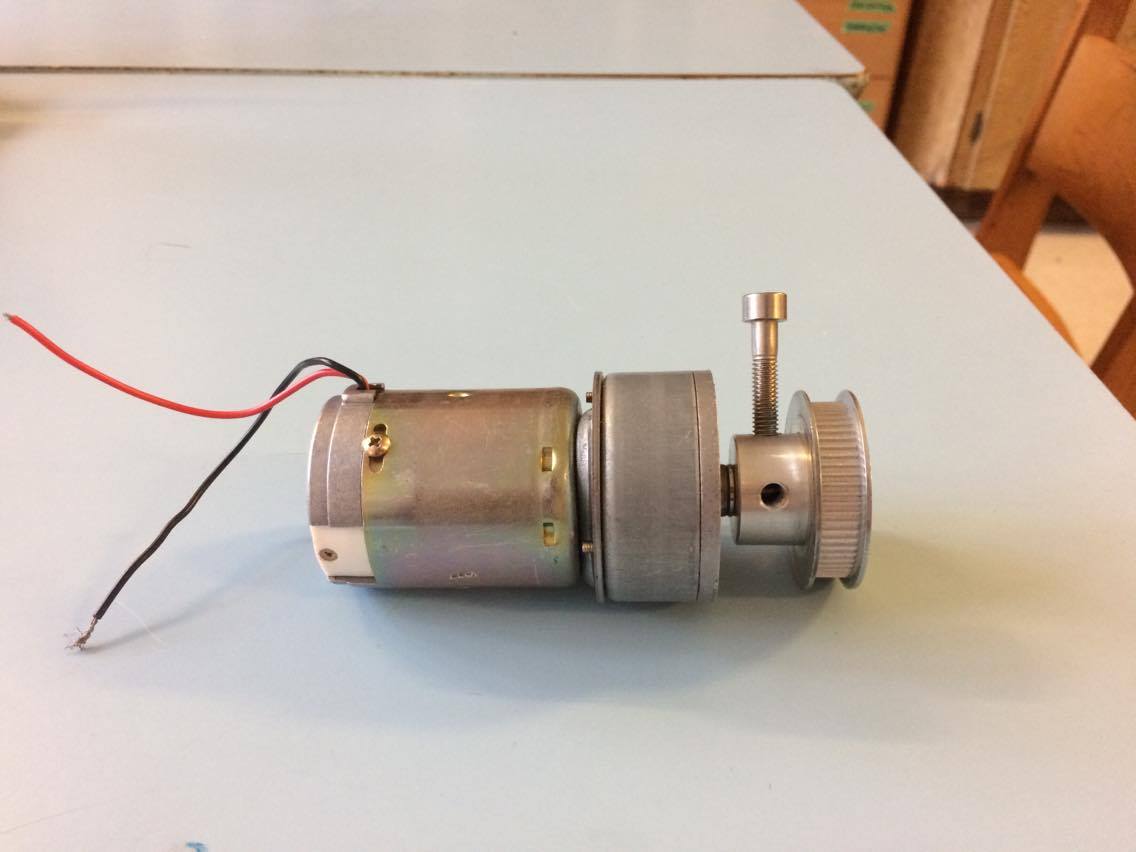
Step 1
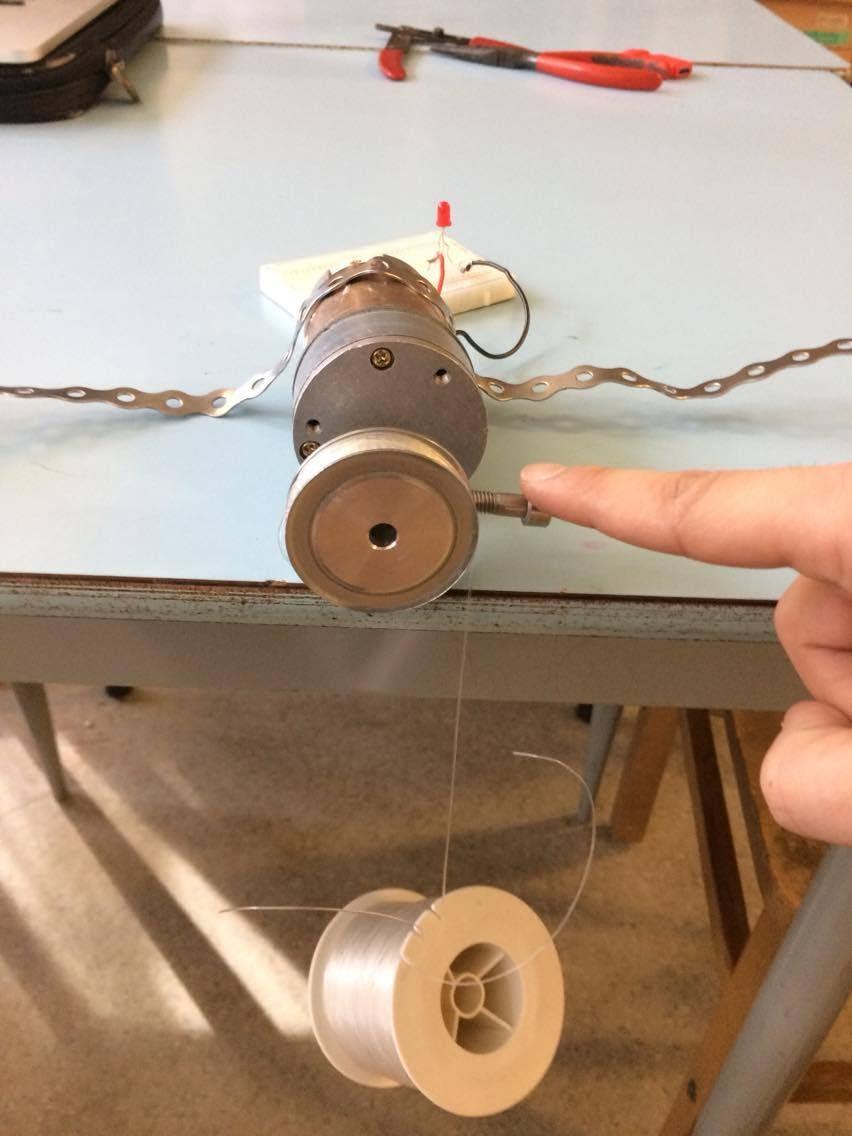
Take the wheel and attach it to the shaft of your motor
Motor Wheel
Motor + Wheel
Step 2
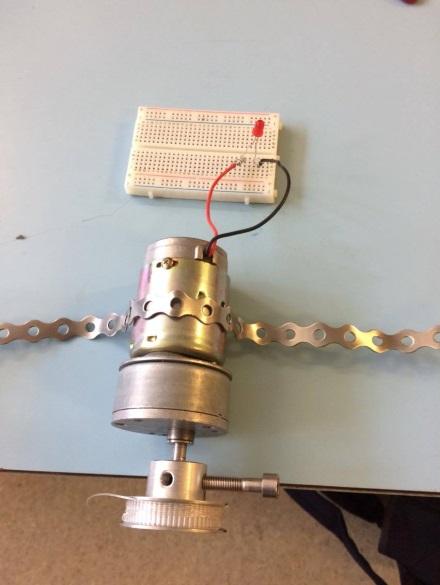
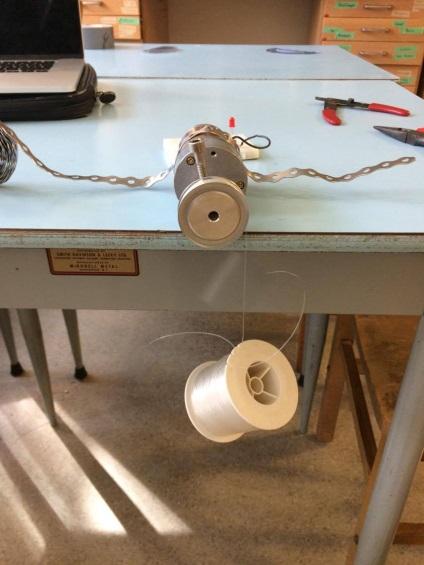
Tie the fish line around the wheel and turn until at least 1.73 meter of fish line has rotated around the wheel.
Step 3
Finally, strap the motor to the top of the structure using metal straps. Furthermore, attach the wires of the motor to the bread board in series circuit with the LED light and attach the weight to the end of the string.
Complete set-up without weight Complete set-up with weight (where the fish line roll represents the weight)
Instructions
Instructions For Motor Use
The motor in this demonstration is used in a reversed manner to work as a generator. Since a motor takes in electrical energy and transforms it to mechanical, then a generator does the opposite and converts mechanical into electrical. One thing to keep in mind when dealing with your motor is its gear reduction ratio. A larger gear reduction ratio requires a larger weight to put the wheel in motion. This means that it will also fall slower. You can use this information as reference for when deciding how high you want to build your structure depending on how long you want to generate electricity for. You can also add more LED`s for more light, however this will change the falling speed of the mass as you are adding more resistance in your circuit. You can play around with this to find the desired number of lights you want to use.
One useful trait of the motor in our situation is that it requires a certain initial force in the beginning to overcome the motors static friction and allow for rotation of the wheel. To solve this, we can simply push on the wheel to put it in motion.
Instruction For Building the Structure
You can be as creative as possible with this part. My structure is just a personal preference of how I wanted it created and the reason for its height was because it complemented the gear reduction ratio of my motor and allowed for the mass to fall for a long enough time giving sufficient observation time for the audience.
A Final Note
If you are interested in this demonstration, there is currently a business project based on the idea of generating electricity using gravity. This project is called Gravity Light and is now in the markets helping provide electricity in third world countries and other parts of the world where access to electricity is scarce. Check out their website at http://gravitylight.org/.
Finally, below is a YouTube video of my demonstration in motion. Thank you for visiting my webpage and hope you found it useful!