
DESIGN
In preparation for teaching this hydraulics lesson you will need to build three things: a Cartesian diver, a hydraulic syringe system, and a frame designed to allow you to use a hydraulic syringe system to remotely interact with the Cartesian diver.
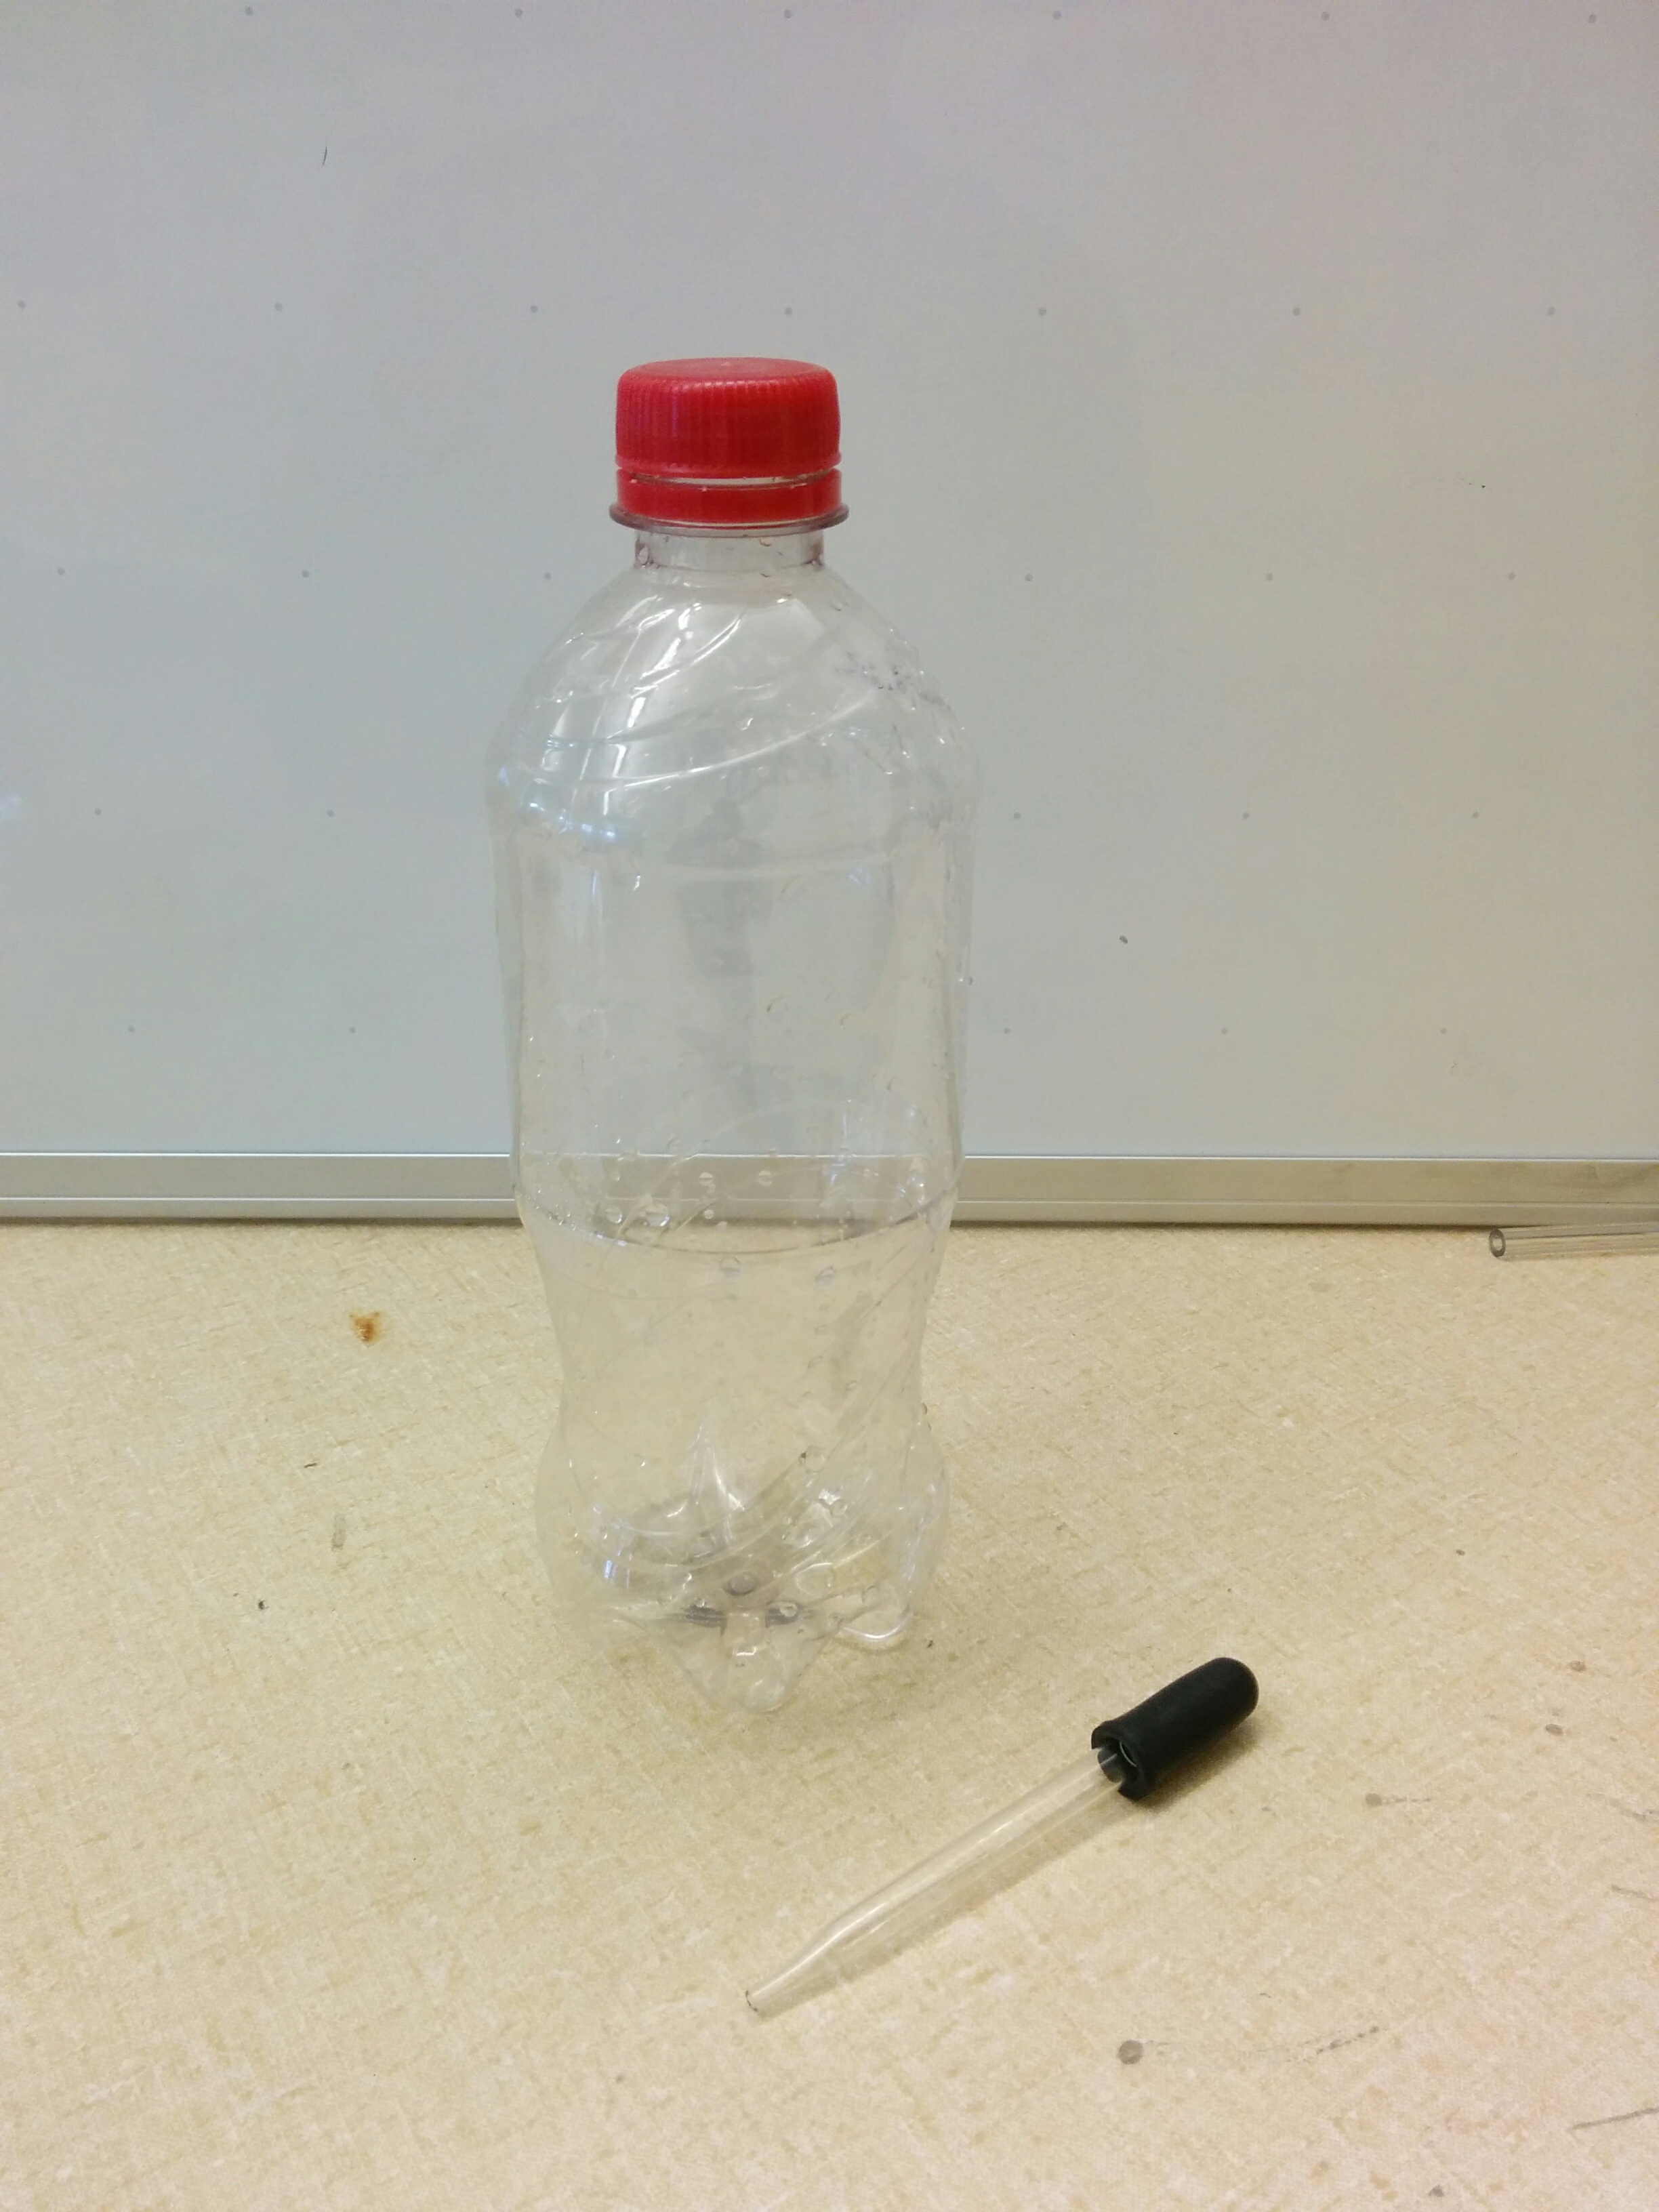
Cartesian diver building instructions:
Materials: Two-litre pop bottle with the label removed, eye dropper, water
Building a Cartesian diver is a quick and simple process. It is a great tool to be used in the classroom because you can have students create their own in less than five minutes.
Step 1: The first step for building a Cartesian diver is to fill the pop-bottle three-quarters full with water.
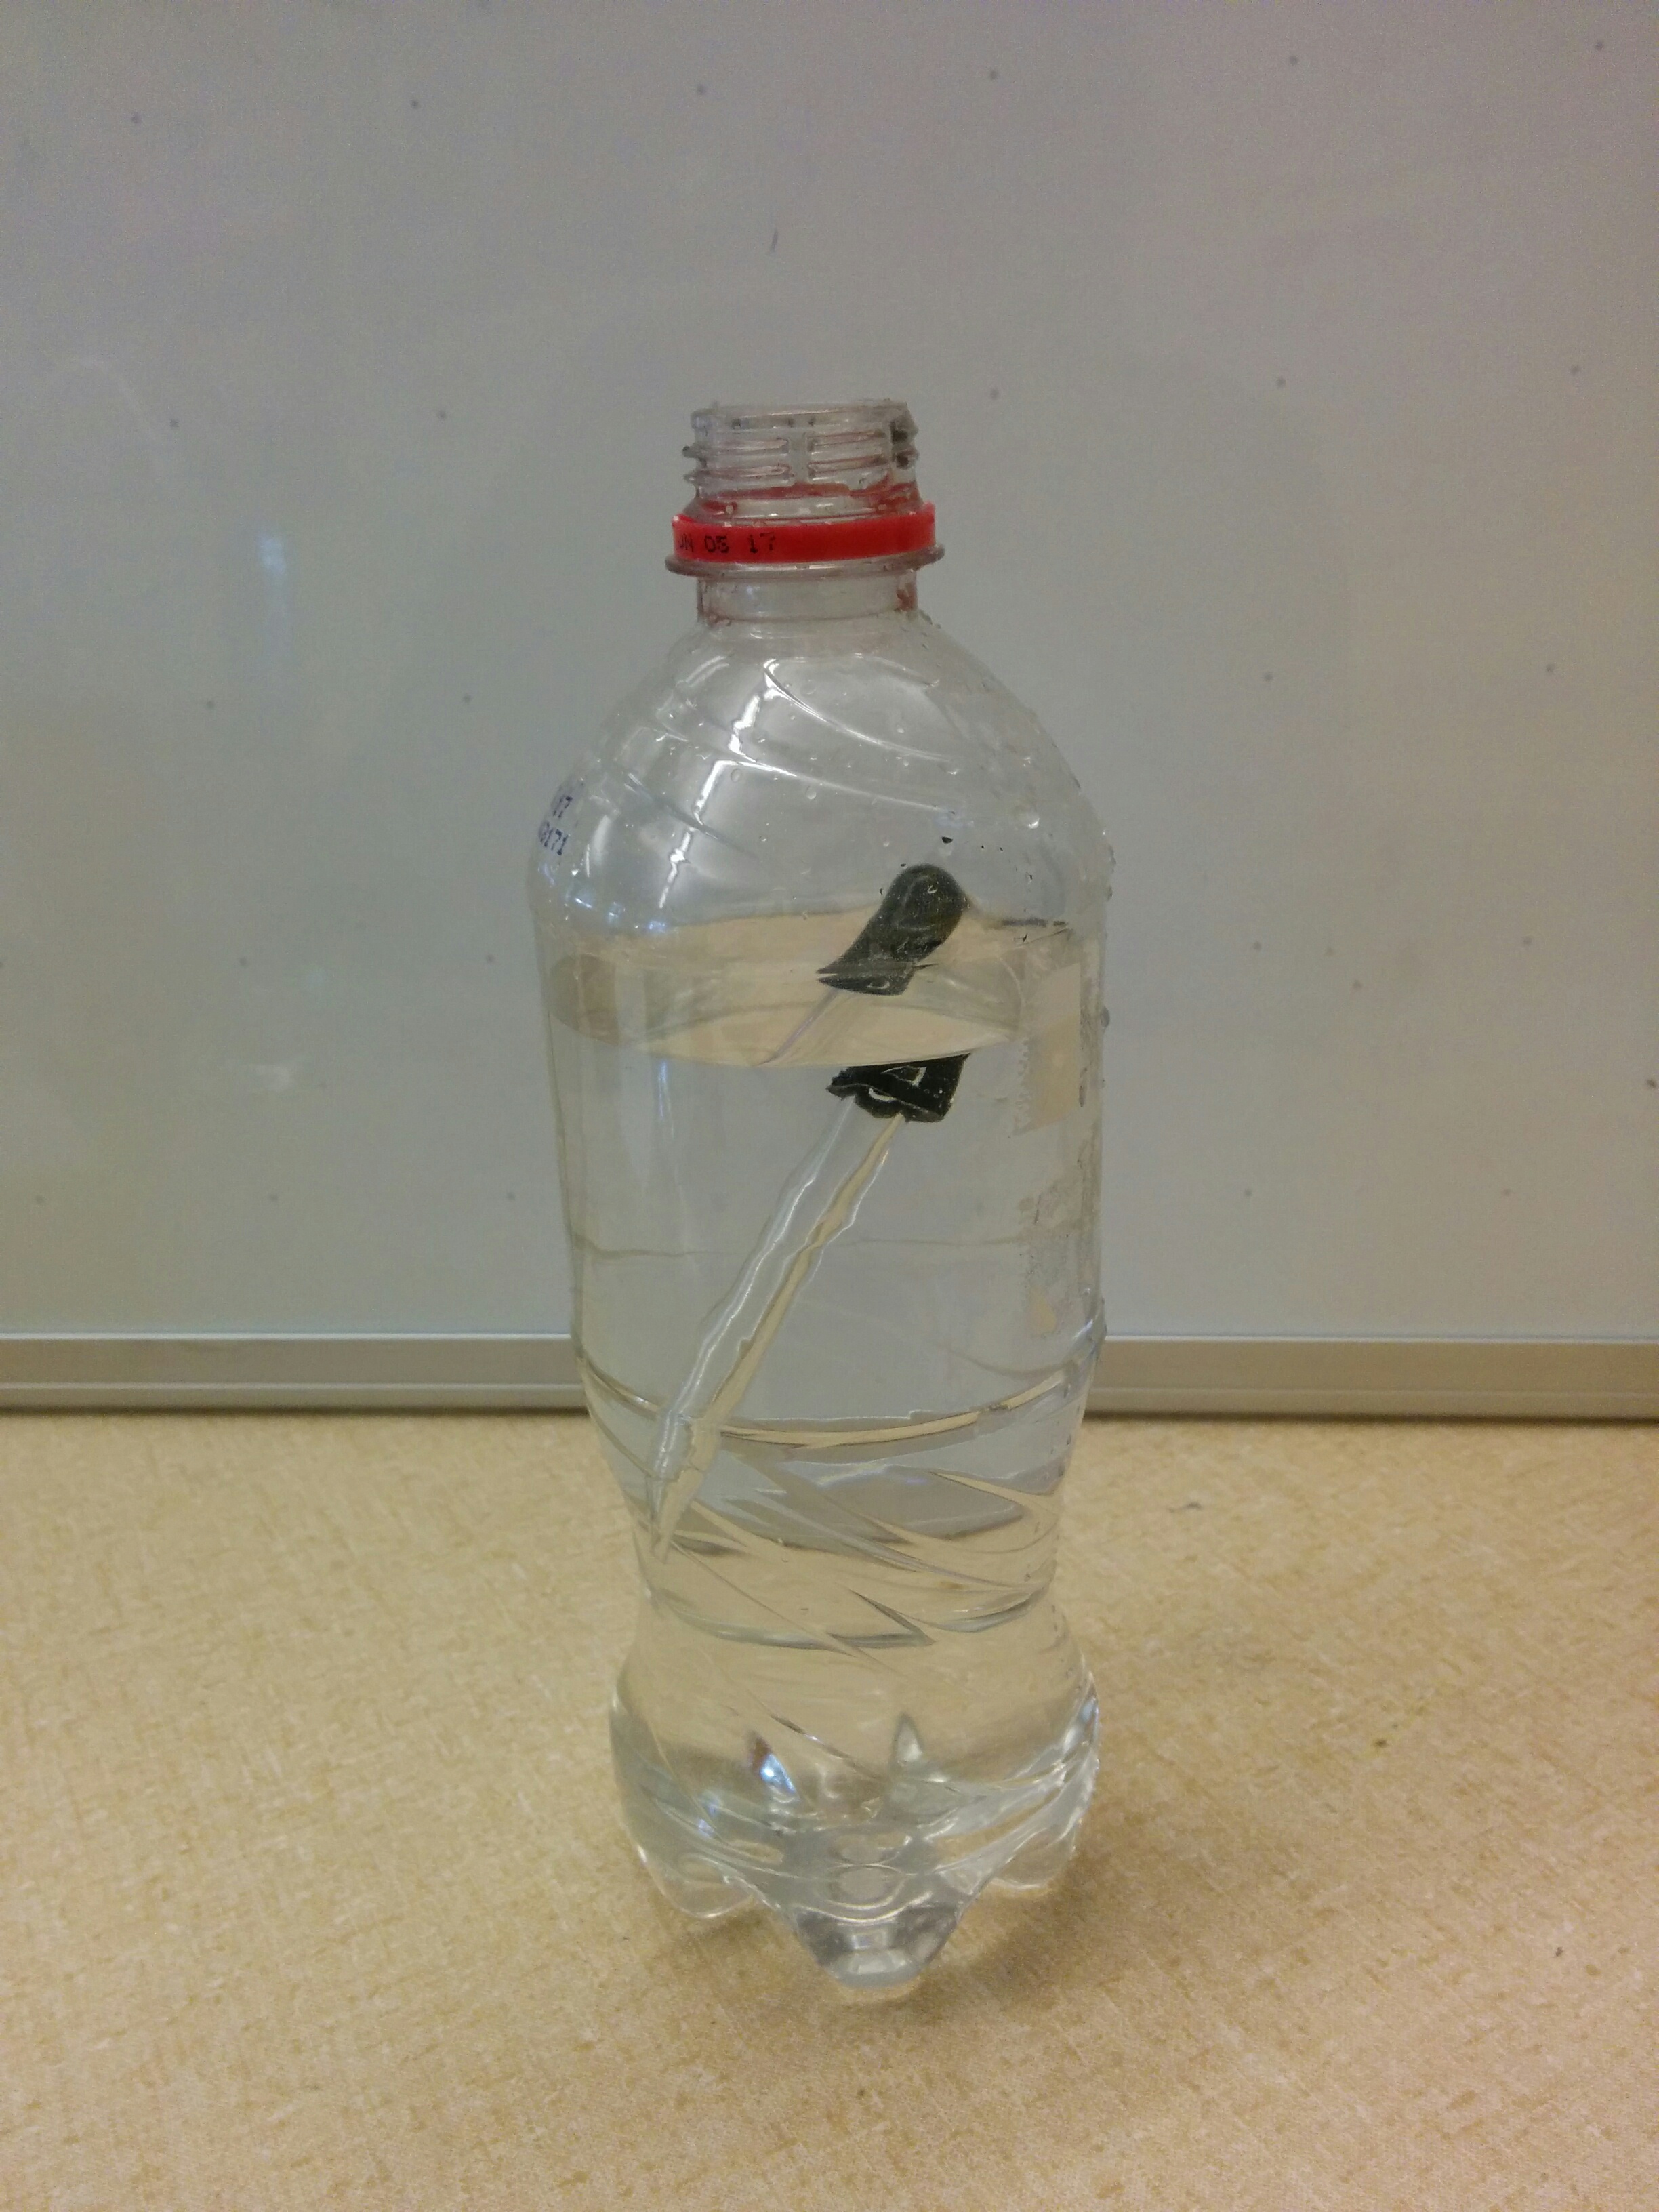
Step 2: Take the eye dropper and drop it into the pop bottle with the rubber end facing upward. The dropper should float due to the air bubble trapped inside. If it does not float, you may need to find another dropper to use. The eye droppers commonly found in chemistry store rooms are usually well suited for creating a Cartesian diver. If the eye dropper sinks, let the water sit for several minutes. There may be too many air bubbles in the water, which decreases its density.
Step 3: Once you have a dropper successfully floating, fill the pop bottle the rest of the way with water.
Step 4: Put the cap on the bottle so that no water or air can escape the bottle.
Step 5: Now when you squeeze the bottle, the diver should sink to the bottom and then return to the top when you release your grasp. If the dropper does not sink when you squeeze the bottle, you can either remove some air from inside the dropper or add some extra weight to it. To replace some of the air inside the dropper with water you will need to remove it from the bottle and draw water into it by squeezing the rubber bit and placing it underwater before releasing your grip.
You may need to fiddle with the amount of air in the dropper several times before it has the proper pressure sensitivity. If done correctly, it shouldnt take very much pressure to cause the diver to sink.
Hydraulic Syringe System Building Instructions:
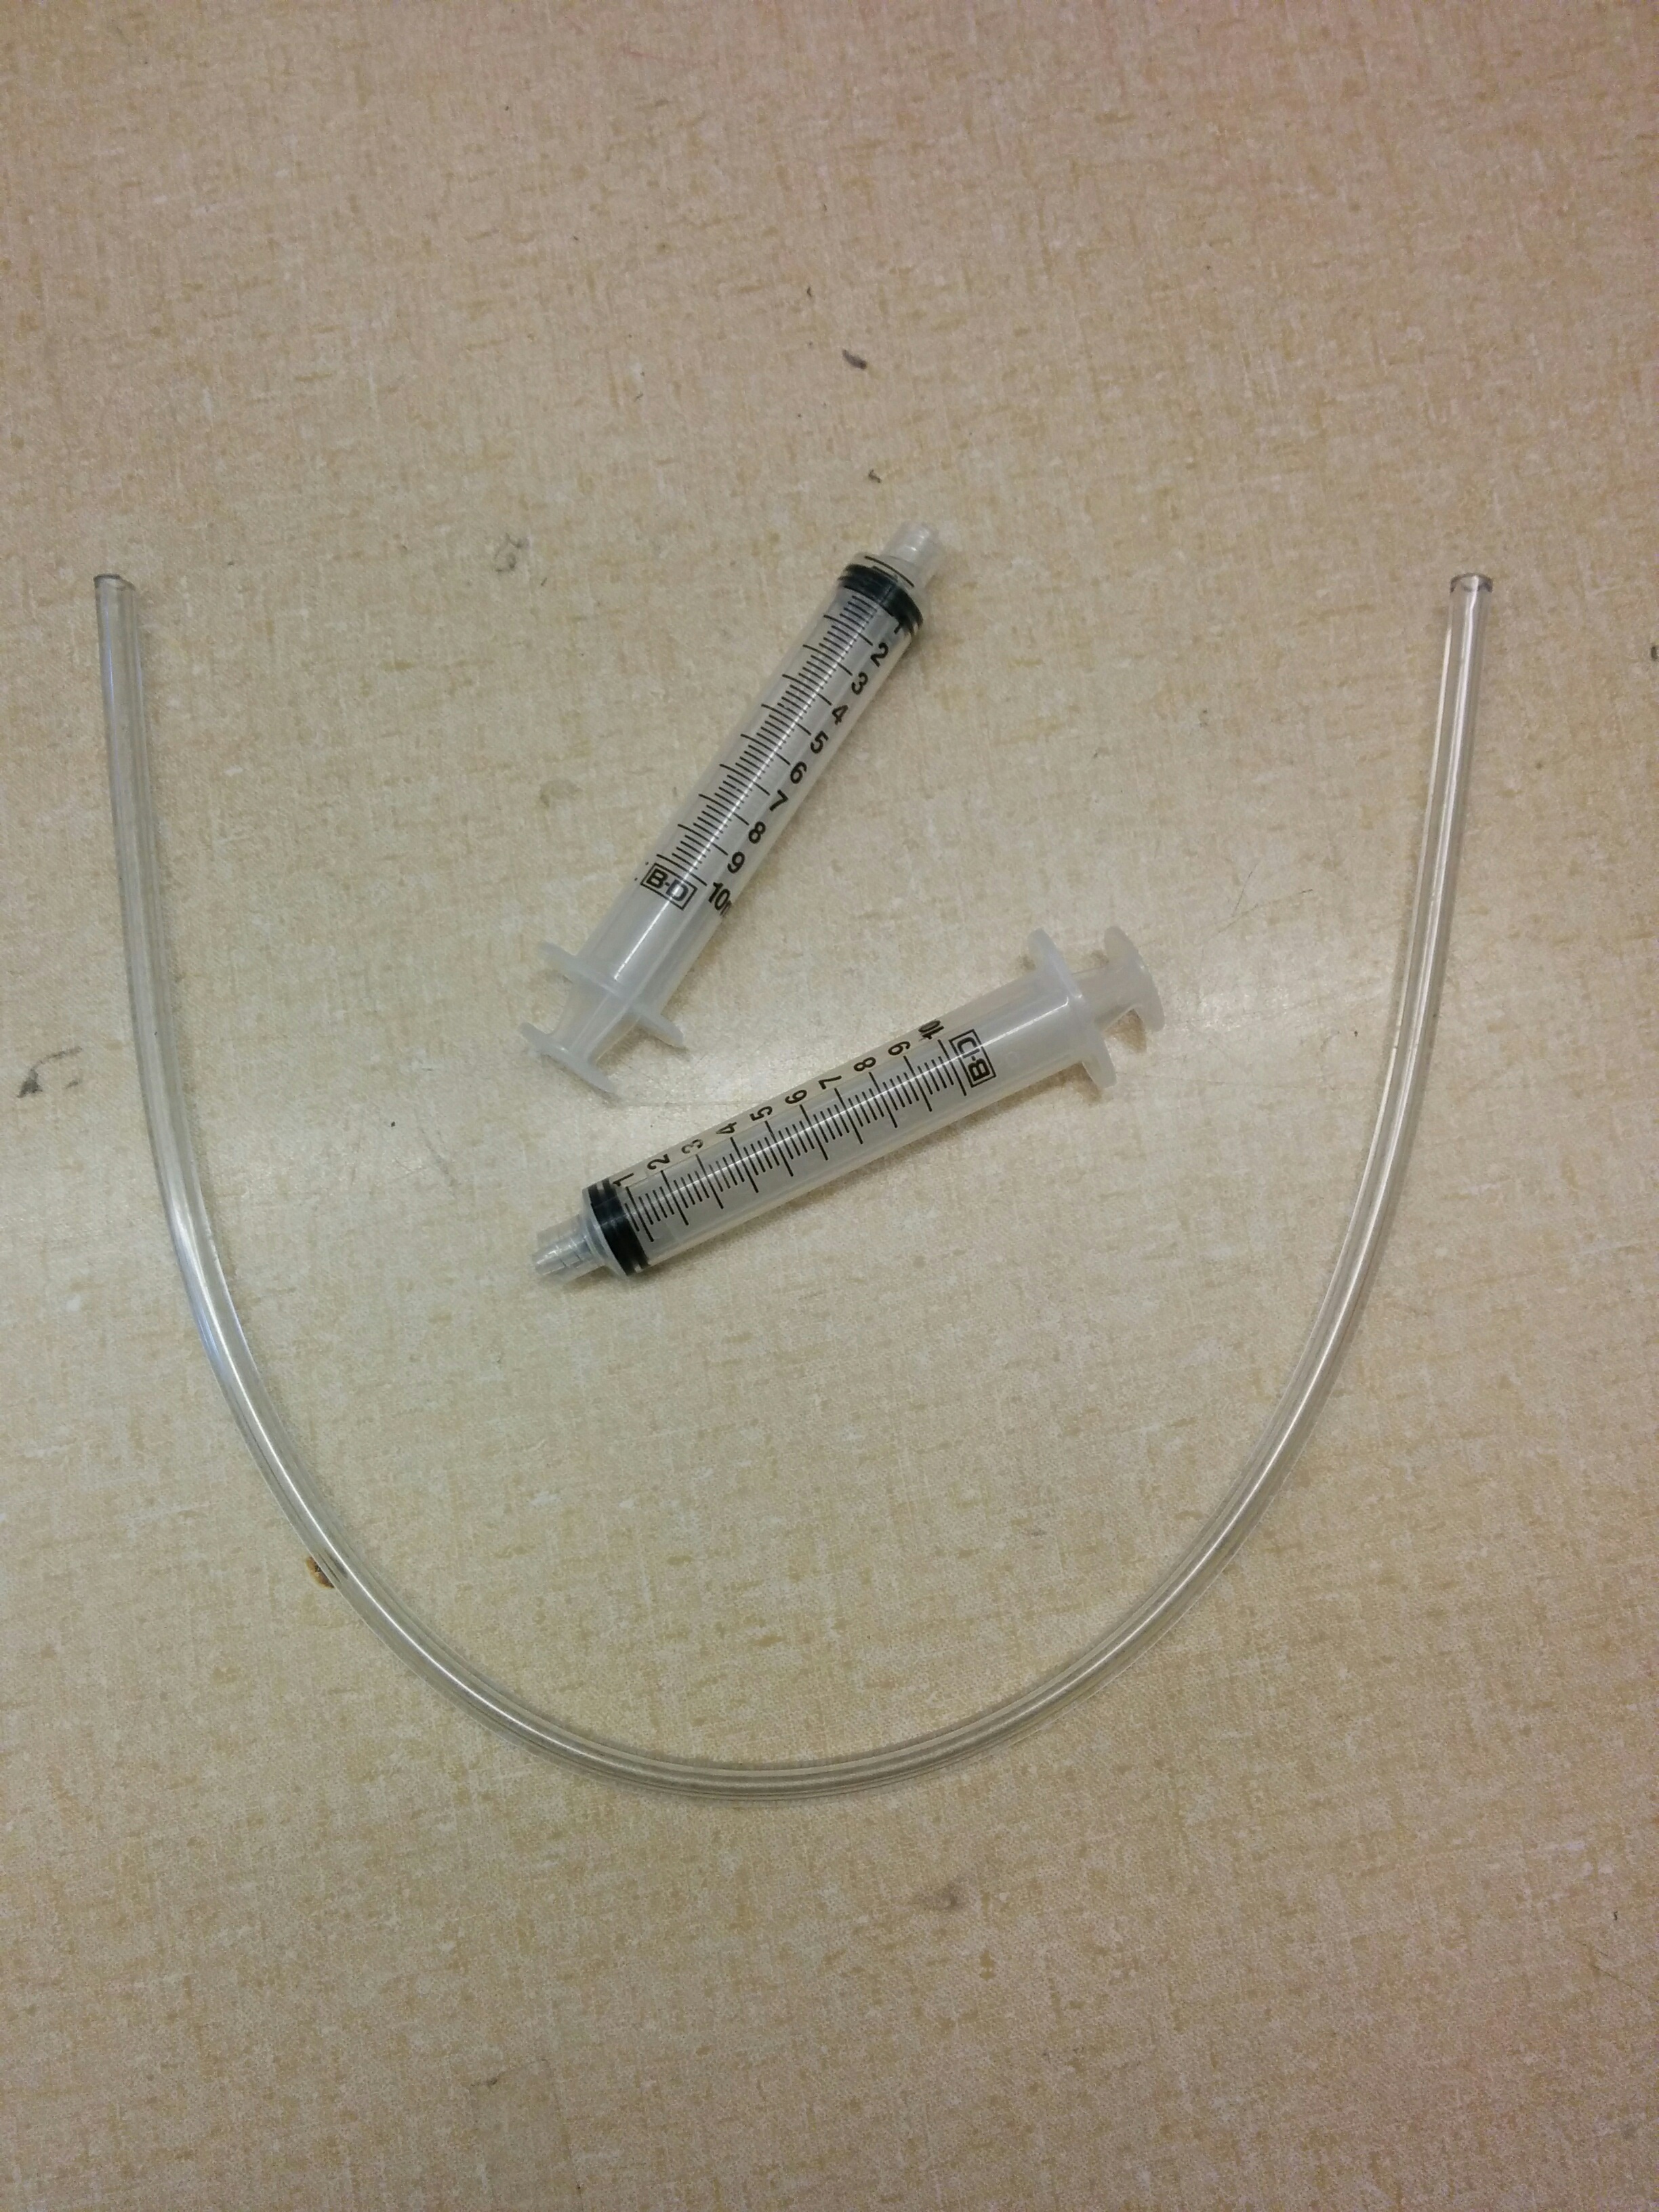
Materials: Two syringes, plastic tubing, water in a container
Hydraulic syringe systems are also suitable for having students create them during class.
Step 1: Push the air out of both of the syringes by pushing the pistons into the chambers.
Step 2: Take one of the syringes, place the hole which is located at the tip of the syringe underwater and draw water into the chamber by pulling the piston out of the chamber.
Step 3: Attach one end of the tube to the tip of the syringe where the hole is.
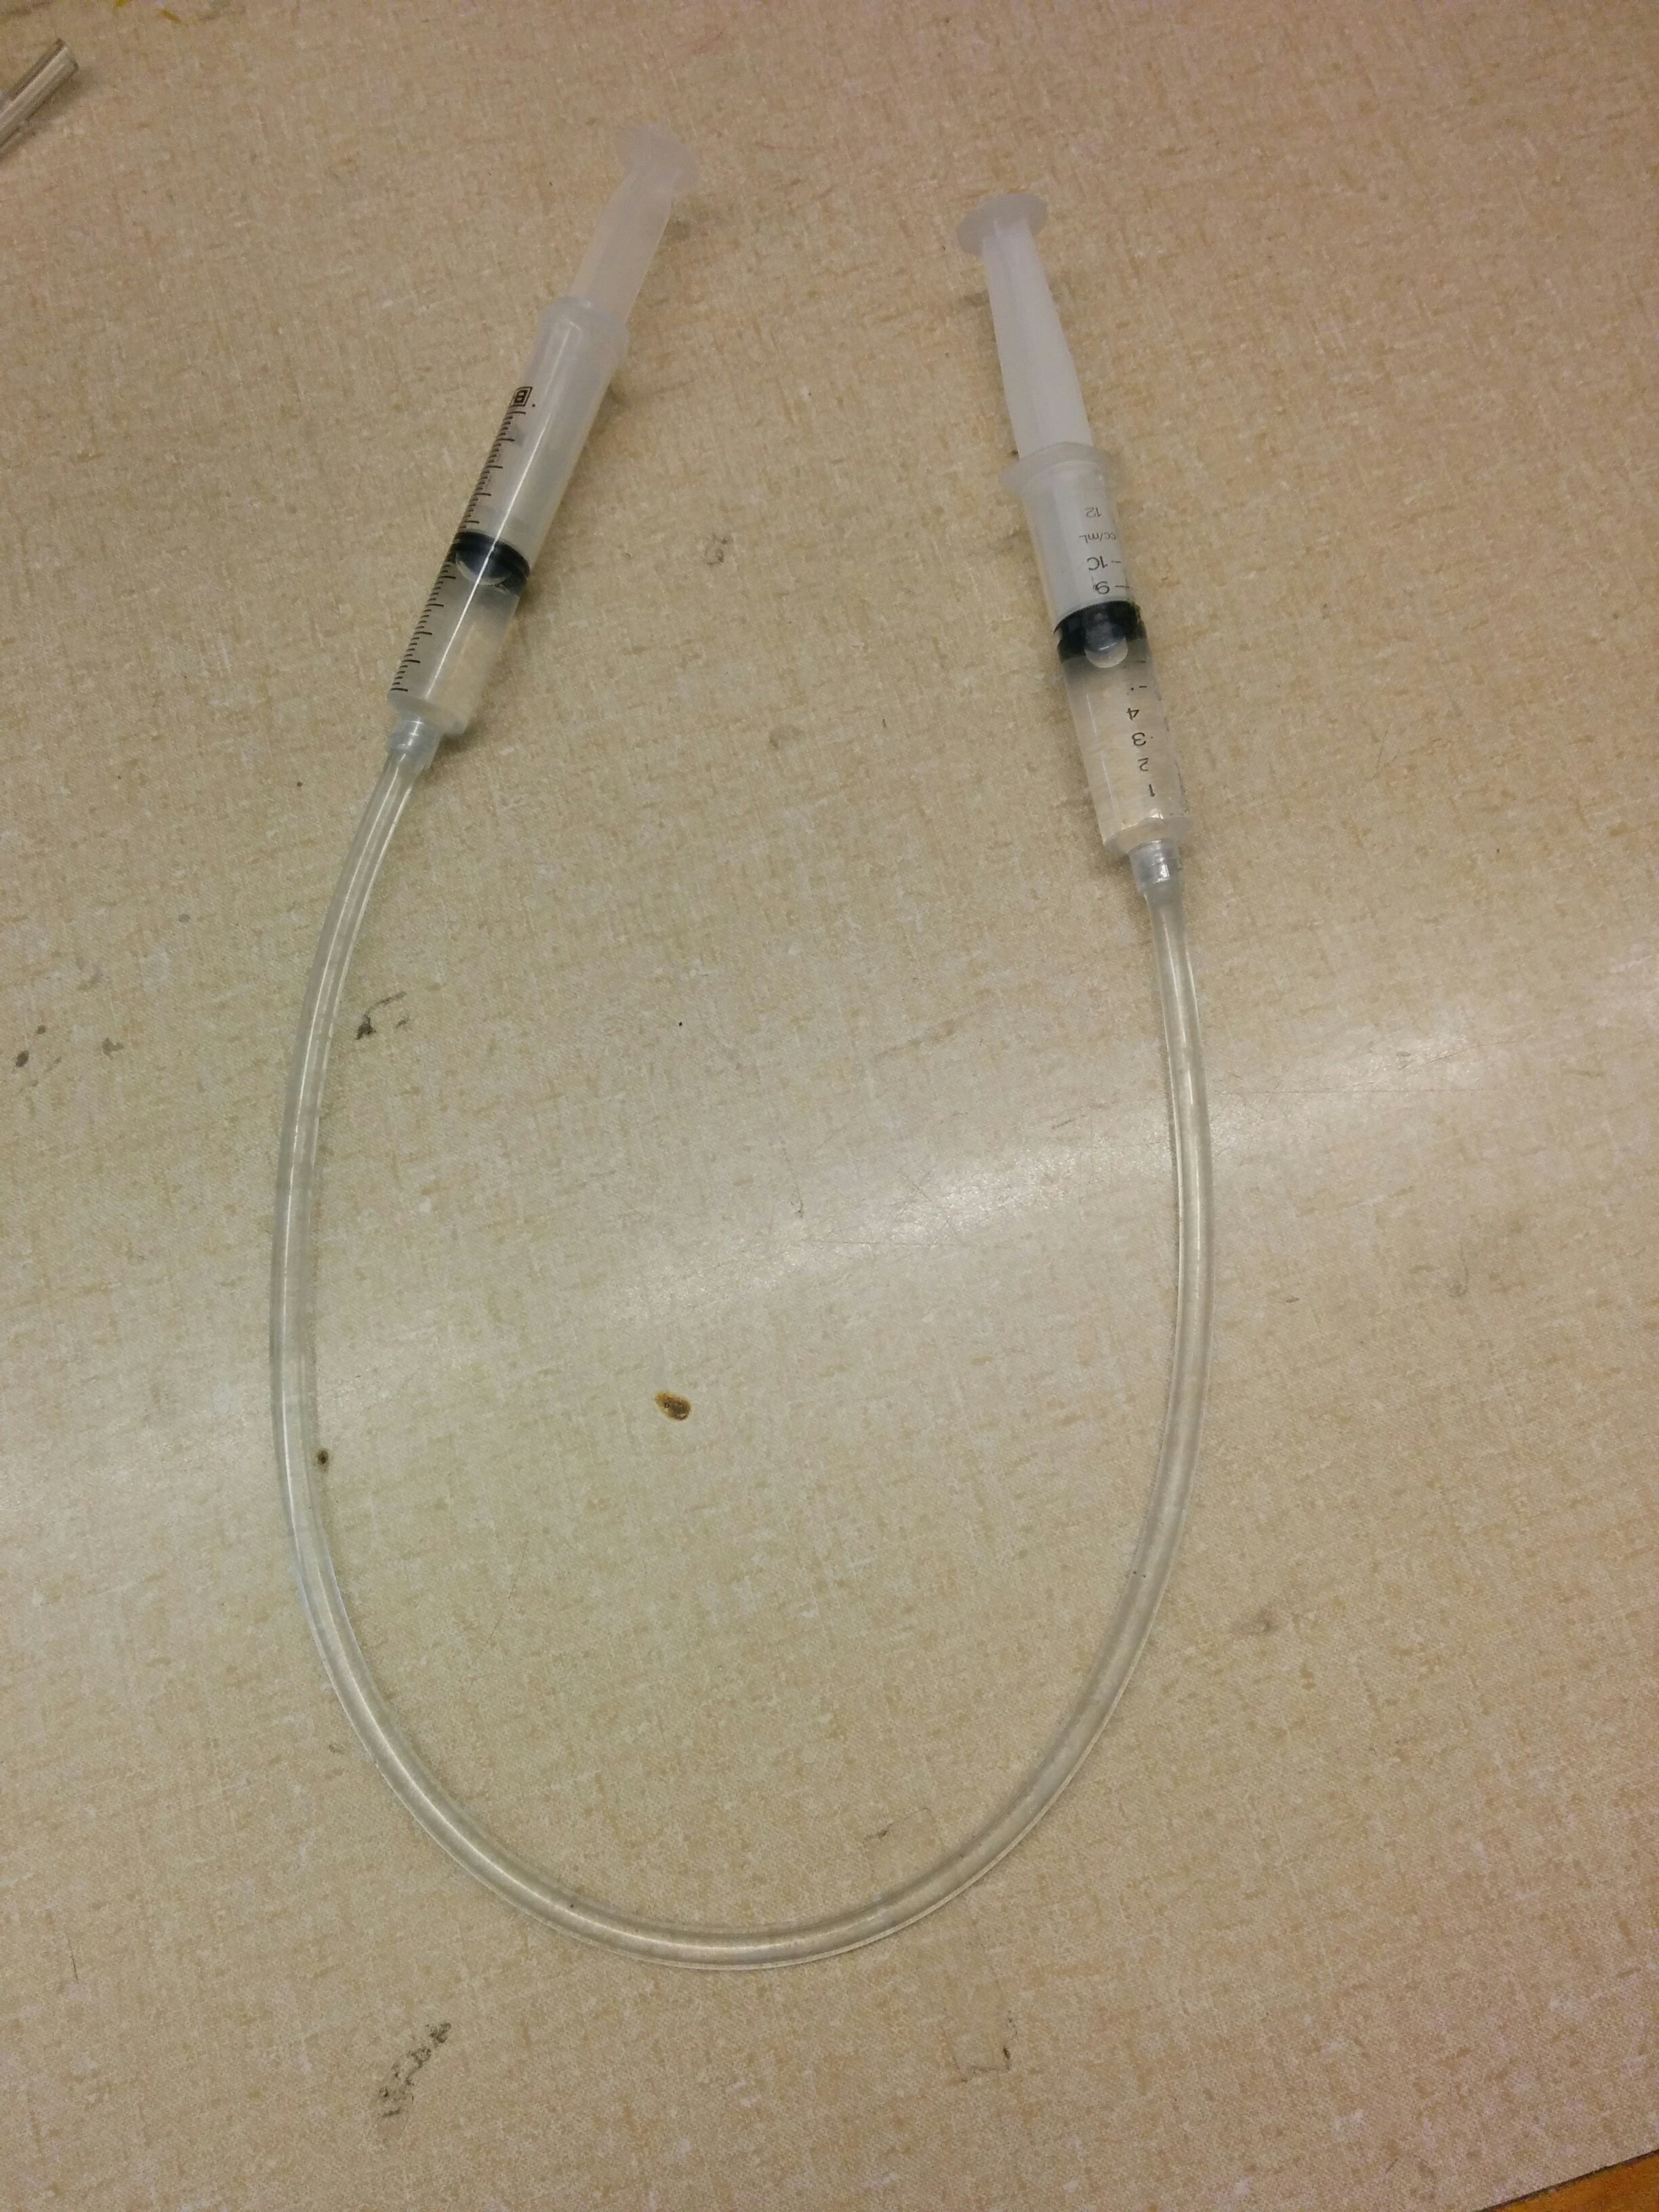
Step 4: Hold the syringe so that the tip with the attached tubing is facing upward and any air bubbles inside the chamber rise to the tip. Expel the air bubbles and some of the water from the syringe chamber until the tubing is full of water.
Step 5: Submerge the other end of the tubing underwater and draw more water into the chamber through the tube.
Step 6: Take the second syringe, submerge it underwater as well and attach it to the other end of the tube. Try your best to get all of the larger air bubbles out of the tube and the syringe chambers. You will need to detach one of the syringes from the tubing in order to accomplish this.
Step 7: Remove the syringe system from the water and dry it off. Now when you push one of the pistons into the syringe chamber, the piston of the other syringe should be forced out of its chamber.
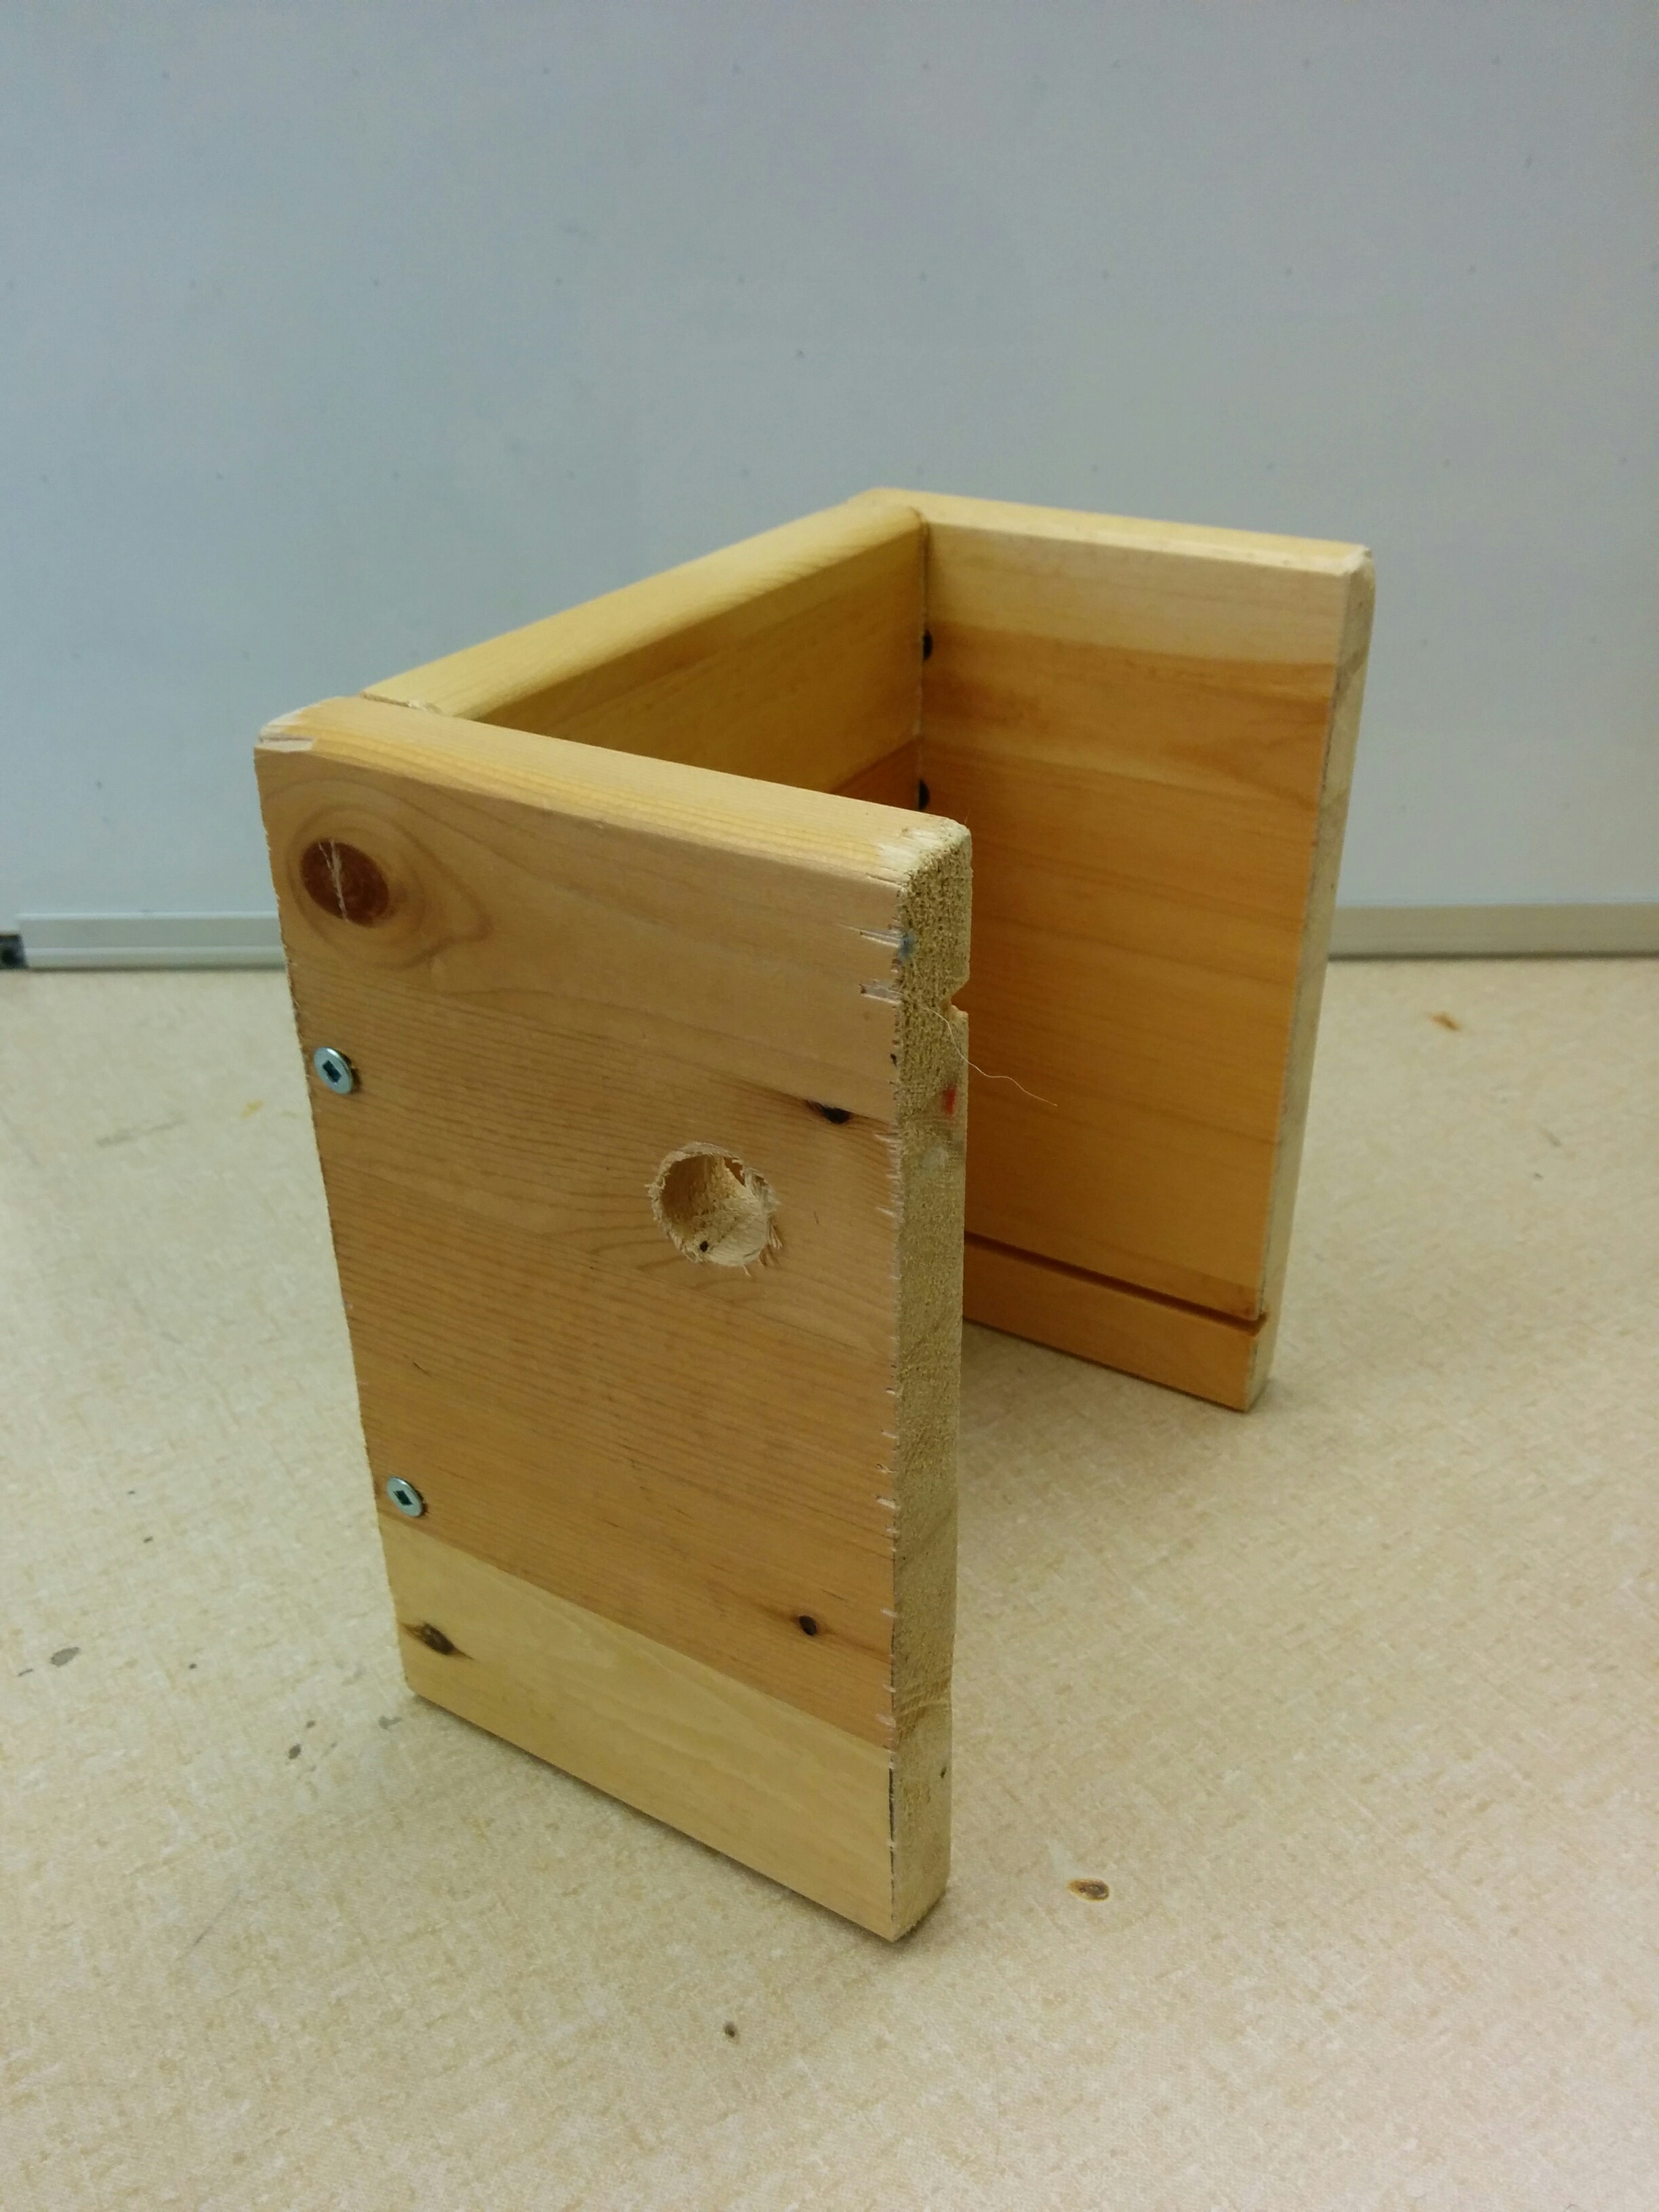
Frame Building Instructions:
Materials: 14cm x 10cm x 2cm block of wood (x2), 14cm x 12cm x 2cm (x1), 4 screws, electric driver with a drill bit suitable for the size of your screws, and a drill bit with a slightly larger diameter than the chamber of your hydraulic syringes.
Step 1: Arrange the wooden blocks as seen in the image and attach them together using an electric driver and screws.
Step 2: Drill a larger hole, with an approximate diameter of 1.5 cm, in one of the 14x10x2cm blocks. The hole should be approximately 8cm from the base of the frame. The chamber of the syringe should fit snuggly in this hole.
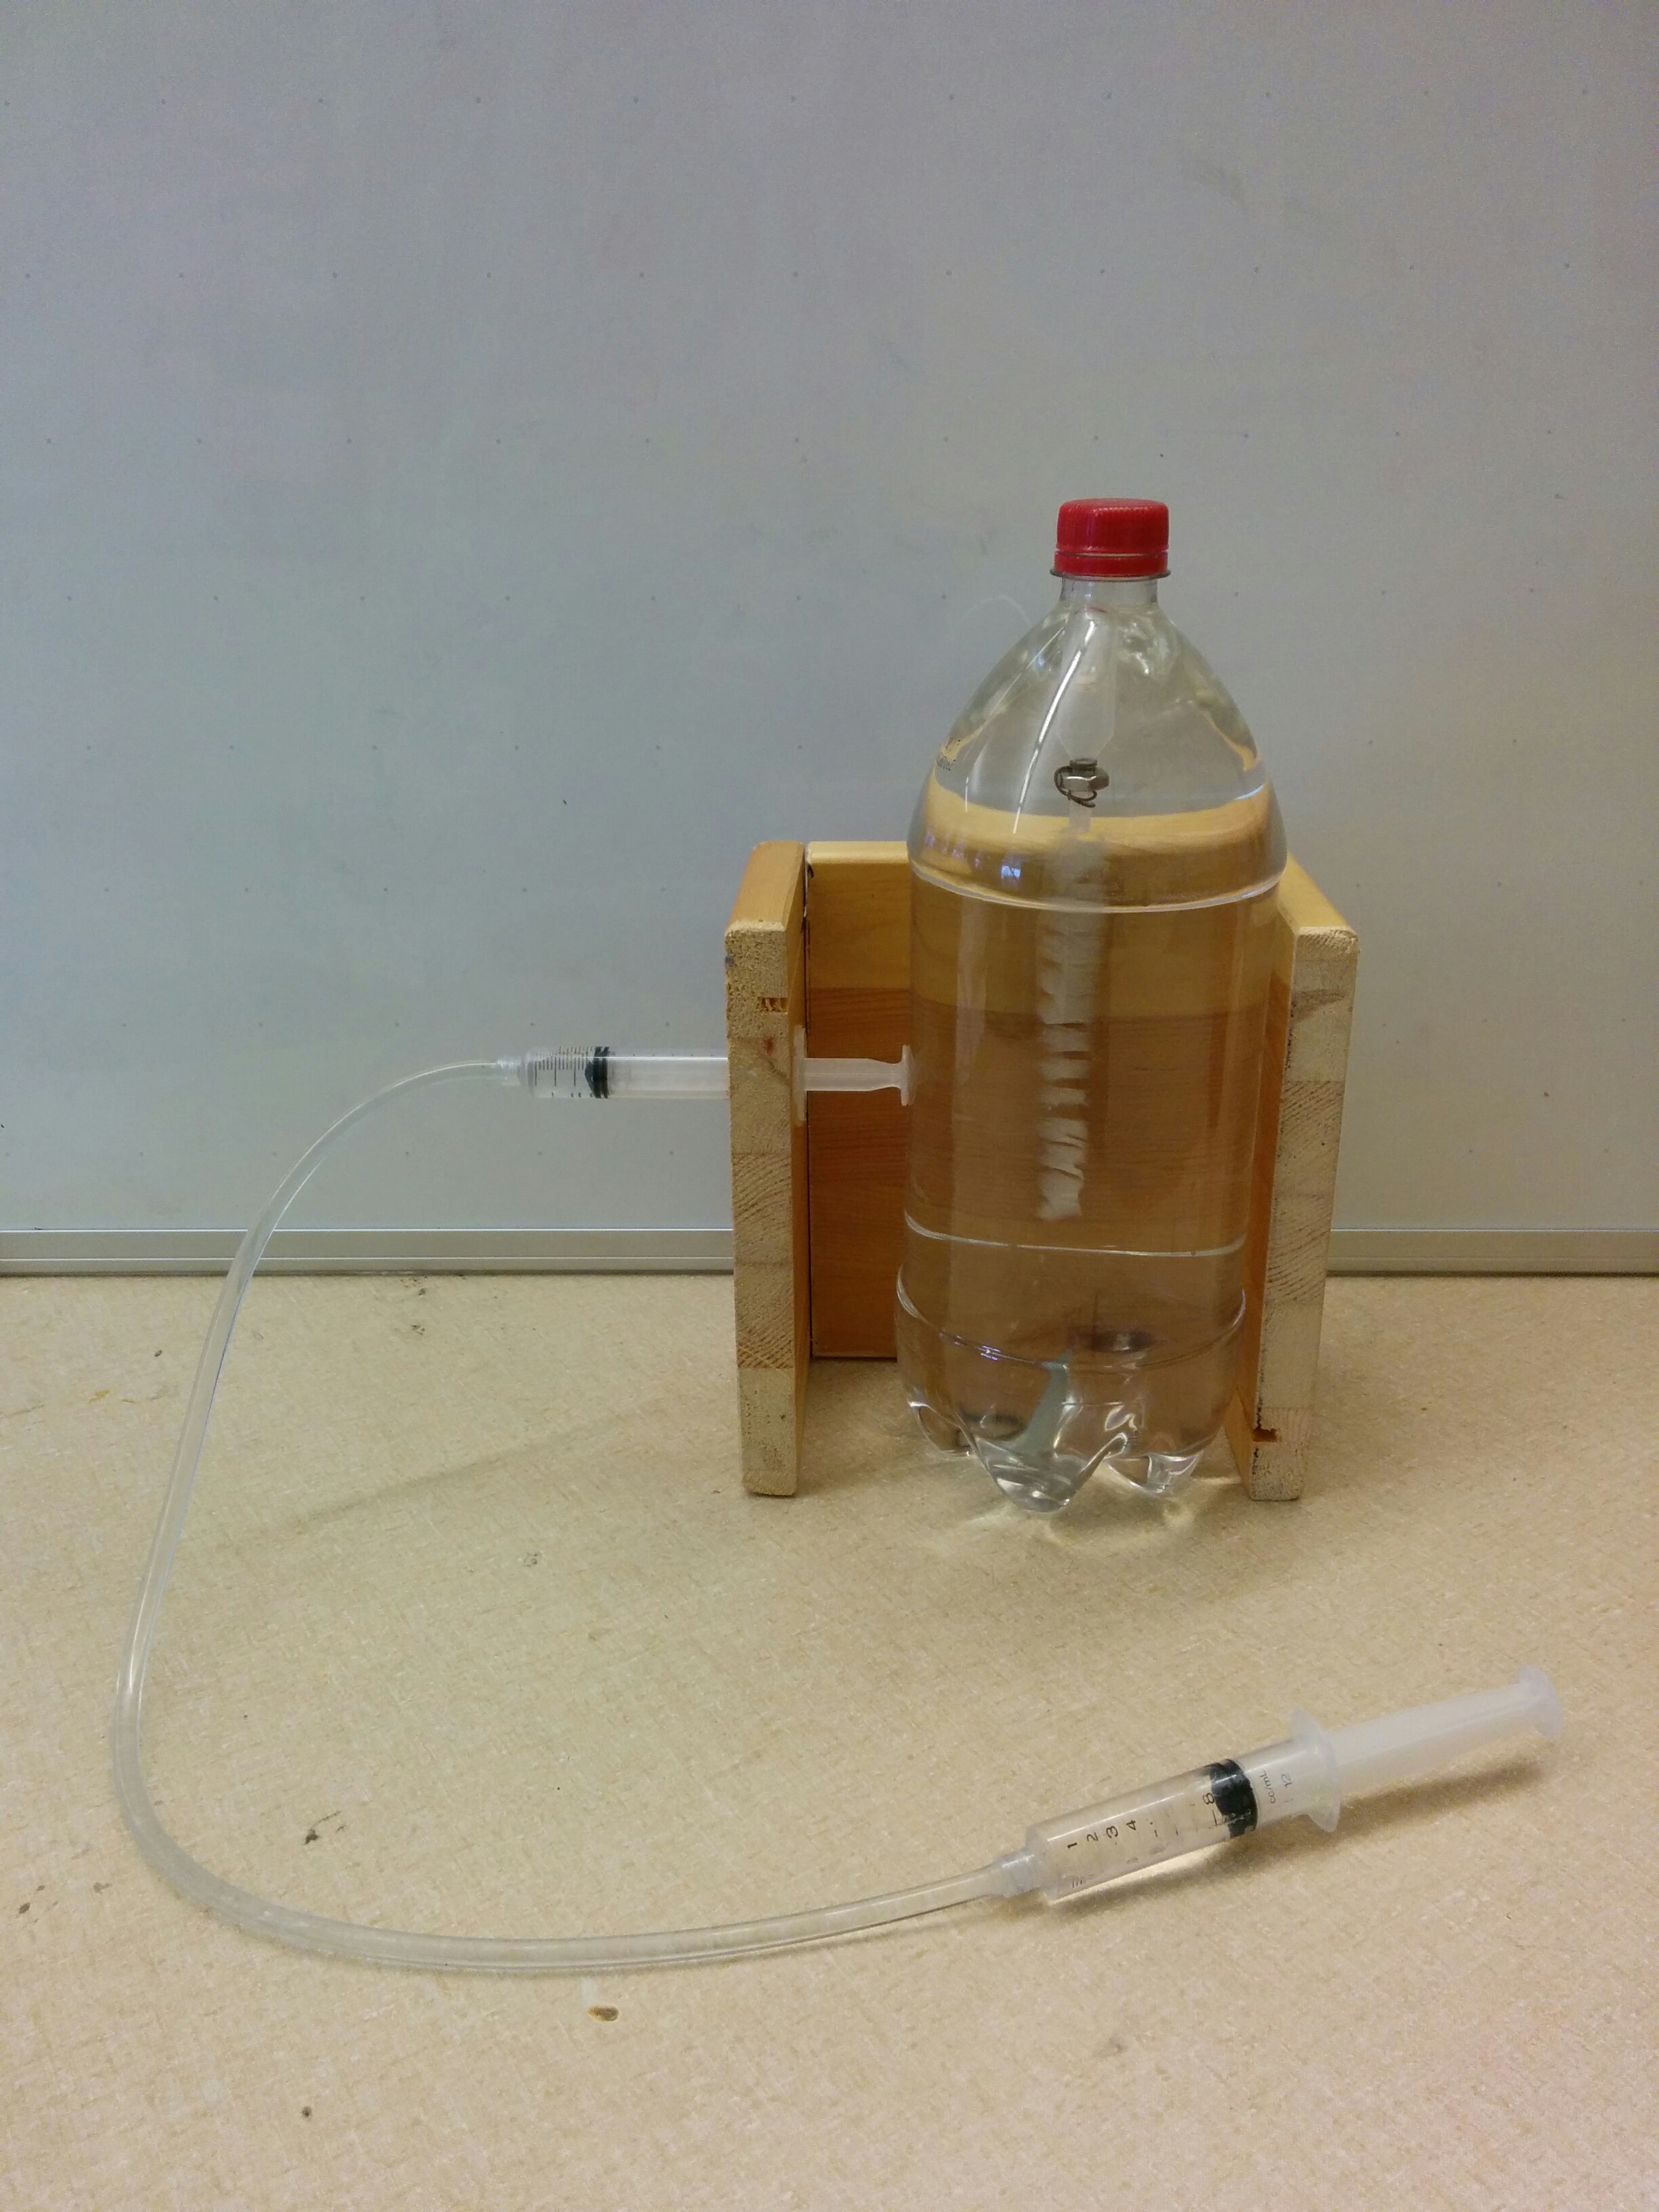
Step 3: You can now combine this frame with your hydraulic syringe system by disconnecting one of the syringes from the tube (make sure that the syringe you disconnect has no water in its chamber).
Step 4: Insert the syringe in the large hole oriented so that the piston is facing the inside of the frame.
Step 5: Re-attach the tip of the syringe to the tubing.
Step 6: You can now place the Cartesian diver within the frame. When you press the piston of the syringe on the far end of the tubing, you should observe the other syringe piston being expelled from its chamber and putting pressure on the Cartesian diver.
You can now remotely activate the diver using your hydraulic system.
LESSON
Learning Goals:
- Students will understand that water is essentially incompressible and that we use this property to our advantage in hydraulic systems.
- They will understand that gases can be relatively easy to compress at least a small amount.
- Applying pressure on a gas changes the density of the gas by decreasing the volume of the gas.
This hydraulics lesson is designed to be done with a class of grade 8 students as part of the new grade 8 BC Curriculum. The curriculum expects students to understand the basics of kinetic molecular theory, including how particles behave in different states of matter.
The format of this lesson revolves around the Cartesian diver demonstration. It is done in an un-demo fashion, meaning that the demonstration is done at the beginning of the class, which raises many questions for the students. The students then spend the rest of the lesson immersed in conversation and experimentation in order to create an explanation for how the demonstration works. The main feature of the lesson is the Cartesian diver, but hydraulic syringe systems are also used to reinforce the learning goals and help guide the students toward the correct explanation.
The lesson begins with you showing the students a working Cartesian diver. Instructions for building your own Cartesian diver can be found within the design section of this webpage along with building instructions for hydraulic syringe systems and also a frame with which you can trigger the Cartesian diver using the syringe system. Following the demonstration, students are asked to write down an explanation in their own words.
The next step is to create a hydraulic syringe system in a step-by-step instructional fashion so that students will know how to make them when they get the opportunity to do so later in the lesson. When you have finished creating the hydraulic syringe system, conduct a conversation about the uses of hydraulic systems in everyday life. Students may spark conversations about hydraulic breaks in cars as well as their uses in construction site machinery.
Following the conversation, split the class in half. One half will create Cartesian divers out of small pop-bottles while the other group will create their own hydraulic syringe systems. While at their stations, student will answer questions that can be found on their worksheets. The questions are specifically designed to help the students create a better understanding of the differences in behaviour between liquids and gases when exposed to pressure. Students will switch stations after 15 minutes.
Finish the class with a discussion in which students share their findings as well as the answers that they came up with for the questions on the worksheets. With the help of input from the students, write a complete explanation of how the Cartesian diver works on the board for the students to copy down on their sheets.
The following lesson plan document is designed to be used by a teacher as a guide while executing this lesson. The second pdf document is the worksheet which can be downloaded and distributed to students for use in this lesson.