How to Build a Van De Graff
Generator
- Base: the base of my VDG is
made of wood. It is cut into a hexagonal shape so that it is sturdy enough
to hold a heavy top
- Motor shaft: this piece of
plastic can be ordered online. Screw it onto the base of the VDG and mount
the motor on it. Note that the top of the mount connects to the column
assembly, where the belt is contained
- Motor: the motor can be ordered
from any local motor repair shop or online. The one I used was a 110V
motor with the lower roller preinstalled onto it. Screw the motor onto the
mount as shown below
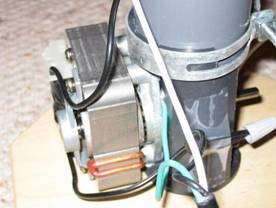
- Outlet cord: this is just any
cord that comes with a computer or other electronic device (3 prongs).
Upon cutting open the other end, the white and black wires connect
directly to the motor (use wire nuts to stabilize the connection). The
green wire, “ground,” can be attached to any metal part of the setup as
long as it does not interfere with the motor, lower roller or belt.
- Lower roller: this is made of
plastic (it will strip electrons from the rubber belt). Since my roller is
attached to the motor, make sure it is positioned at the center of the
base so it will be aligned with the upper roller as shown below
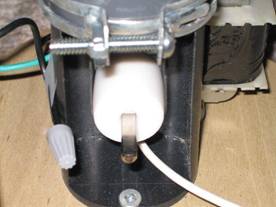
- Lower brush: one end of the
brush consists of some copper wires screwed right underneath the lower
roller. Make sure the brush does not touch the roller since it will carry
the negative charges to the ground. Thus, the other end is connected to
metal which I drilled straight into the wooden base as shown below
- Column assembly: this body
piece of the VDG can be ordered online and it basically connects the upper
and lower parts together. Tightly clamp the column to the motor shaft
- Upper roller: this is made of
metal (it will give off electrons to the belt) and can be ordered online.
Position the upper roller on top of the column assembly and make sure it
is aligned with the lower roller
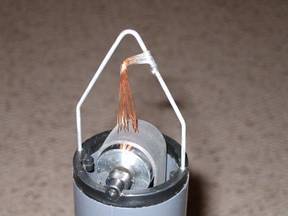
- Upper brush: these copper wires
placed right above the upper roller (but not touching it) will cause a
series of charge separations (gives off electrons to the roller and
receive them from the dome). The setup is shown below
- Rubber belt: the belt, found in
any hardware store, connects the upper and lower rollers and is placed
inside the column assembly. It constantly transfers negative charges down
and positive charges up the VGD
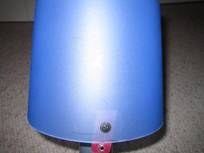 Plastic housing: I used a garbage bin
found from the dollar store and had the UBC machine shop drill a hole in
the middle which fits the size of the column assembly. This circular
plastic covers all the lower components of the VDG and it is then screwed
onto the wooden base (making the final product nicer, without loose wires)
Plastic housing: I used a garbage bin
found from the dollar store and had the UBC machine shop drill a hole in
the middle which fits the size of the column assembly. This circular
plastic covers all the lower components of the VDG and it is then screwed
onto the wooden base (making the final product nicer, without loose wires)
- Metal dome: this metal sphere
can be ordered online and it is placed directly onto the top of the column
assembly. The upper wires strip electrons from the dome, causing positive
charges to be distributed throughout the surface
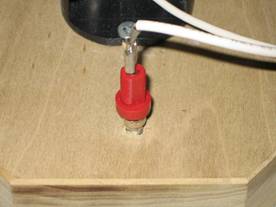
- Switch: the switch can be found
in any hardware store. I used a 15A-120VAC switch connected to the center
of the output cord