
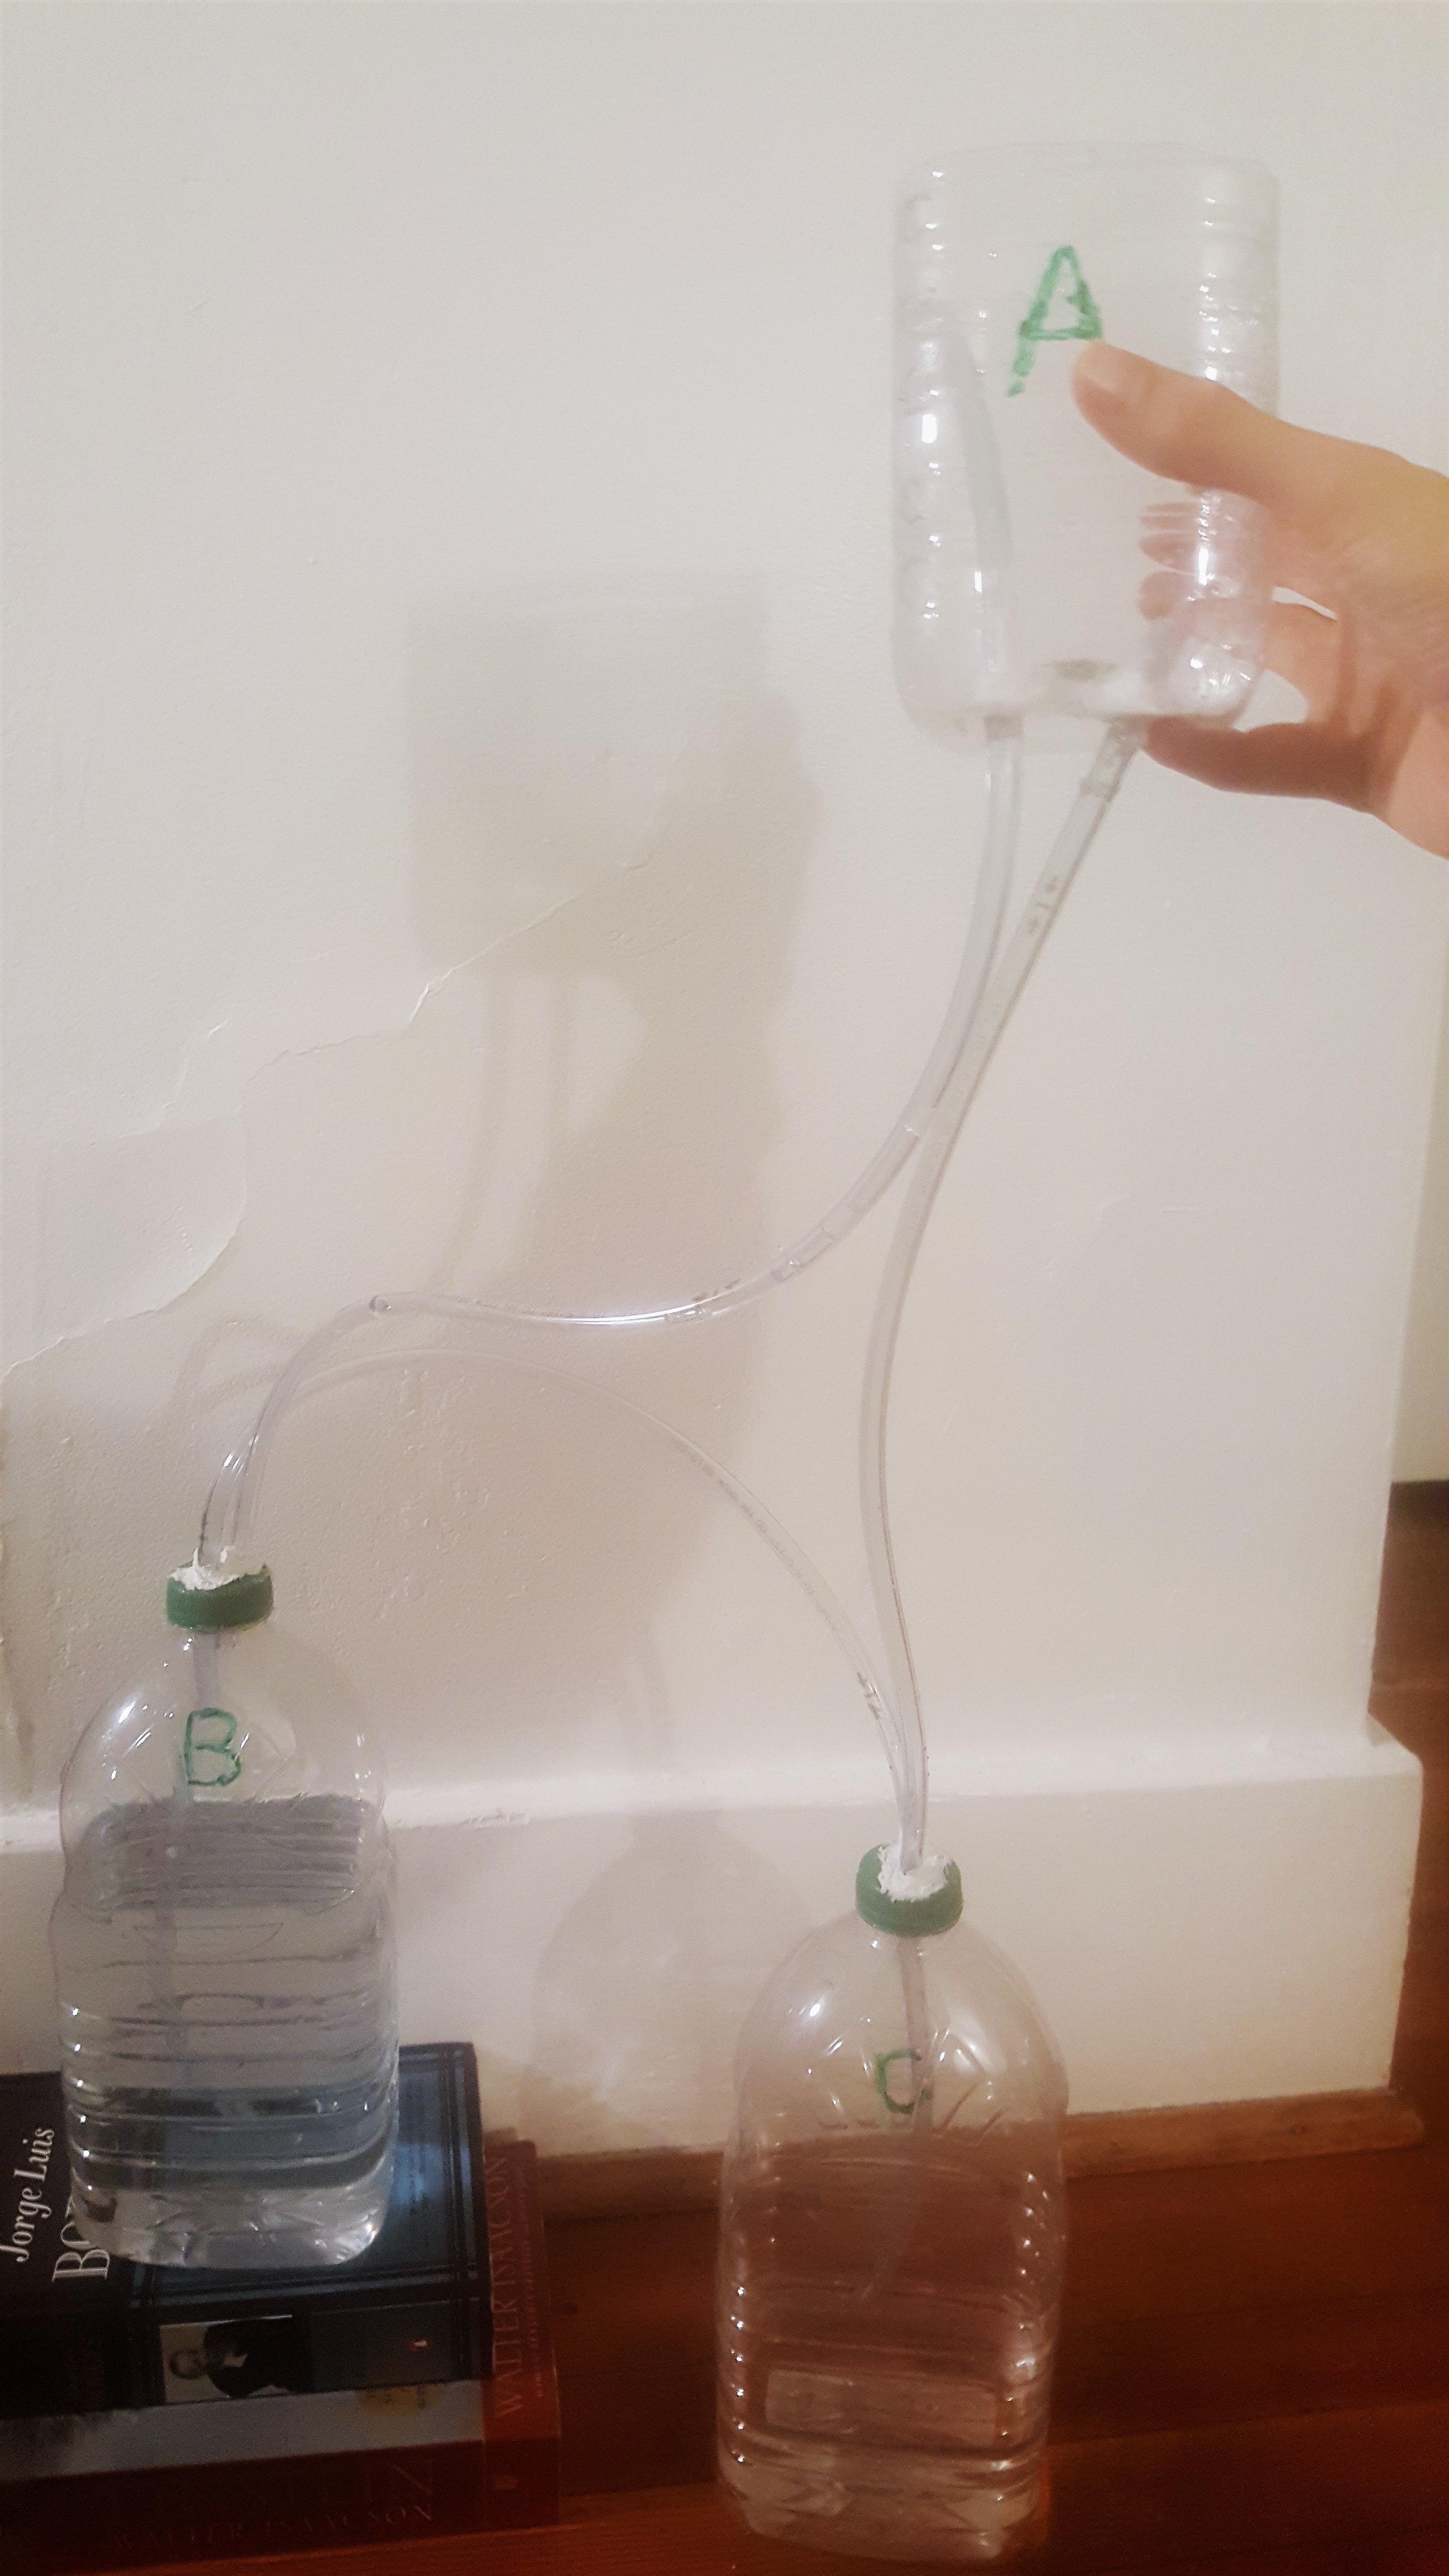
The design is borrowed from a 1st century A.D. Greek mathematician and engineer, Heron from Alexandria. He is extolled for writing a formulat for the area of the triangle, making accurate approximations of the square root, and computing volumes of various solids. Apart from number, he also had a penchant for making quirky toys using pressure and water. This lead to the design of a gravity powered fountain as show above.
Material required:
|
3 large Cranberry Juice bottles |
In the recycling bin |
|
Everbilt ½ in. O.D. x 10 ft Clear PVC Tubing |
Hardware $4.93 |
|
Tube of Silicone (82.8mL will be more than plenty) |
Hardware store: $4.49 |
|
Water |
Hopefully Free |
|
Stack of Books to place water reservoir on |
Hopefully you are not completely digitized that you have some books lying around. |
|
BD Syringes |
At shopper’s 25 cents each |
Construction:
 To
make reservoir A, one of the bottles should be cut in half. Using
robust scissors or a drill, two holes must be made on the lowest
point on side of the bottle, as if it is on the bottom of the
reservoir it will not stand by itself. I would also recommend using
the bottom half of the bottle, so the reservoir stands alone. To make
reservoir B and C two holes will be made on the lids of the other two
bottles. Note the holes do not have to be perfectly rounded but they
should be small enough that you have to squeeze the vinyl tubing
through; this will make sealing much easier.
To
make reservoir A, one of the bottles should be cut in half. Using
robust scissors or a drill, two holes must be made on the lowest
point on side of the bottle, as if it is on the bottom of the
reservoir it will not stand by itself. I would also recommend using
the bottom half of the bottle, so the reservoir stands alone. To make
reservoir B and C two holes will be made on the lids of the other two
bottles. Note the holes do not have to be perfectly rounded but they
should be small enough that you have to squeeze the vinyl tubing
through; this will make sealing much easier.
From the roll of clear vinyl tubing, two 125 cm long tubes and one 75 cm tube should be cut. The tube connecting reservoir A to C will be 125 cm long, and will be connected so 5 cm of the tubing is threaded through one of the holes at the bottom of reservoir A. The other end is threaded through the lid of reservoir C all the way to the bottom of the bottle. The tube connecting reservoir A to B will be 75 cm long as well and should be threaded through the second hole of reservoir A.
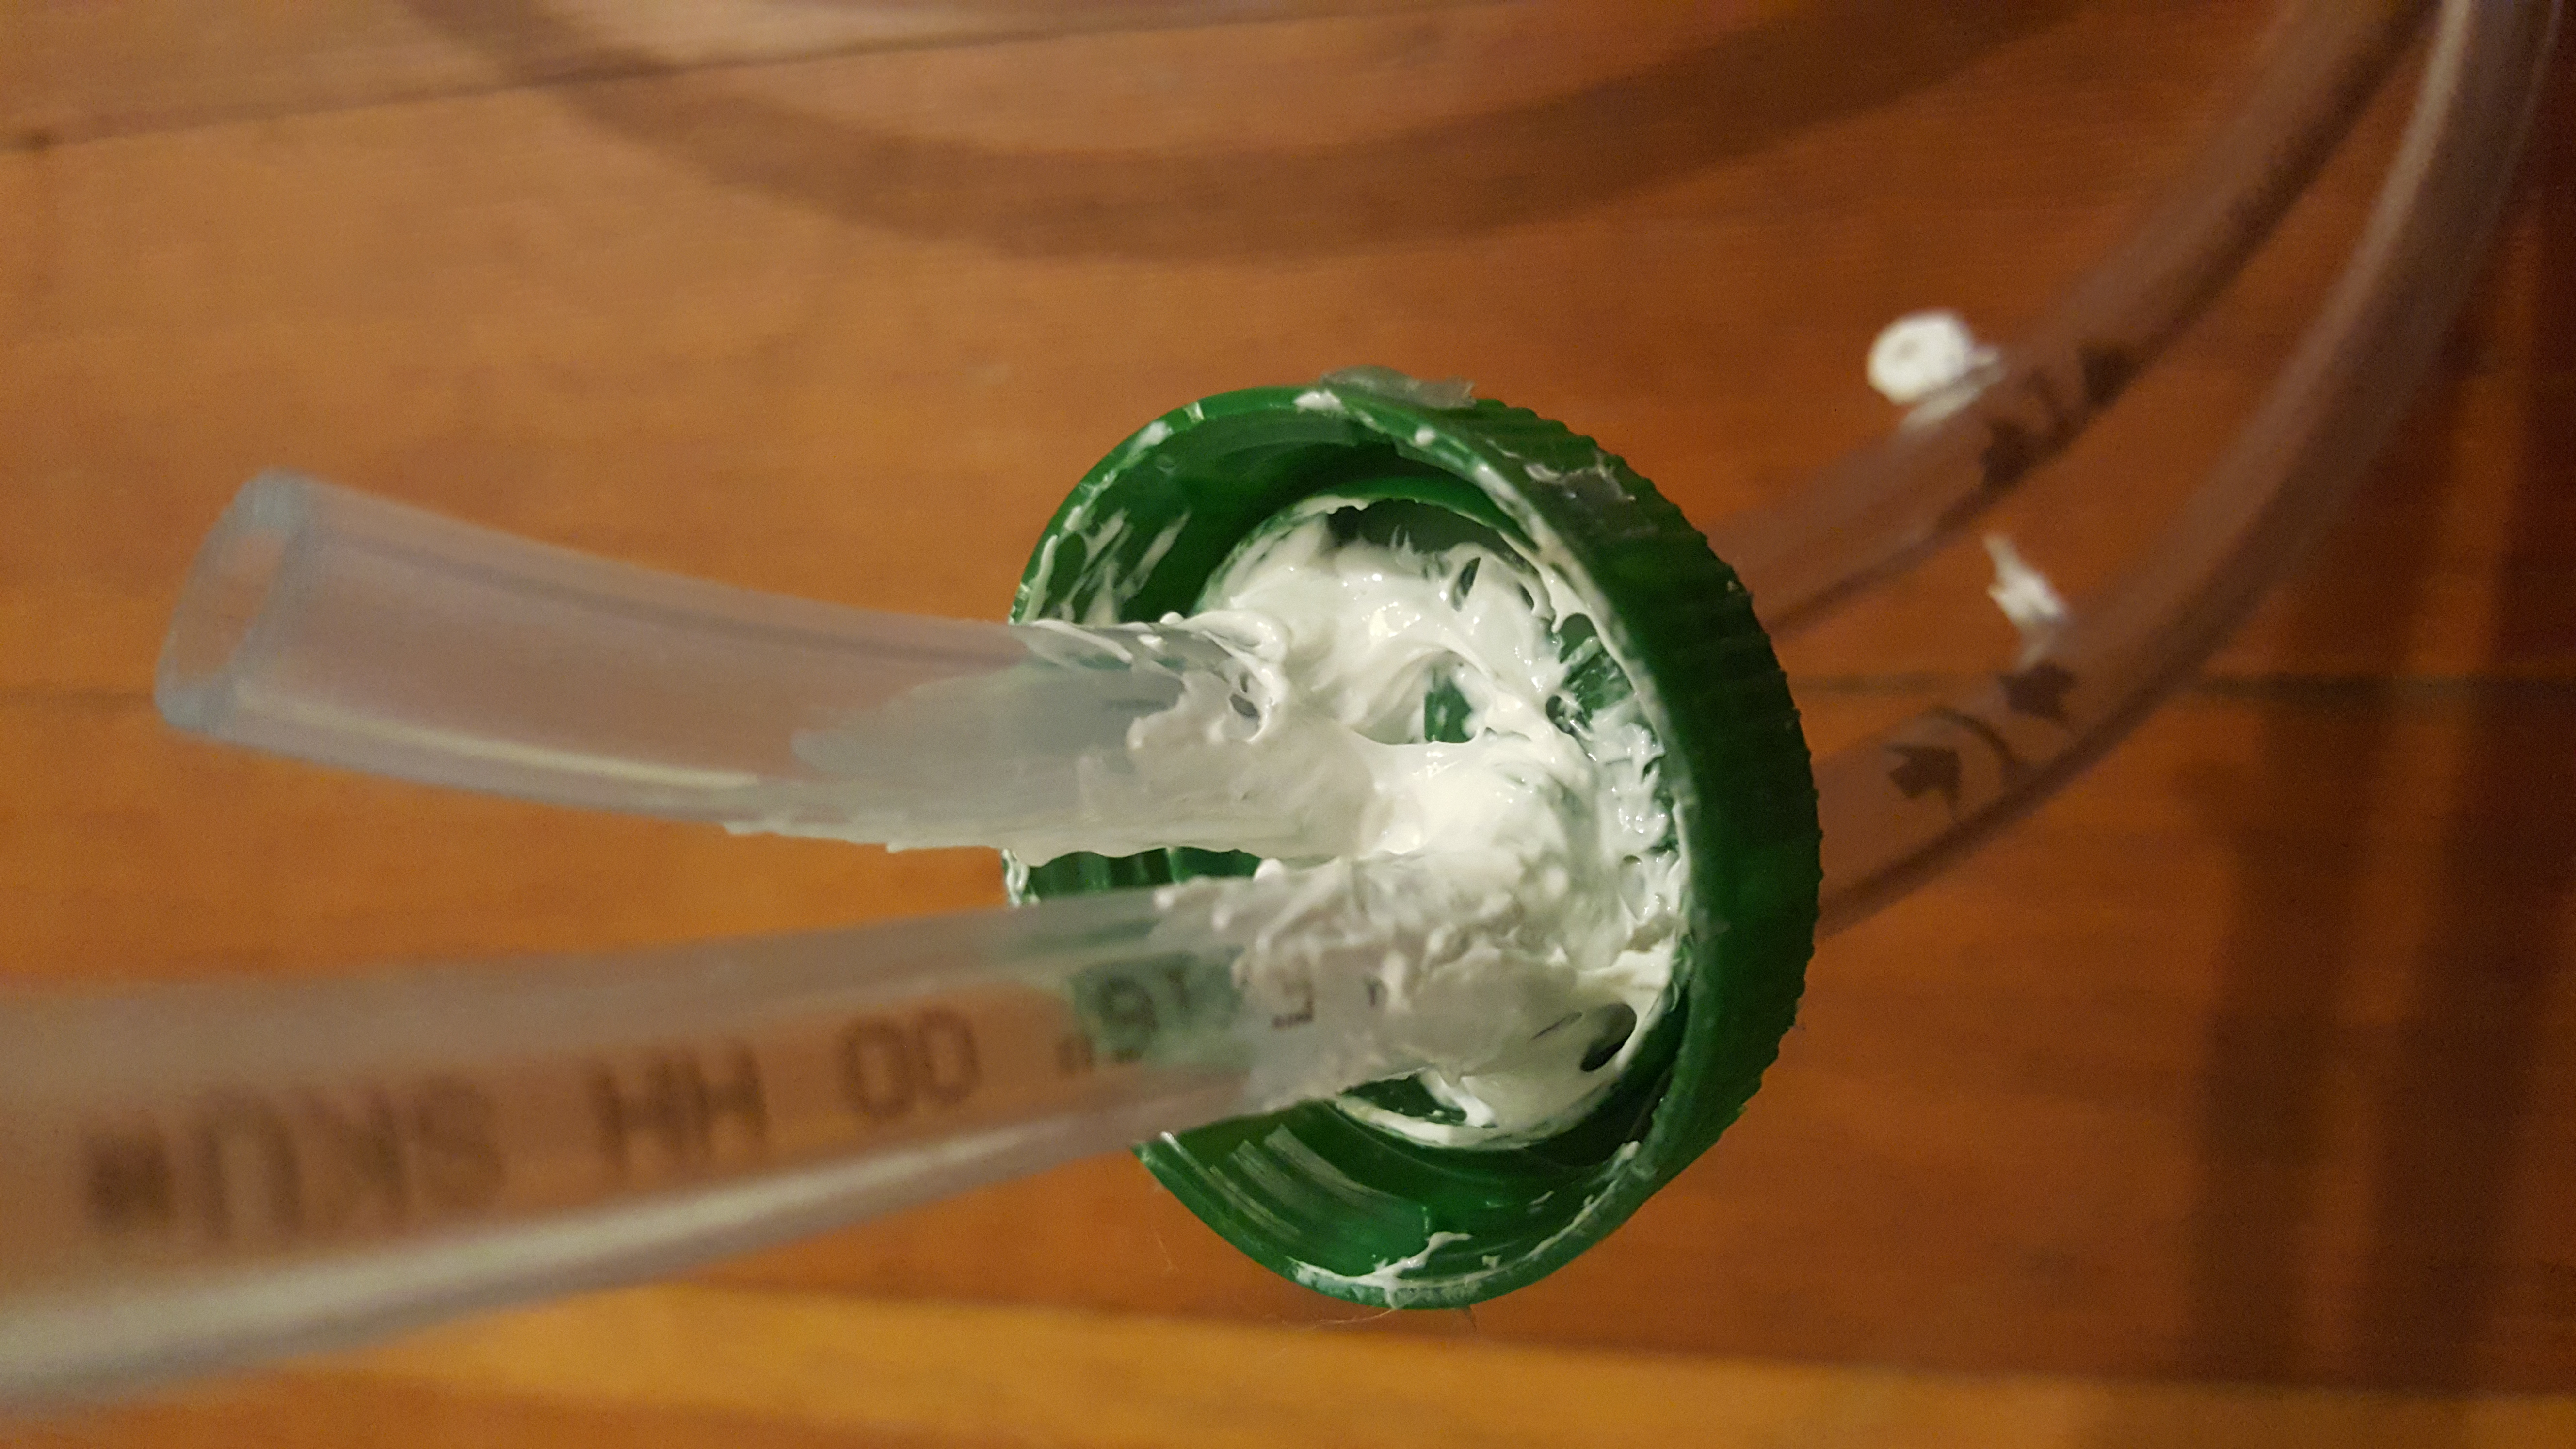
Enough vinyl tubing should be threaded into reservoir A so that if water is poured in the spout will not be submerged. The other end will be threaded through one of the holes in reservoir B all the way to the bottom of the bottle. The tubing connecting reservoir B and C will be 50 cm, and 5cm of both ends will be threaded through the lid of the reservoir. To seal the tubing in the holes, make sure to seal both sides with silicon sealant. You can use the tip of the tube to smooth out the cream, however you can also use your fingers. Make sure to wash your hands immediately if you do use your fingers. Let the sealant dry overnight and check for air leakage. Reapply sealant as needed.
Completed Design:
To prepare the set up for a class fill reservoir B with a little air left at the top. There should be little to no water in reservoir C. Position reservoir B on the stack of books so that it is higher than reservoir C. Reservoir A should but set on a stand so that it is not too high above reservoirs B and C, otherwise the force of pressure will not be strong enough for the water to reach the spout. Notice in the video to the left the higher reservoir B is the faster the flow of water. This may be something to show students to understand how gravity is affecting the efficiency of the machine.