Apparatus & Construction
Materials
Construction
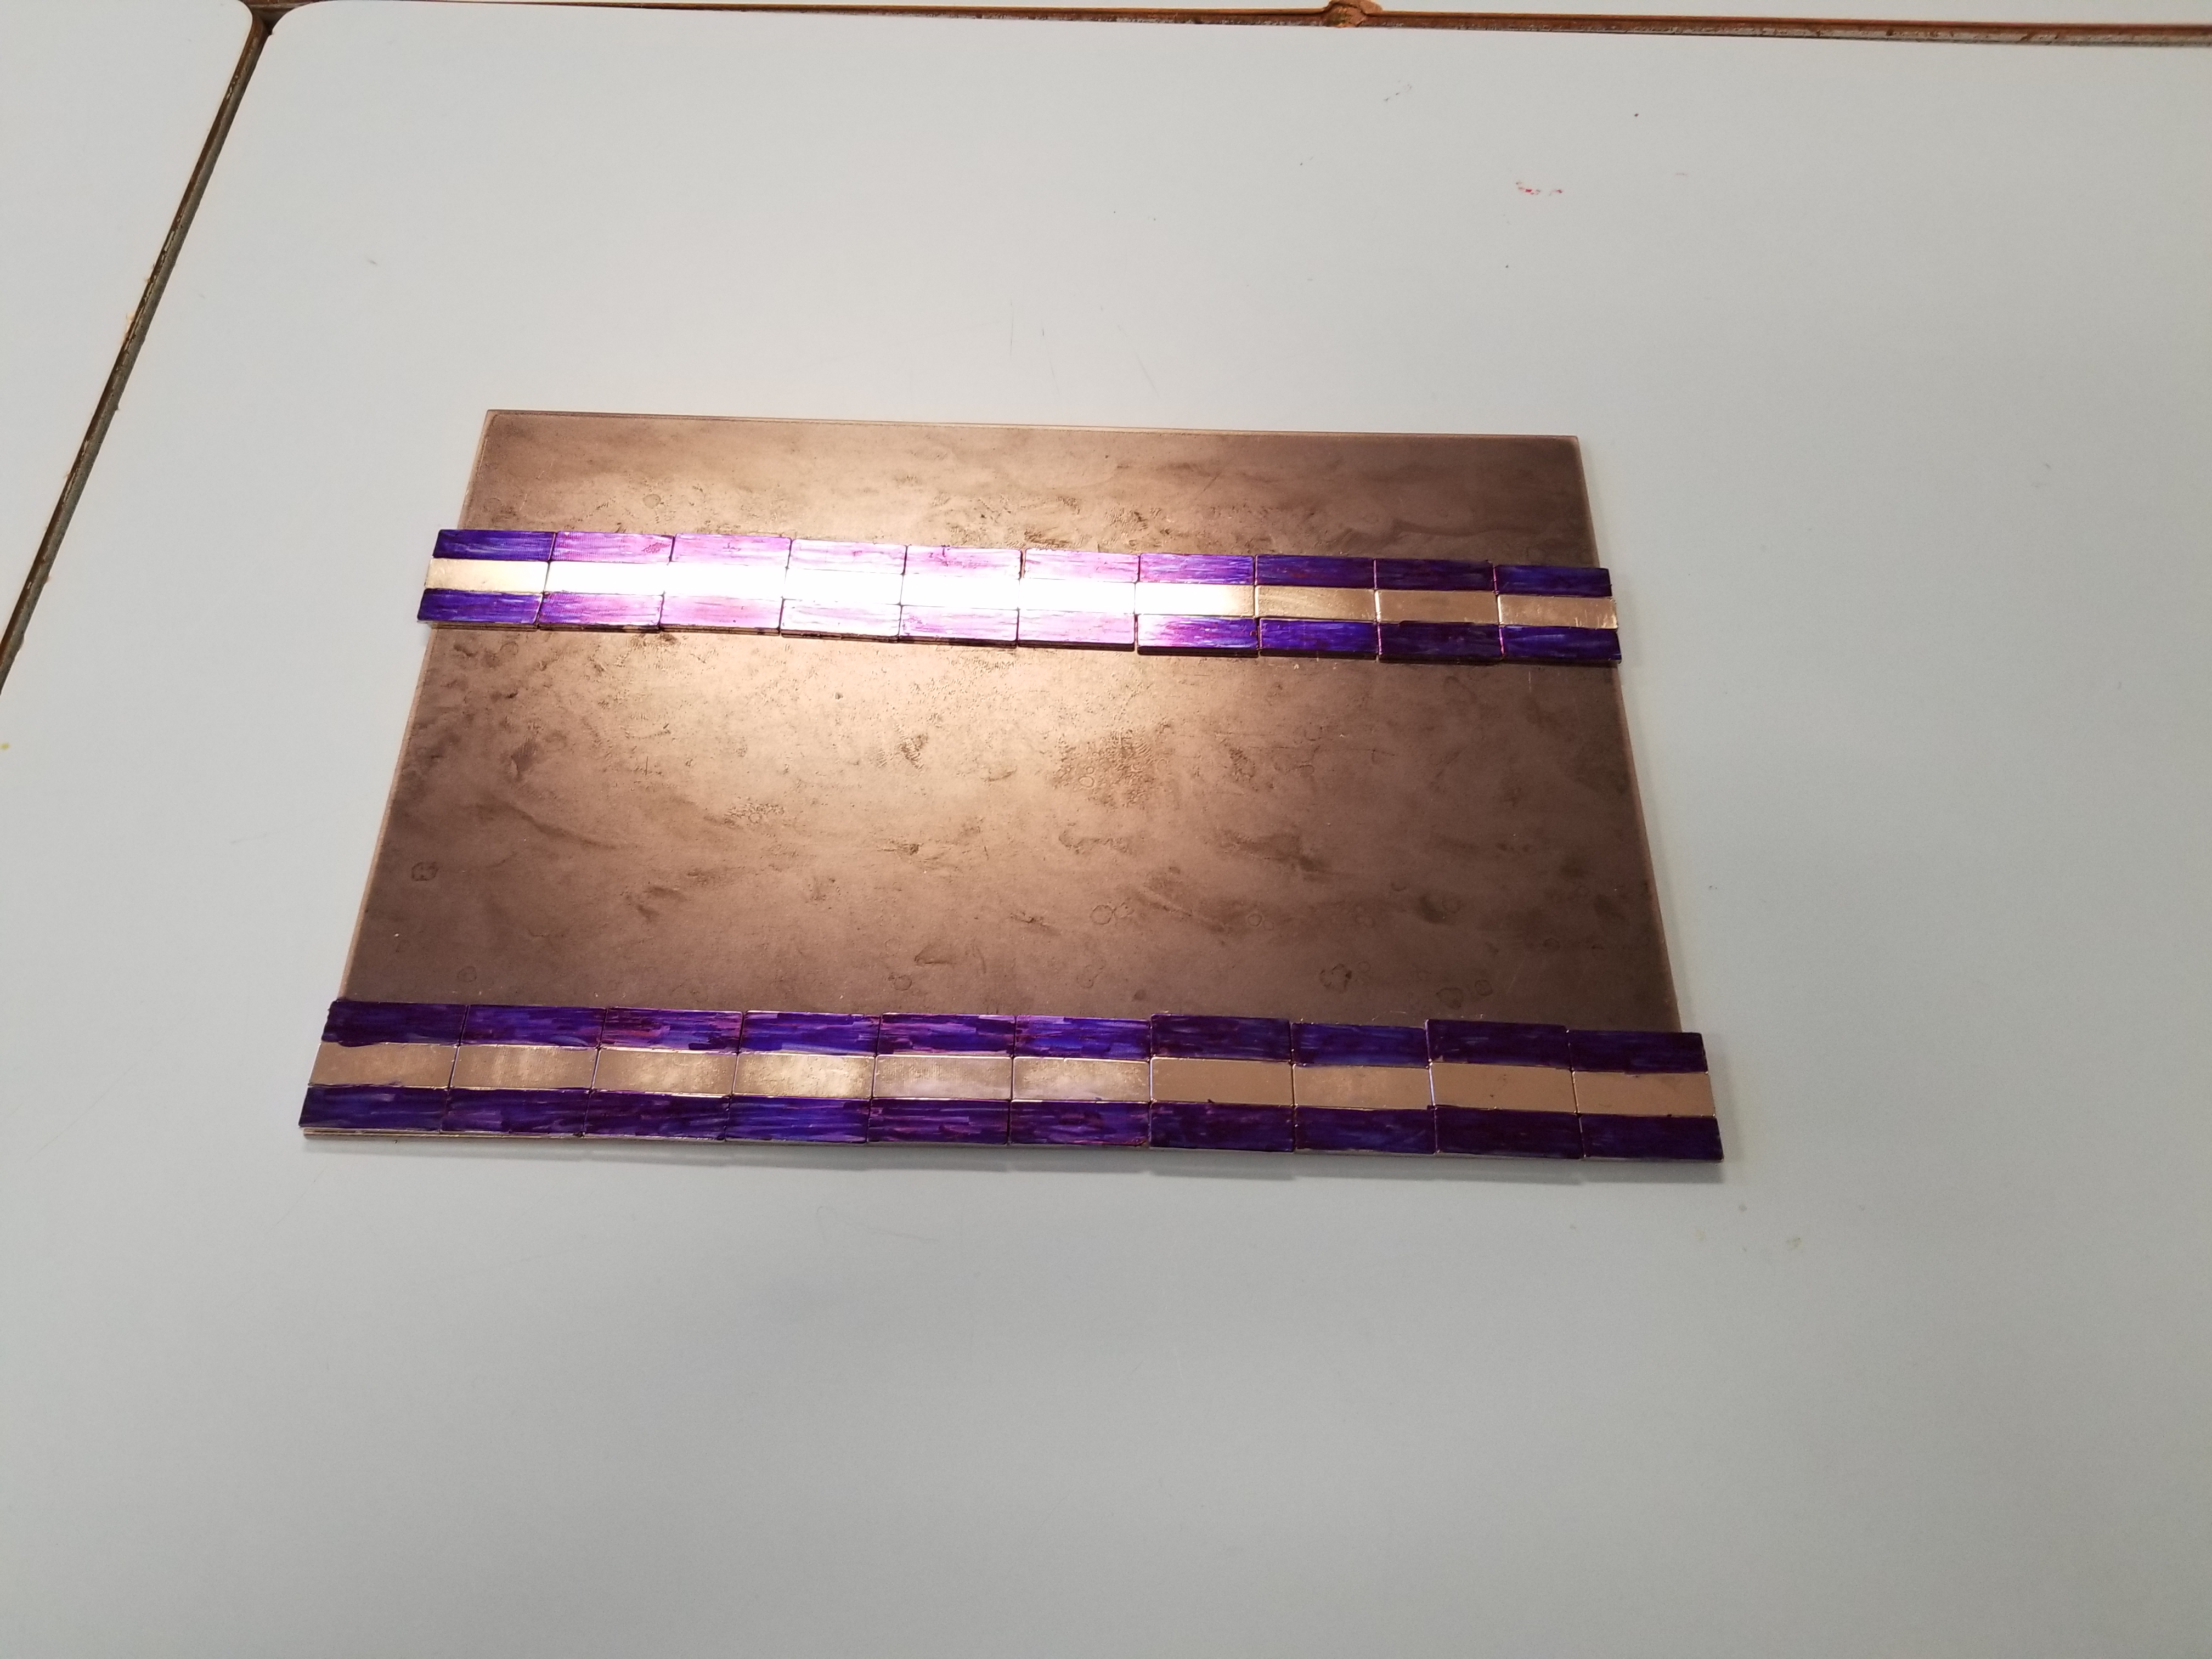
1. Colour-coding the polarities: Colour one arbitrary side of all the neodymium magnets as it will avoid confusion in regard to polarity with construction and allow for easier visualization of the physics concepts of the final product.2. Rectangular segment: Place the rectangular magnets on the smaller steel plate in an alternating pattern of three (S-N-S or N-S-N). The length of the track will be ~30cm, using 10 pieces. Repeat this process to complete the adjacent track, approximately 12cm apart. This distance will vary depending on turn radius. (Fig.1)
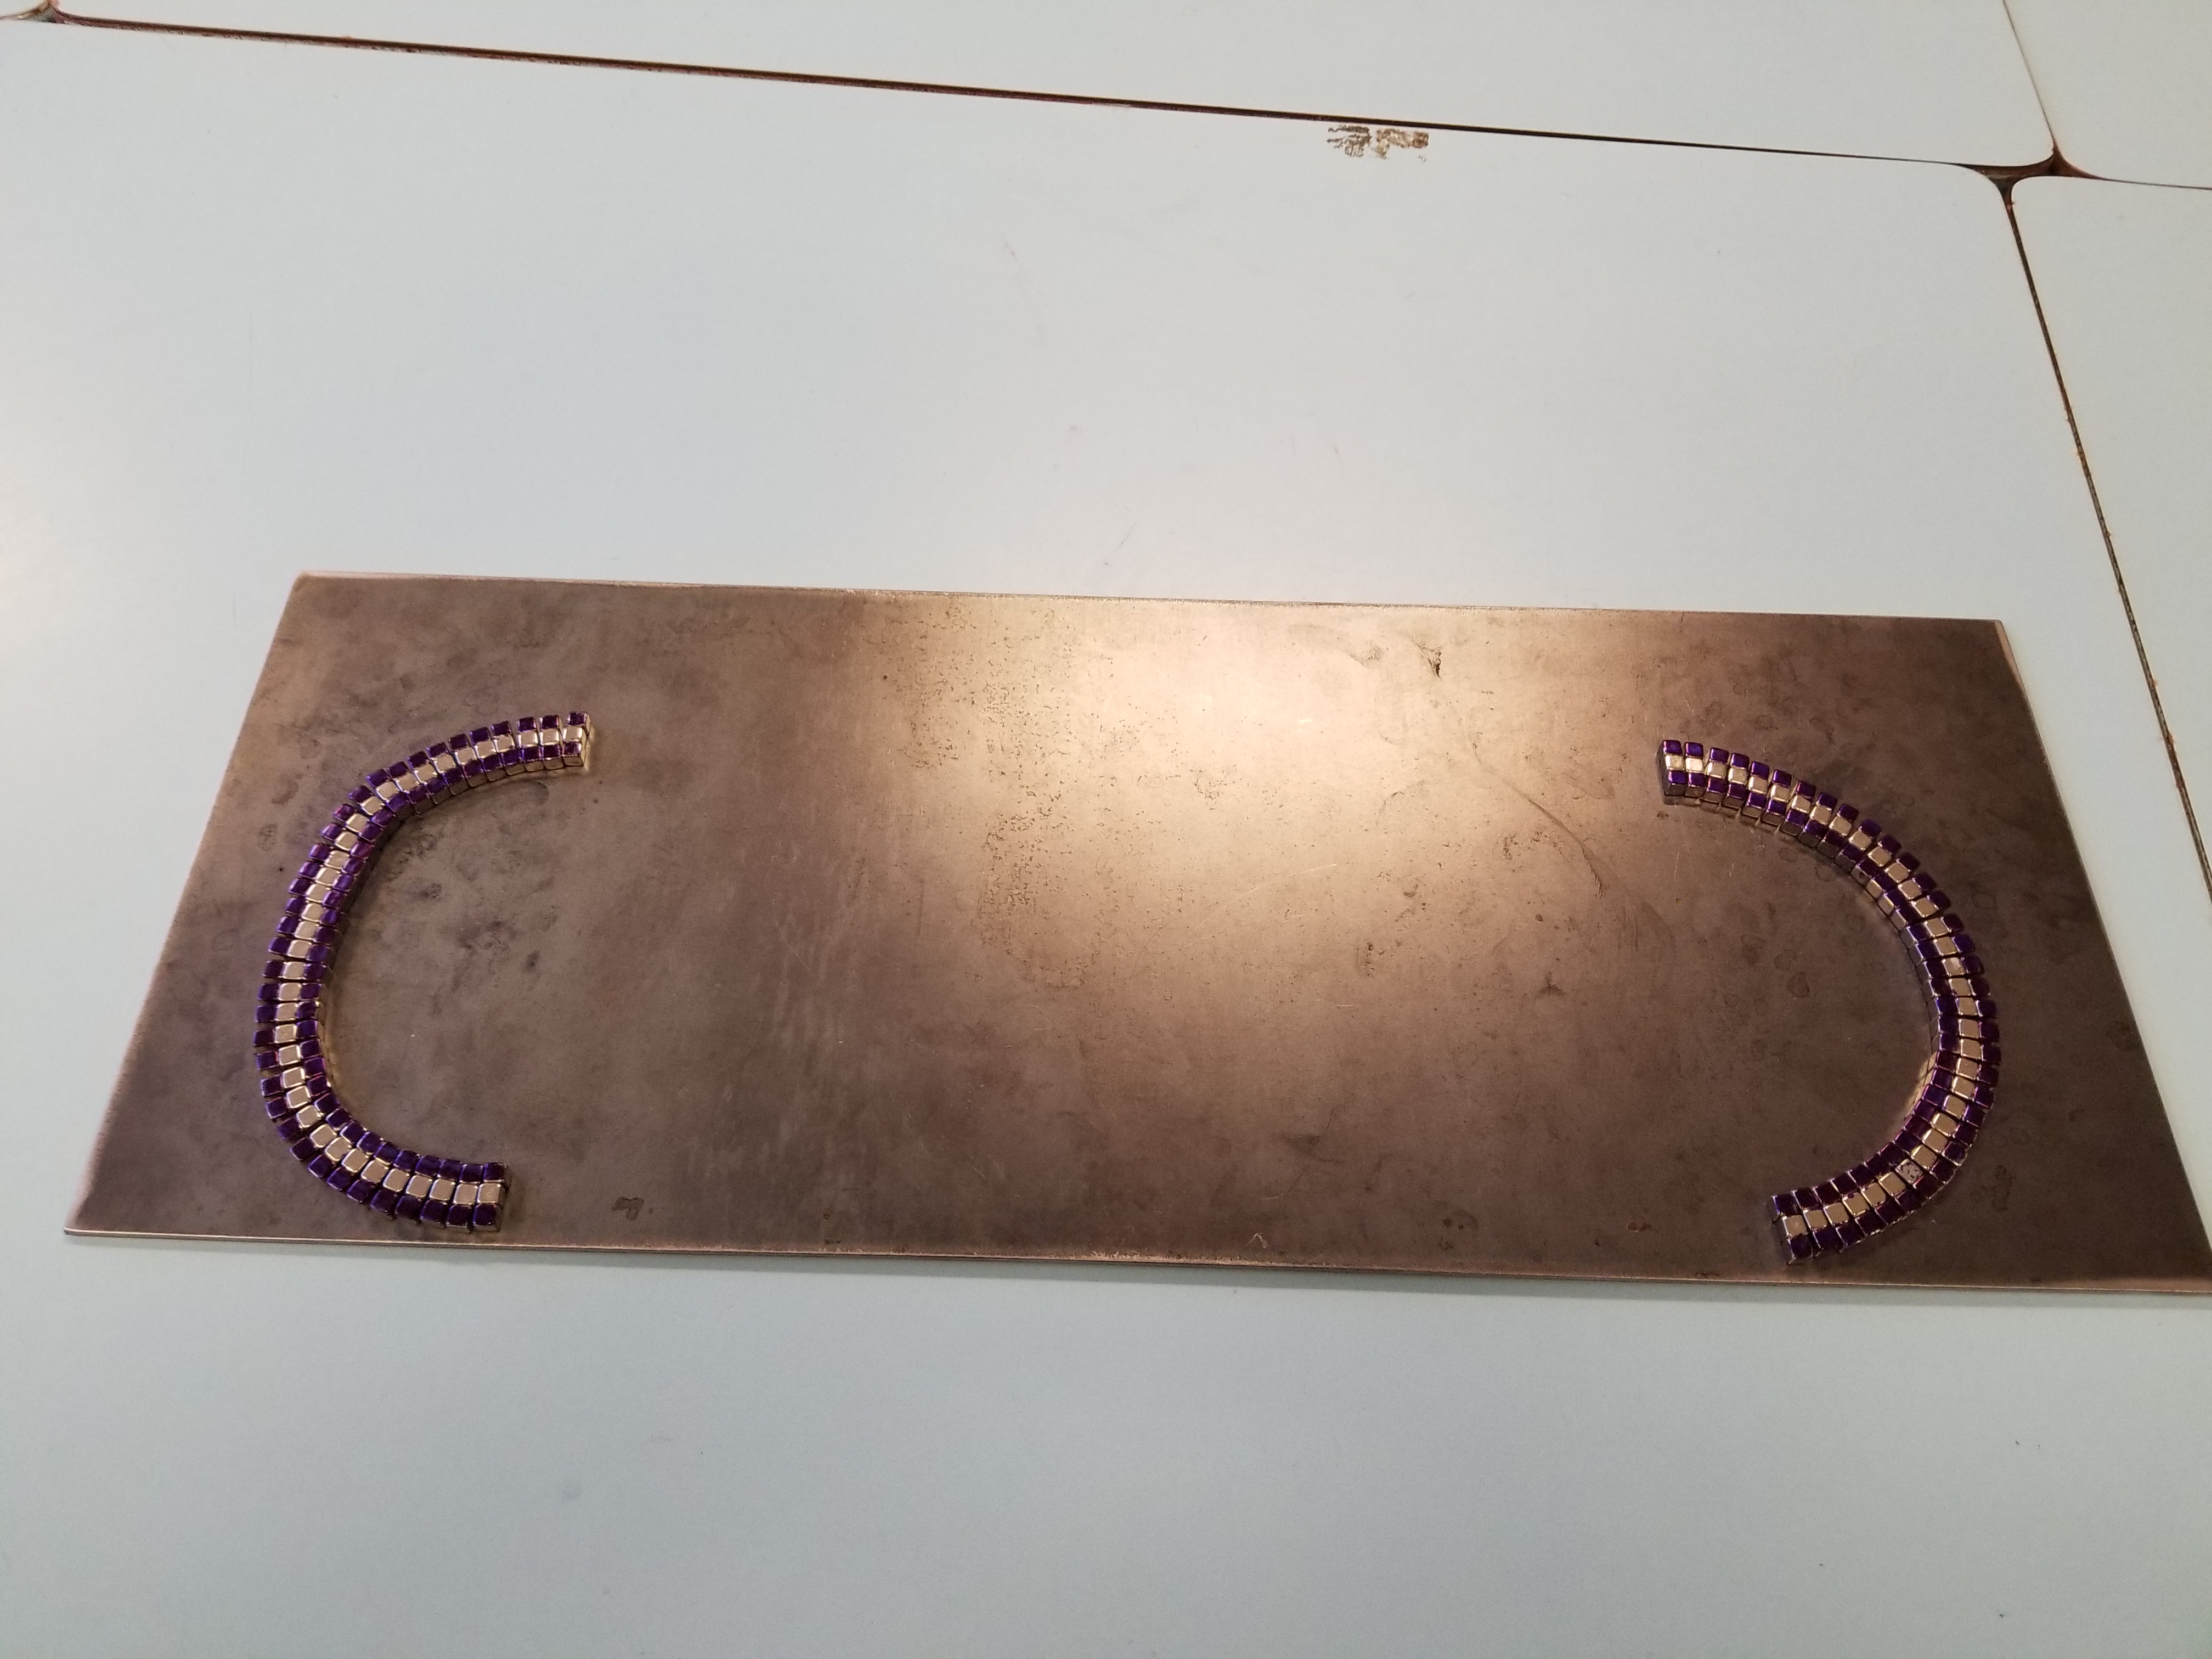
3. Incorporating curves: Use 108 of the cube magnets to begin constructing the curves on the larger steel plate. For this particular project, curve uniformity was obtained through a simple guideline: tilt adjacent magnet triplets such that the inner pieces are in full contact, the middle pieces are partially in contact, and the outer pieces have a tiny separation between them. This was adequate for a demo at this level, but more sophisticated techniques can be used. Repeat on the other side, 30cm away.(Fig.2)
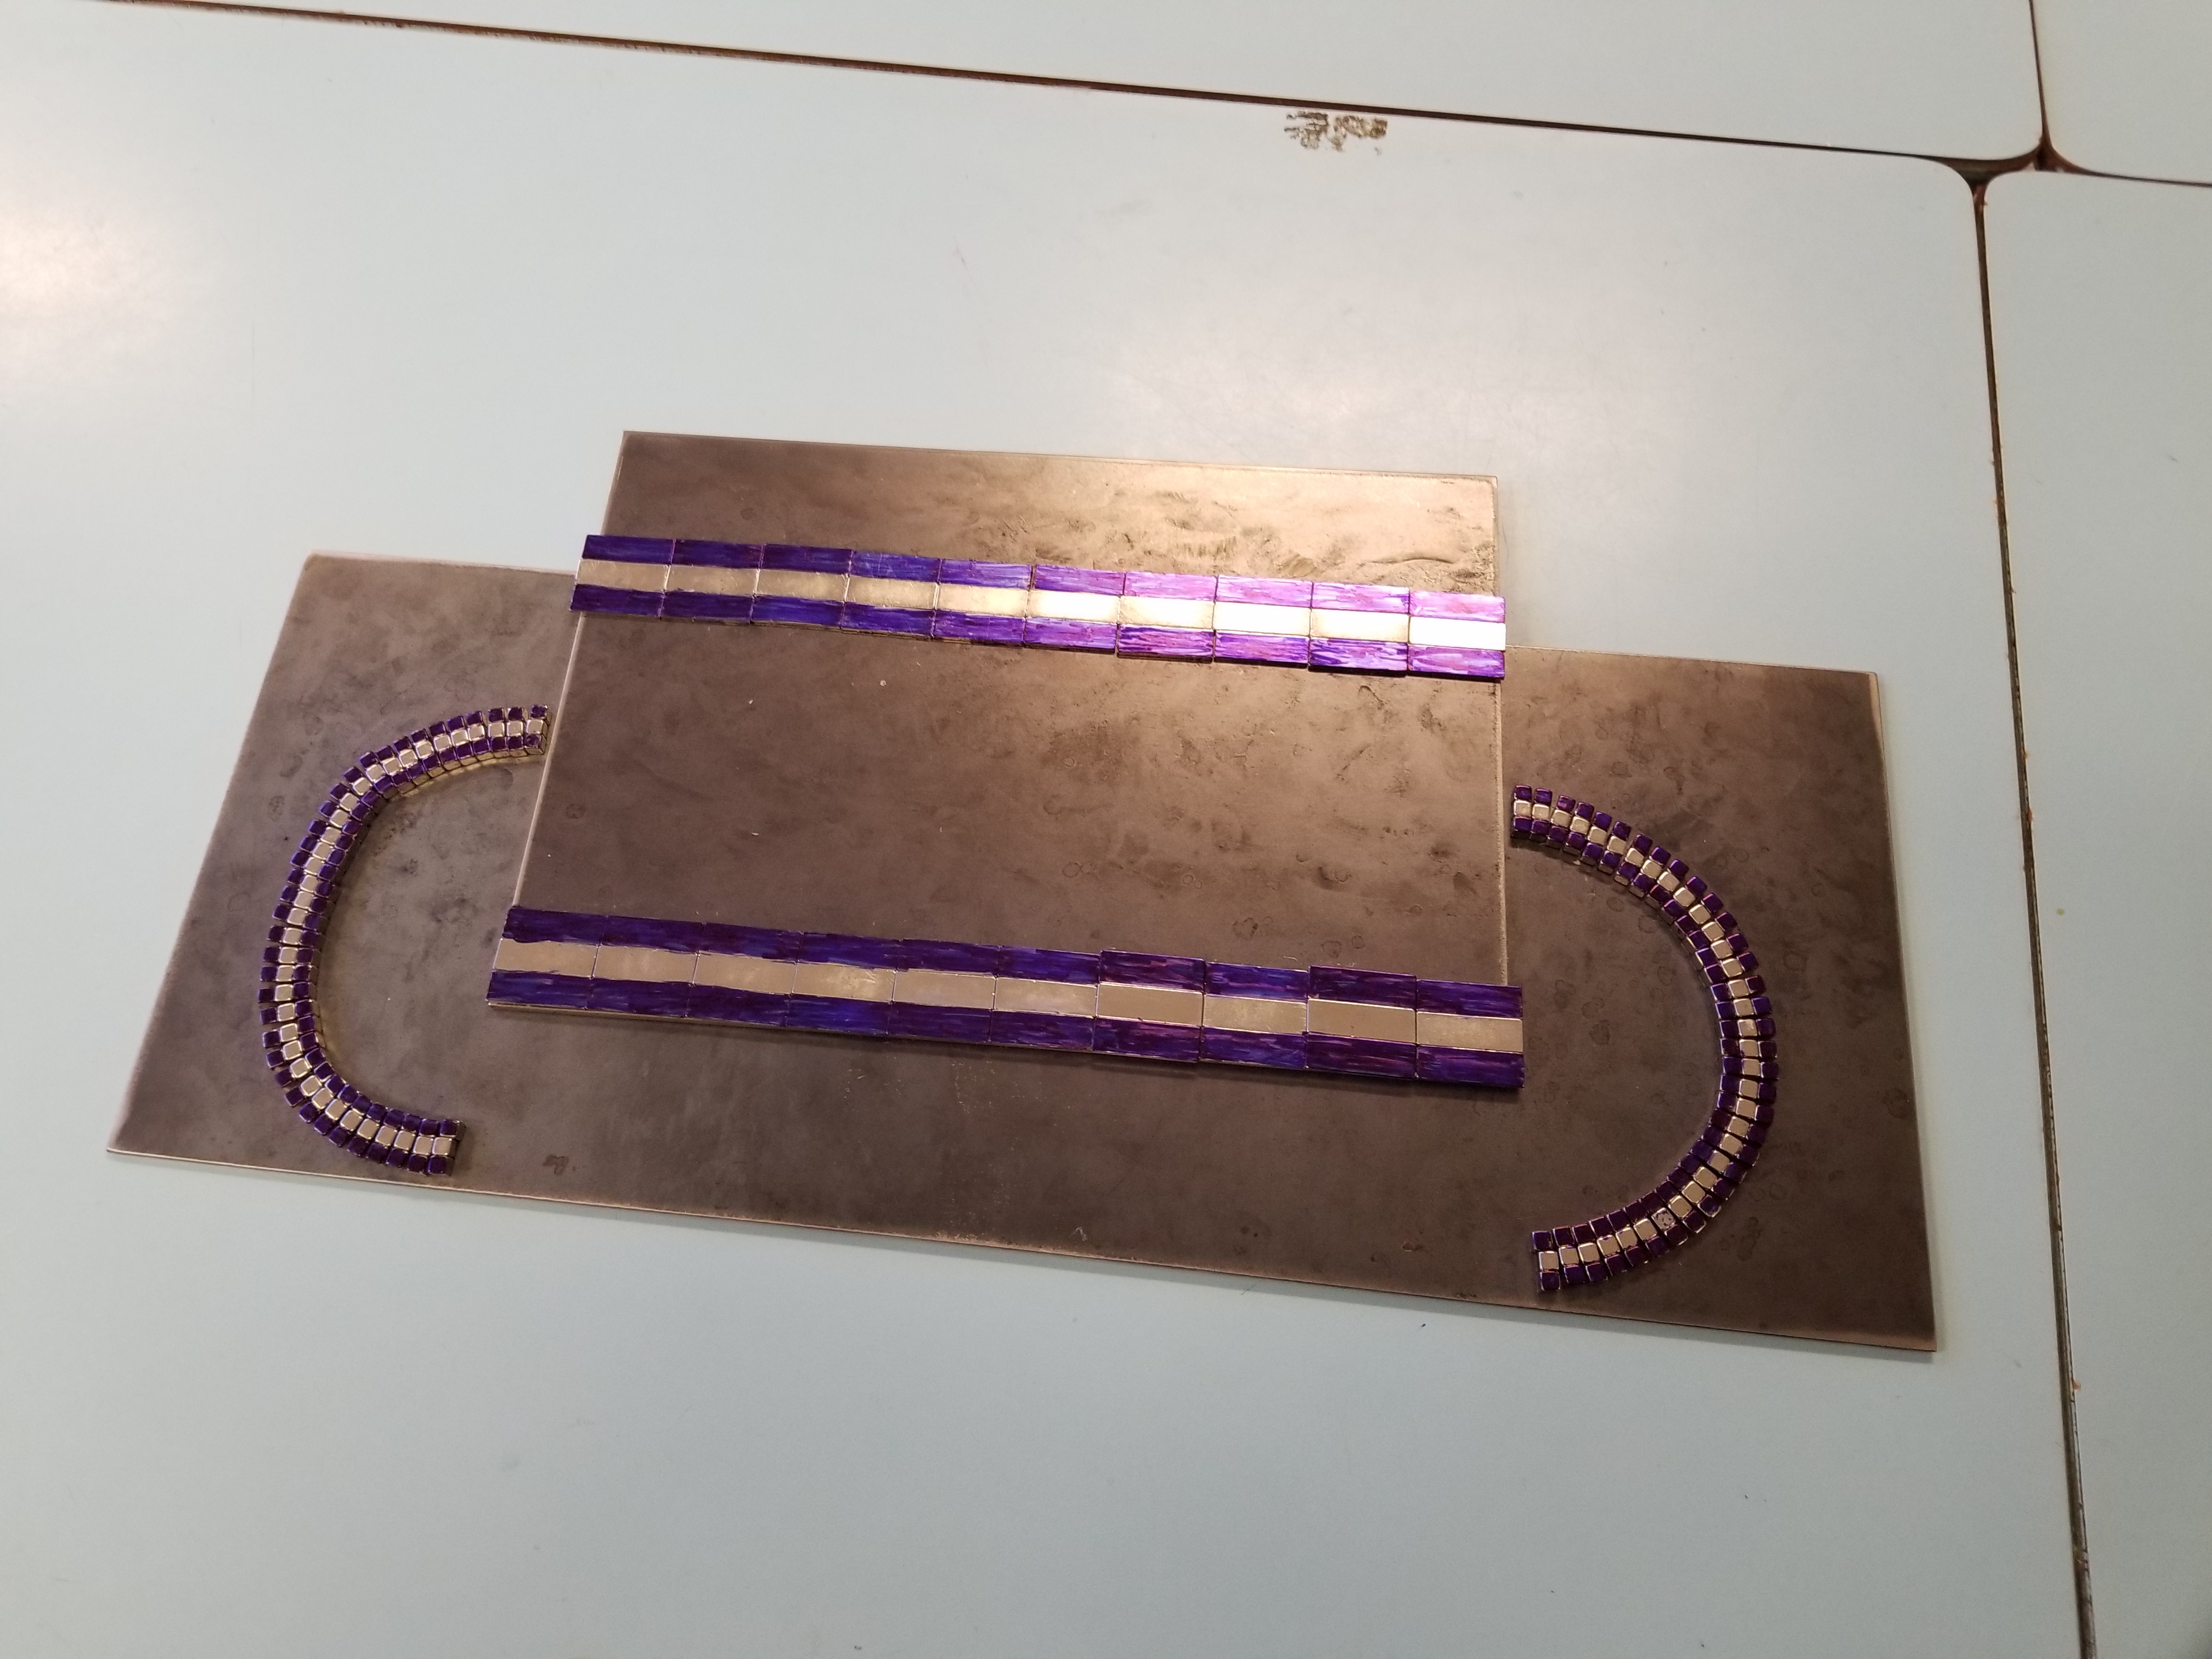
4. Finished product: Slide the smaller plate in the 30cm gap between the curves. Aim for a very tight fit, which may mean making small adjustments to the cube magnets (Fig.3).