Home Design Concepts
Demonstration Other
Materials and Build of the Demonstration
Materials:
·
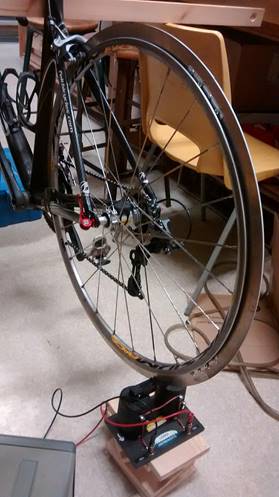
A bike and
its rear wheel (front wheel is optional)
·
A way to
stabilize the bike while the rear wheel is spinning
o Two chairs and a piece of wood did the trick as seen
in the photos below
·
A sheet of
aluminum to be cut
·
Nuts and
bolts
·
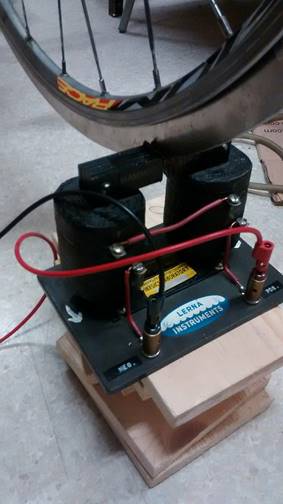
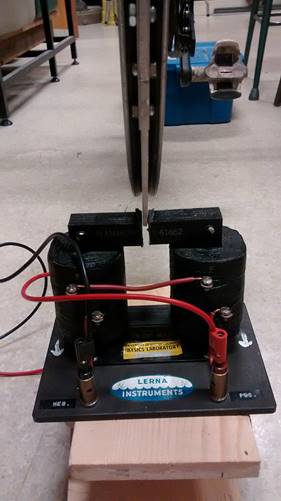
Electromagnet
·
Power
supply
·
Speed
sensor for the wheel in order to analyze the time it takes for it to slow in
detail
o Here a Garmin speed sensor was used along with a
Garmin head unit to record the speed
o A speed sensor and corresponding head unit can be
foregone if you are not looking to quantify the braking effect
Design:
The bulk of
the design is in retrofitting a rear bicycle wheel in order to be used as an
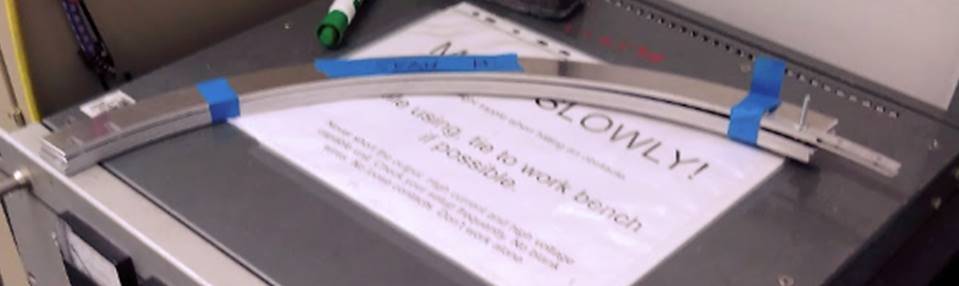
eddy current brake. The approach taken here was to cut a sheet of aluminum into
four separate pieces (shaped as quarter arcs of a circle) using a water jet
cutter such that when these four pieces are put together they will form a
circle with an inner radius equal to that of the radius of the rear bicycle
wheel being used (from the center of the wheel out to the lower profile of the
rim). The goal here is that this circle created with the aluminum fits snuggly
around the wheel in the location where an inner tube would normally sit on a
bicycle wheel. The outer radius of this aluminum circle will depend on the
dimensions of the bicycle being used. This means that the outer radius needs to
be large enough so that it sticks out from the rim and can pass through the
field produced by the electromagnet, but small enough so that it does not
interfere with the frame of the bicycle. Moreover, the thickness of the sheet
can be altered depending on the gap of the electromagnet that it has to pass
through. In this case the thickness of the sheet used was 1cm, but a greater
thickness if possible is better for creating a greater braking force. To
connect these four pieces together, slots were cut into each piece near each of
its ends and then nuts, bolts and small aluminum pieces (with holes also cut
into them) were used to fasten adjacent pieces together.
Once this
rear wheel has been created, it is inserted into the bicycle just as a rear
wheel usually would be. Next the bicycle must be positioned such that the rear
wheel is off the ground and will be able to spin so that the aluminum passes
through the gap of the electromagnet. Finally, the wheel can be spun by turning
the crank of the bicycle and then once it is up to the desired speed, the power
supplying the electromagnet can be switched on so that the magnetic field is
setup. The time taken for the wheel to come to a stop from a particular speed
when the magnetic field is present should be noticeably shorter than when the
magnetic field is switched off. When the magnetic field is not present, the
wheel would spin forever if it were not for frictional forces in the hub of the
wheel and air resistance. If the two stopping times with and without a magnetic
field are not noticeably different, this is because the magnetic field is not
strong enough and so it should be replaced with a stronger electromagnet until
the affect is observed.
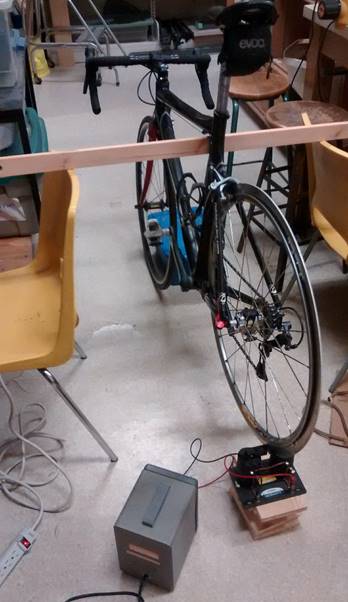
Pictures:
The images
below will hopefully provide a better visualization of the design and materials
used.