Demo 2: The Electromagnetic Clock
Physics Concepts
- Conservation of Energy
- Simple Harmonic Oscillators
- Electricity and Magnetism
- Basic Circuits
Required Materials
| Material | Amount | Notes |
|---|---|---|
| Metal Ruler | 1 | Recommended 12-15 inches |
| Neodymium Magnet | 1 | Warning: neodymium magnets are incredibly powerful and can cause injury and damage to electronics and magnetic stripe cards if used improperly. |
| Copper Plate | 1 | Dimensions should be roughly 1 x 1 inch |
| Electromagnet | 1 | |
| 9V Batteries | 8 | |
| Alligator Clips | 12 | |
| Duct Tape | 1 Roll | |
| Wooden Board | 1 | Dimensions 2 x 4 x 11 1/4 inch |
| Wooden Board | 1 | Dimensions 1/2 x 3/4 x 16 3/4 inch |
| Wooden Board | 2 | Dimensions 3/4 x 3/4 x 3 1/2 inch |
| Wooden Board | 2 | Dimensions 3/4 x 3/4 x 3 7/8 inch |
| Wooden Board | 2 | Dimensions 1/2 x 3/4 x 2 3/16 inch |
| Wood Screws | 6 | 1 1/2 Inch Length |
| Wood Finishing Nails | 8 | 1/2 inch length |
| Drill | 1 | Also needs drill bits for a size just smaller than your wood screws |
| Screwdriver | 1 | Must have the correct tip for the wood screws you purchased |
| Hammer | 1 | |
| Vice or Clamps | 1 or 2 | This will be used to hold parts together when assembling the stand |
Construction
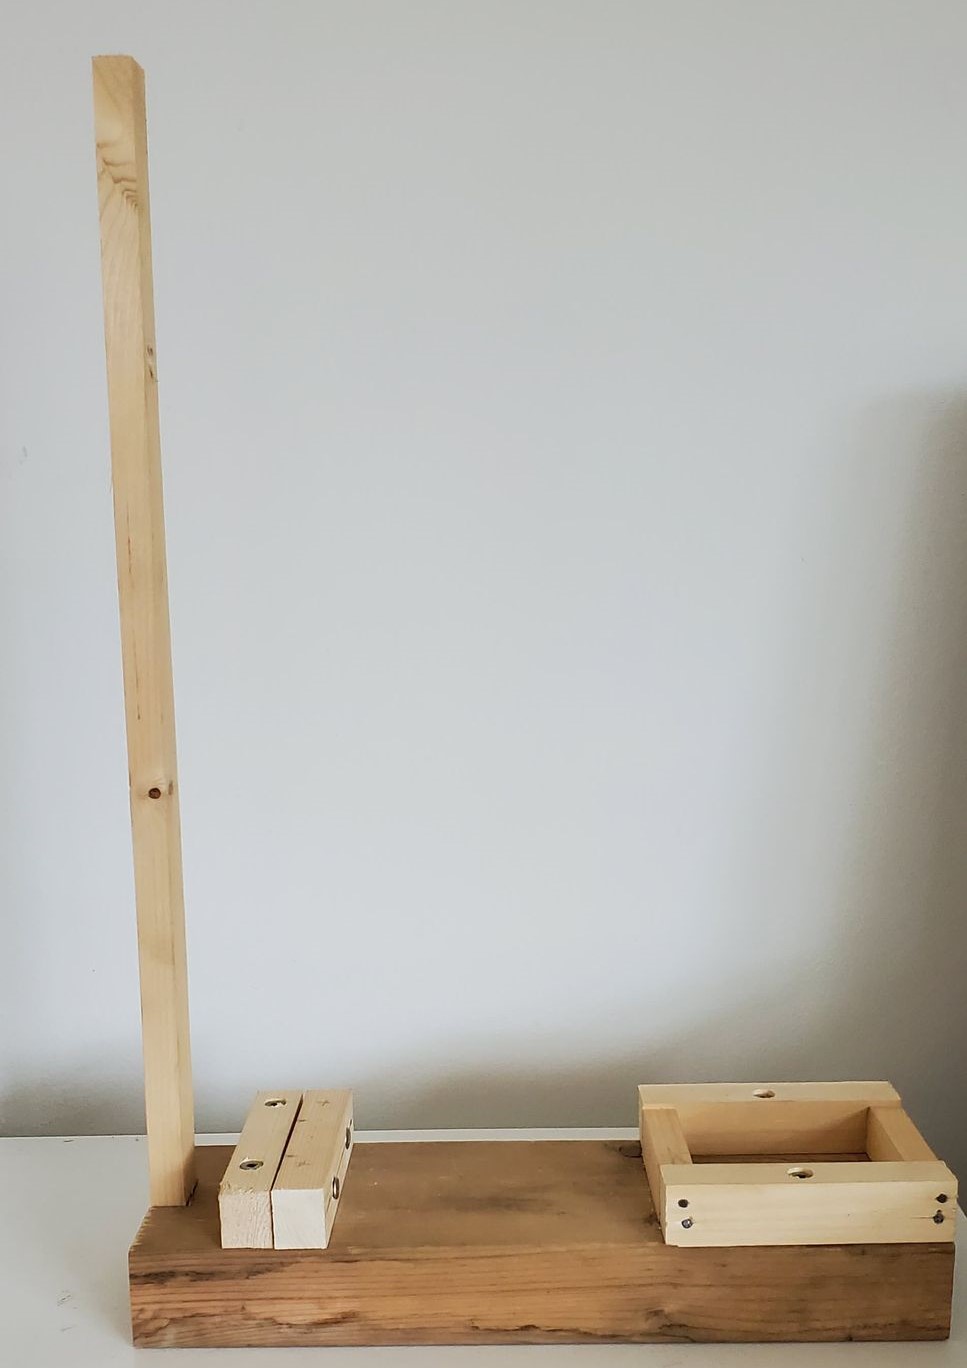
Wooden Stand
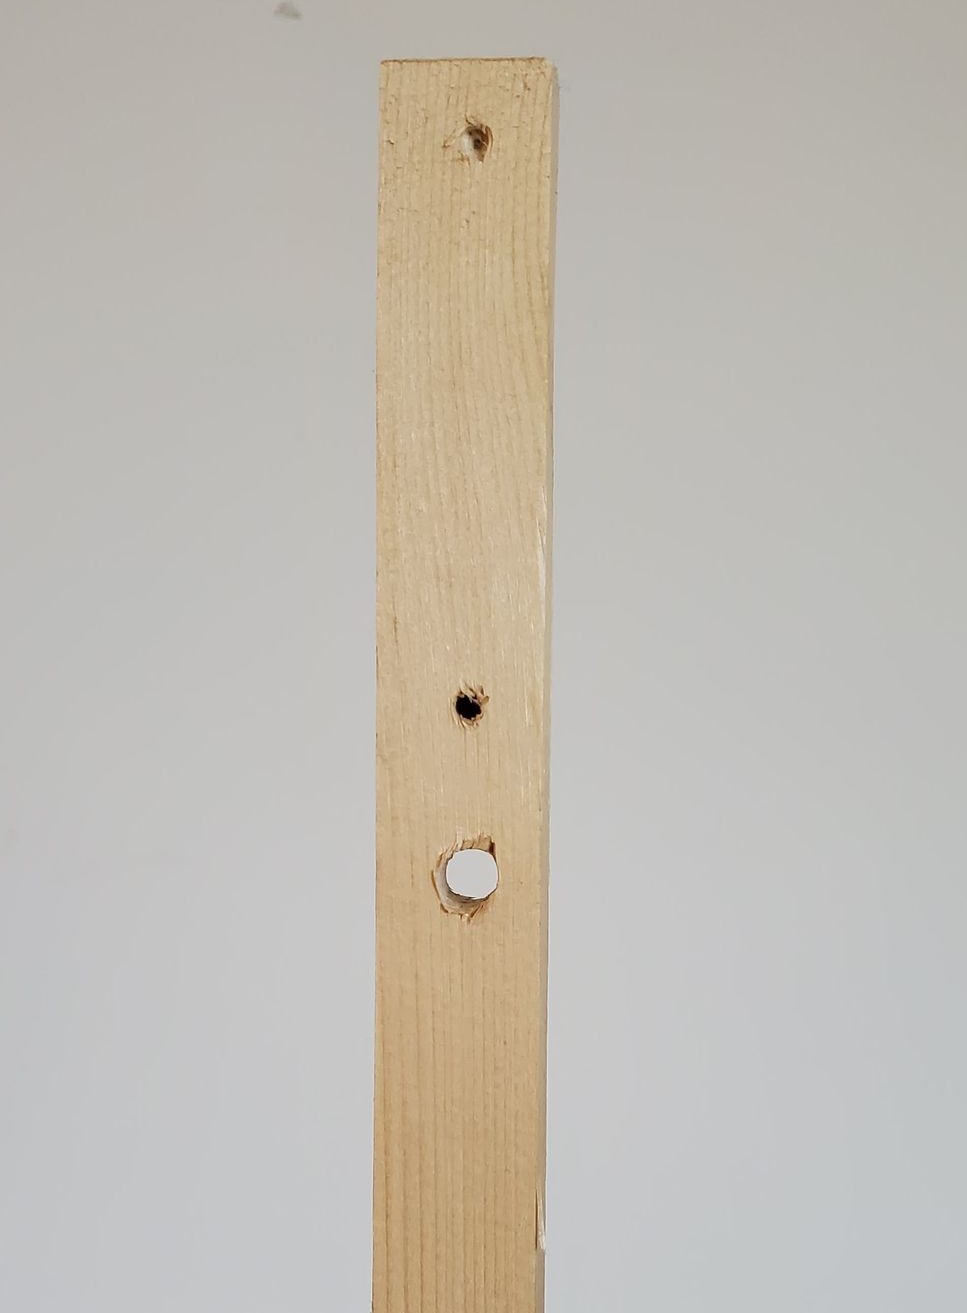
- Take the 1/2 x 3/4 x 16 3/4 block and measure a point 13 1/4 inches from one end and centered along the 3/4 inch face
- Drill a hole at the marked location using a 3/8 inch drill bit
- Take your 2x4 block of wood and place it with the wide face down on your workbench
- Then, take the 1/2 x 3/4 x 16 3/4 block and line it up along the side of the 2x4 as below and use two of the 1 1/2 inch wood screws to secure it to the end of the block using the drill
- Note: The end with the hole drilled through it from step 2 should be the end farthest from where you are securing to the 2x4
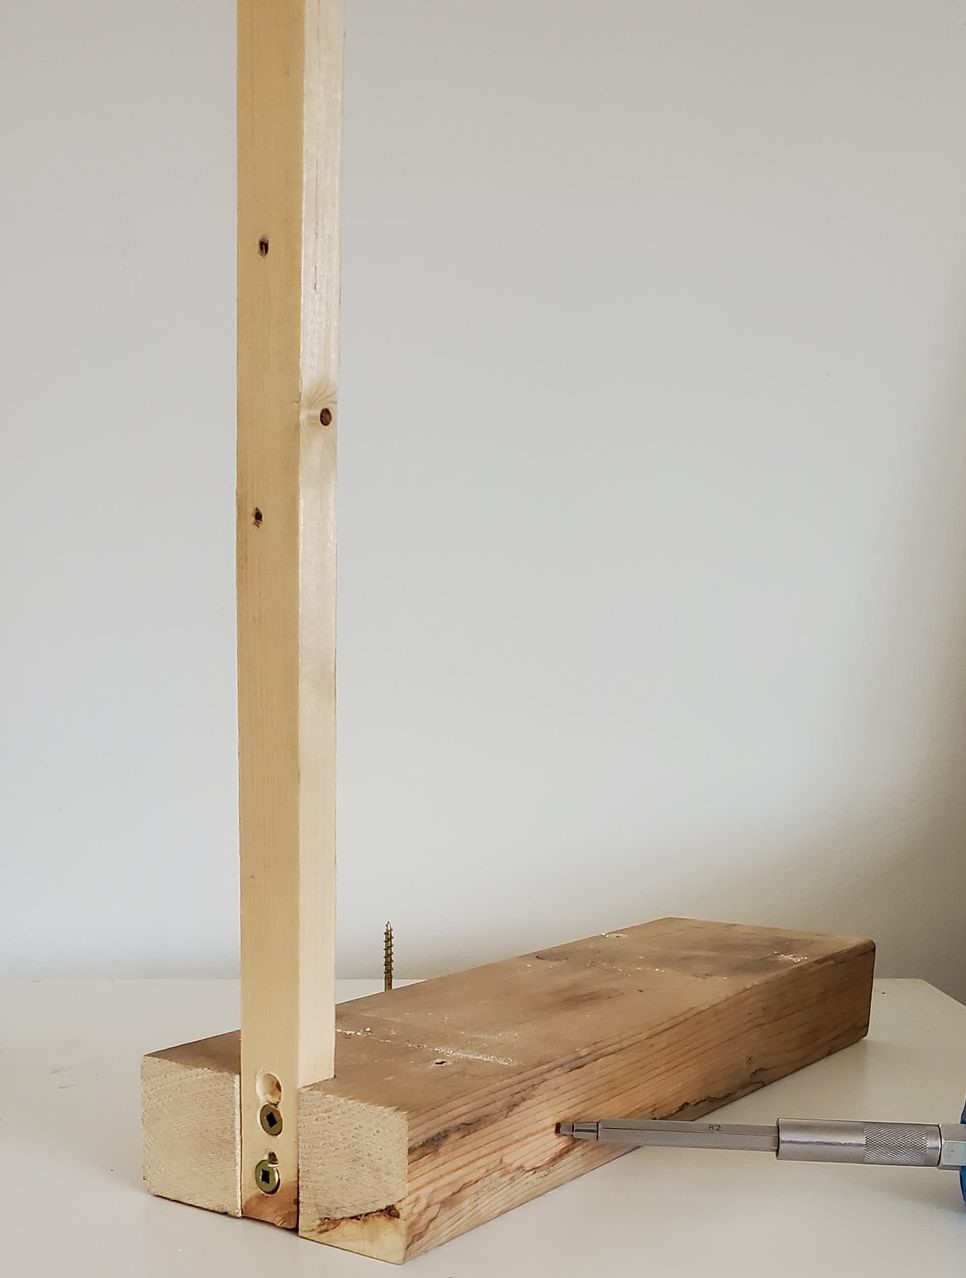
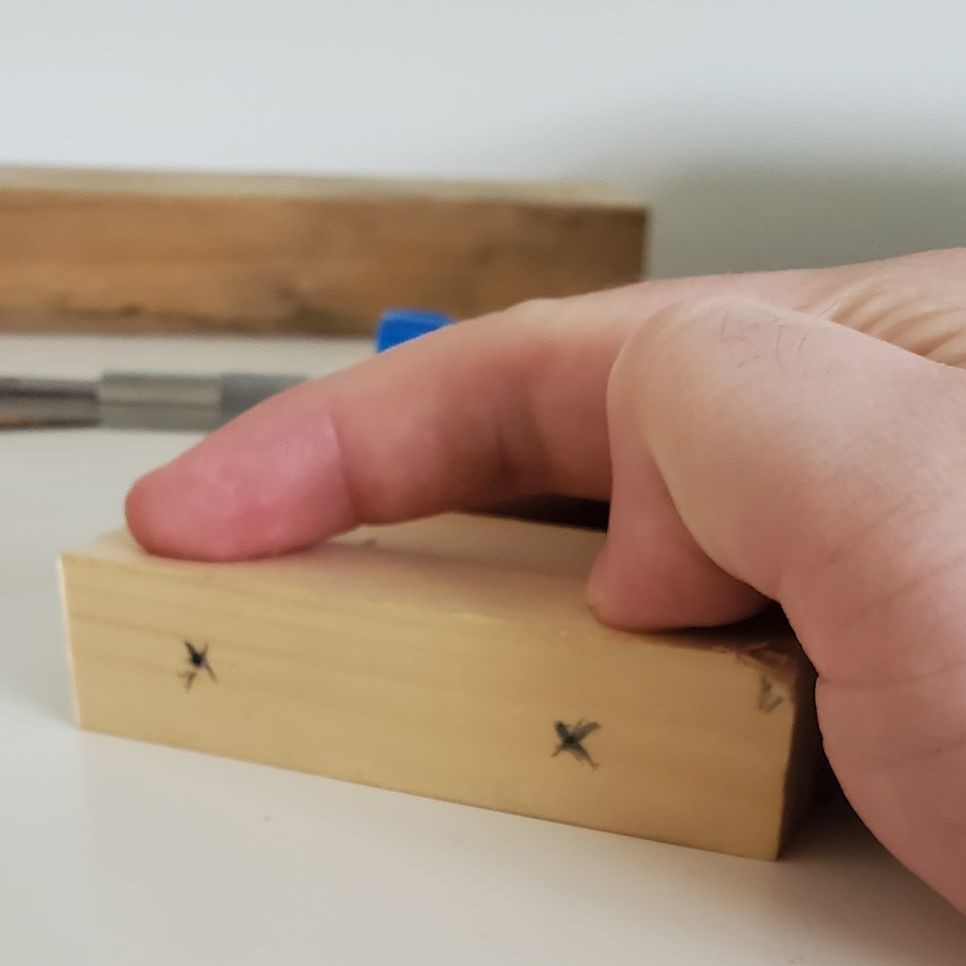
- Take the 3/4 x 3/4 x 3 1/2 inch blocks and place them as shown in the figure below with your metal ruler in the centre
- Mark where the edges of the ruler line up with your blocks of wood with a pencil
- Measure 1 inch in from each side and centered from the top and bottom and mark them along the outer face on one block as below
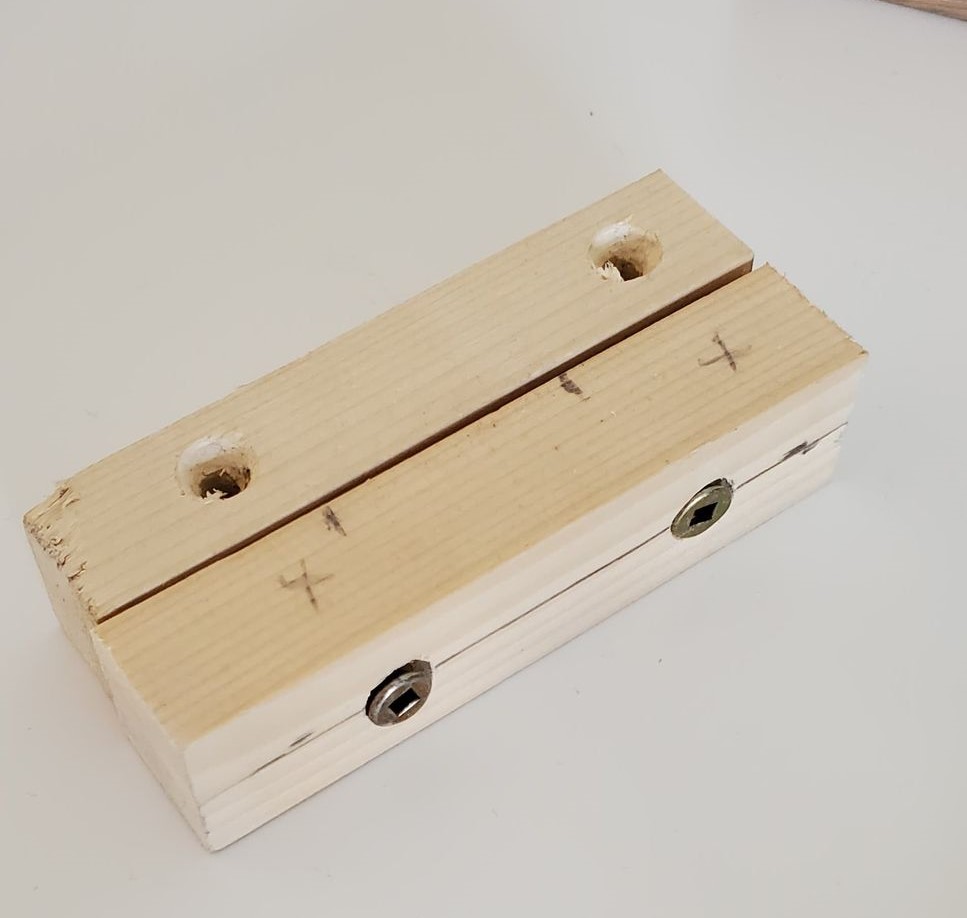
- Line the two blocks up so they are flush and put them in a vice or clamp them to stop them from moving, then drill into the marked location on the side of the block into the second block without piercing through to the other side as shown below
- Using your screwdriver (or carefully with the drill) secure the two blocks together using two wood screws
- Note: Do not fasten them completely tight yet as you will need to put the ruler between them to be secured later
- Along the top of the block not containing the heads of the screws from step 8, measure and mark 1/2 inch from each side and centered
- Using your drill, drill holes in the locations on the top of the marked block
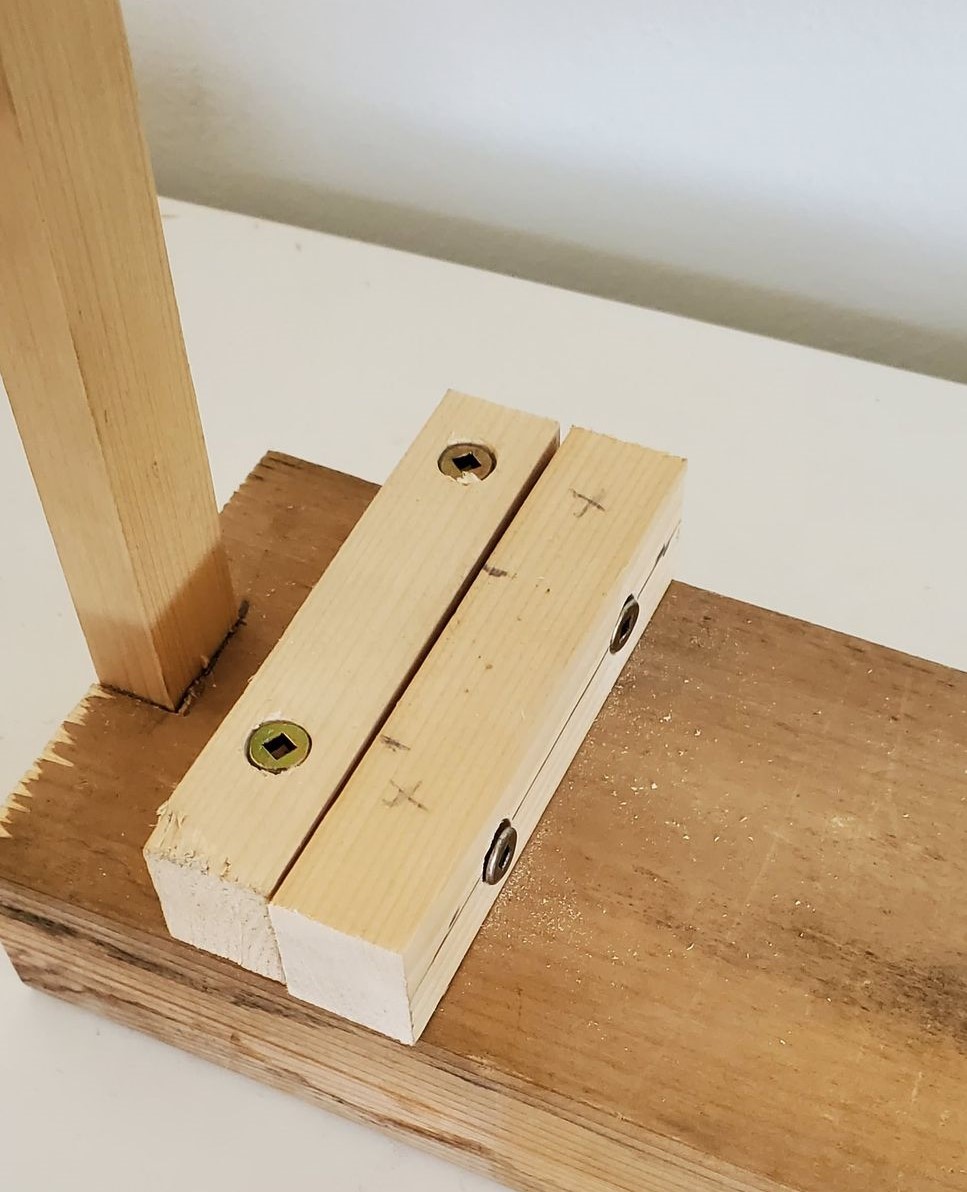
- Then, using your screwdriver (or carefully using a drill), screw your wood screws through the block into the 2x4 block approximately 3/4 inches from one end
- Note: the distance from the end should be the approximate distance from your neodymium magnet to the powered electromagnet for the powered electromagnet to repel the ruler and magnet. This just happened to be the distance for me
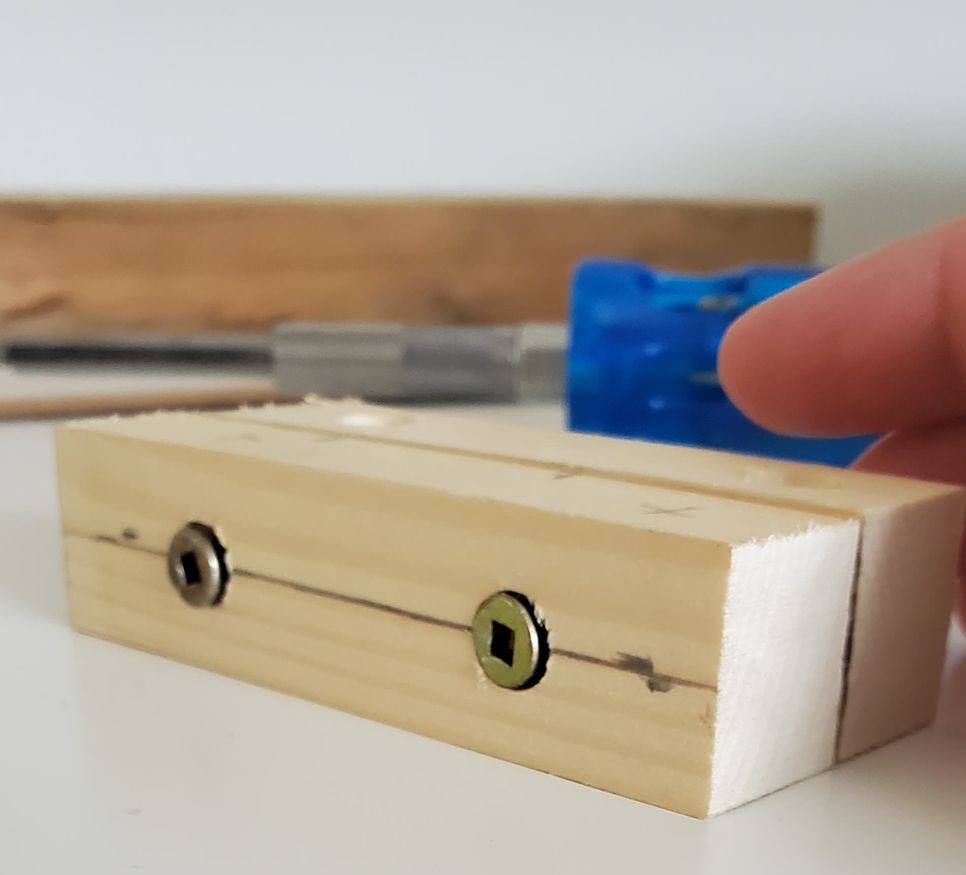
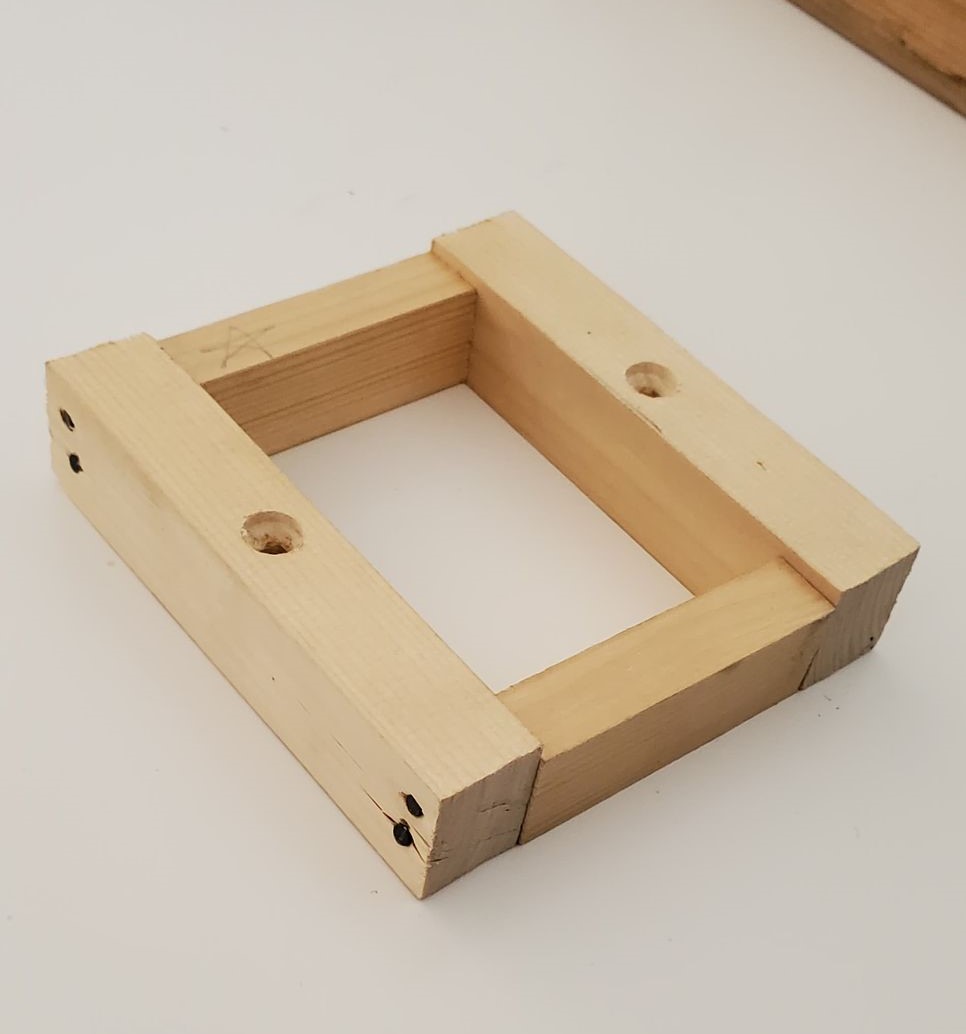
- Take one of the 3/4 x 3/4 x 3 7/8 inch blocks and the two 1/2 x 3/4 x 2 3/16 inch blocks and line the two blocks flush to the ends of the first block and nail them in using finishing nails
- Take the remaining 3/4 x 3/4 x 3 7/8 inch block and nail it to the small blocks to create a square
- Finally, line the square up as below and use wood screws to secure the larger blocks to the 2x4 at the opposite end from the post you previously affixed to it
- Note: You may want to drill pilot holes first as this thin of a piece of wood could crack by simply drilling a wood screw through it
- Once you have done this you should have a stand that looks something like the photo below
Electromagnetic Oscillator Circuit
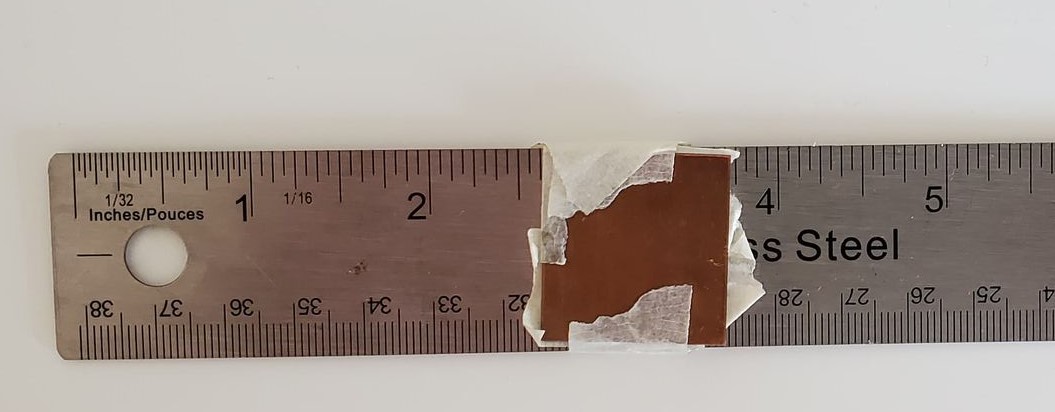
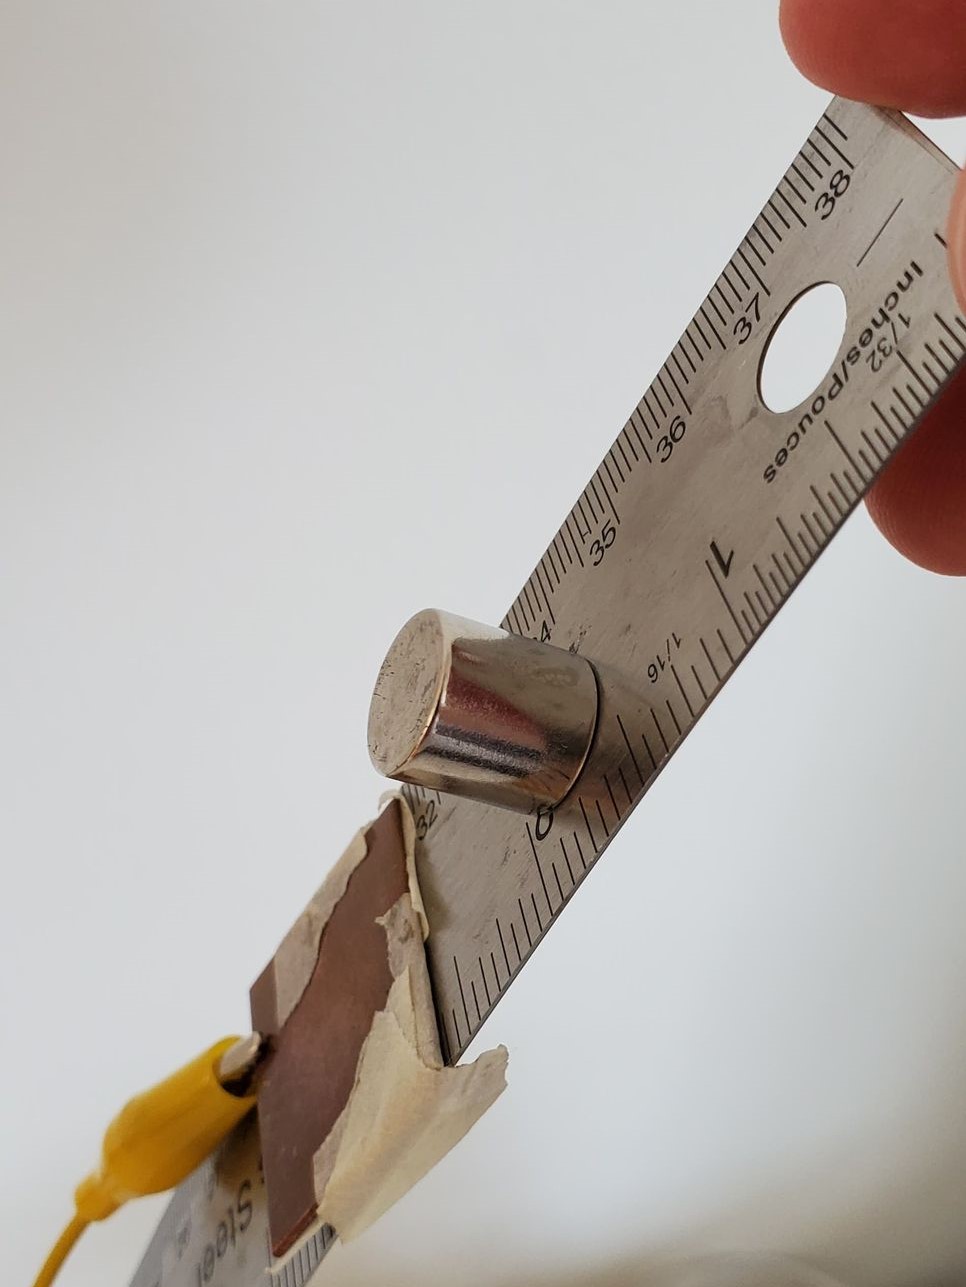
- Take the copper plate and connect an alligator clip to it
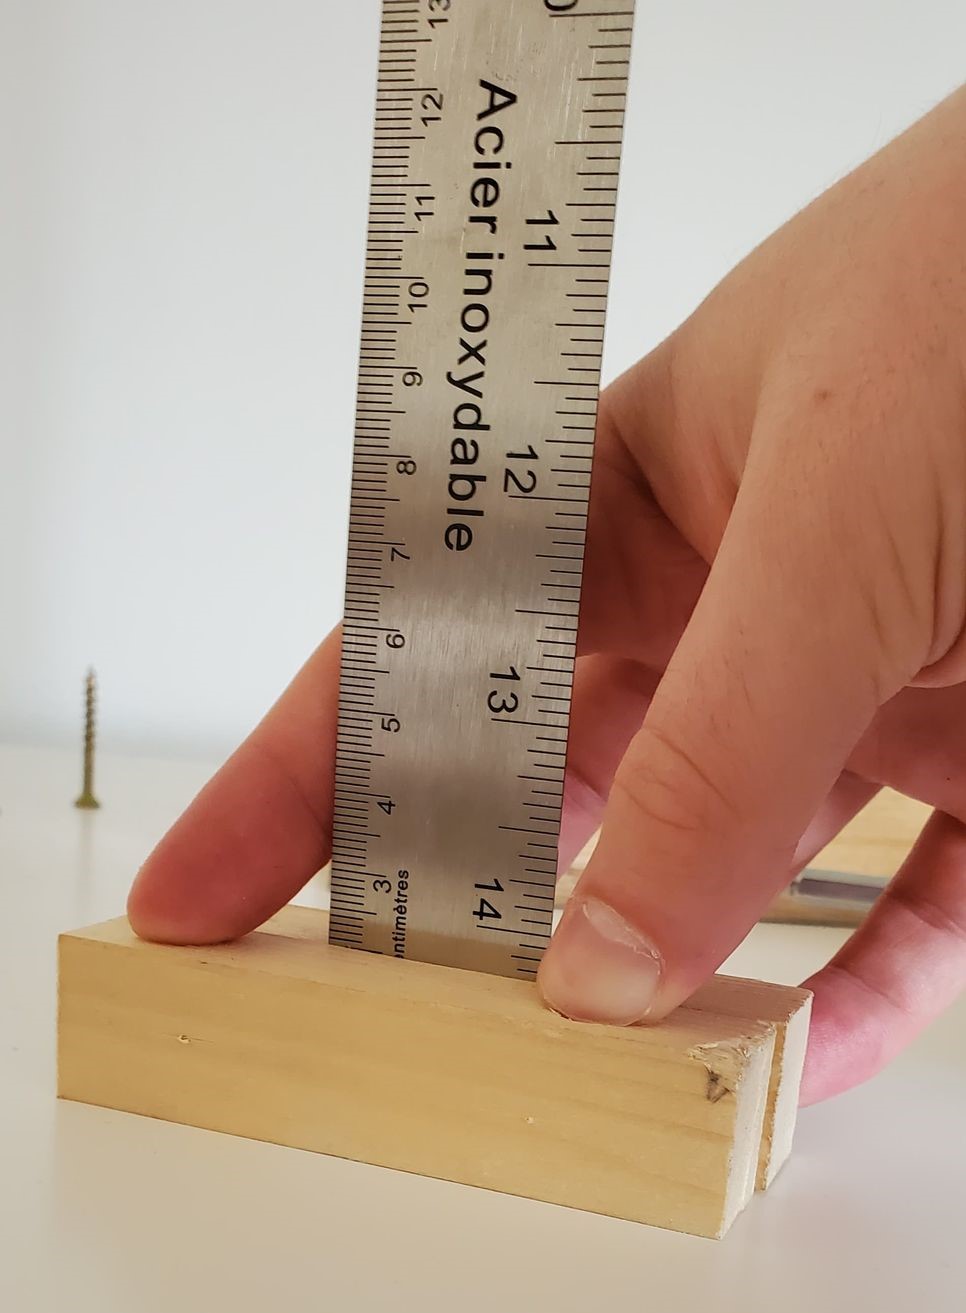
- Then, affix the plate to the metal ruler at approximately the 2 5/8 inch line (or such that it is in line with the hole you drilled into the post of your stand) using tape as below
- Ensure that the copper is mostly exposed as you will need to make electrical contact with it later
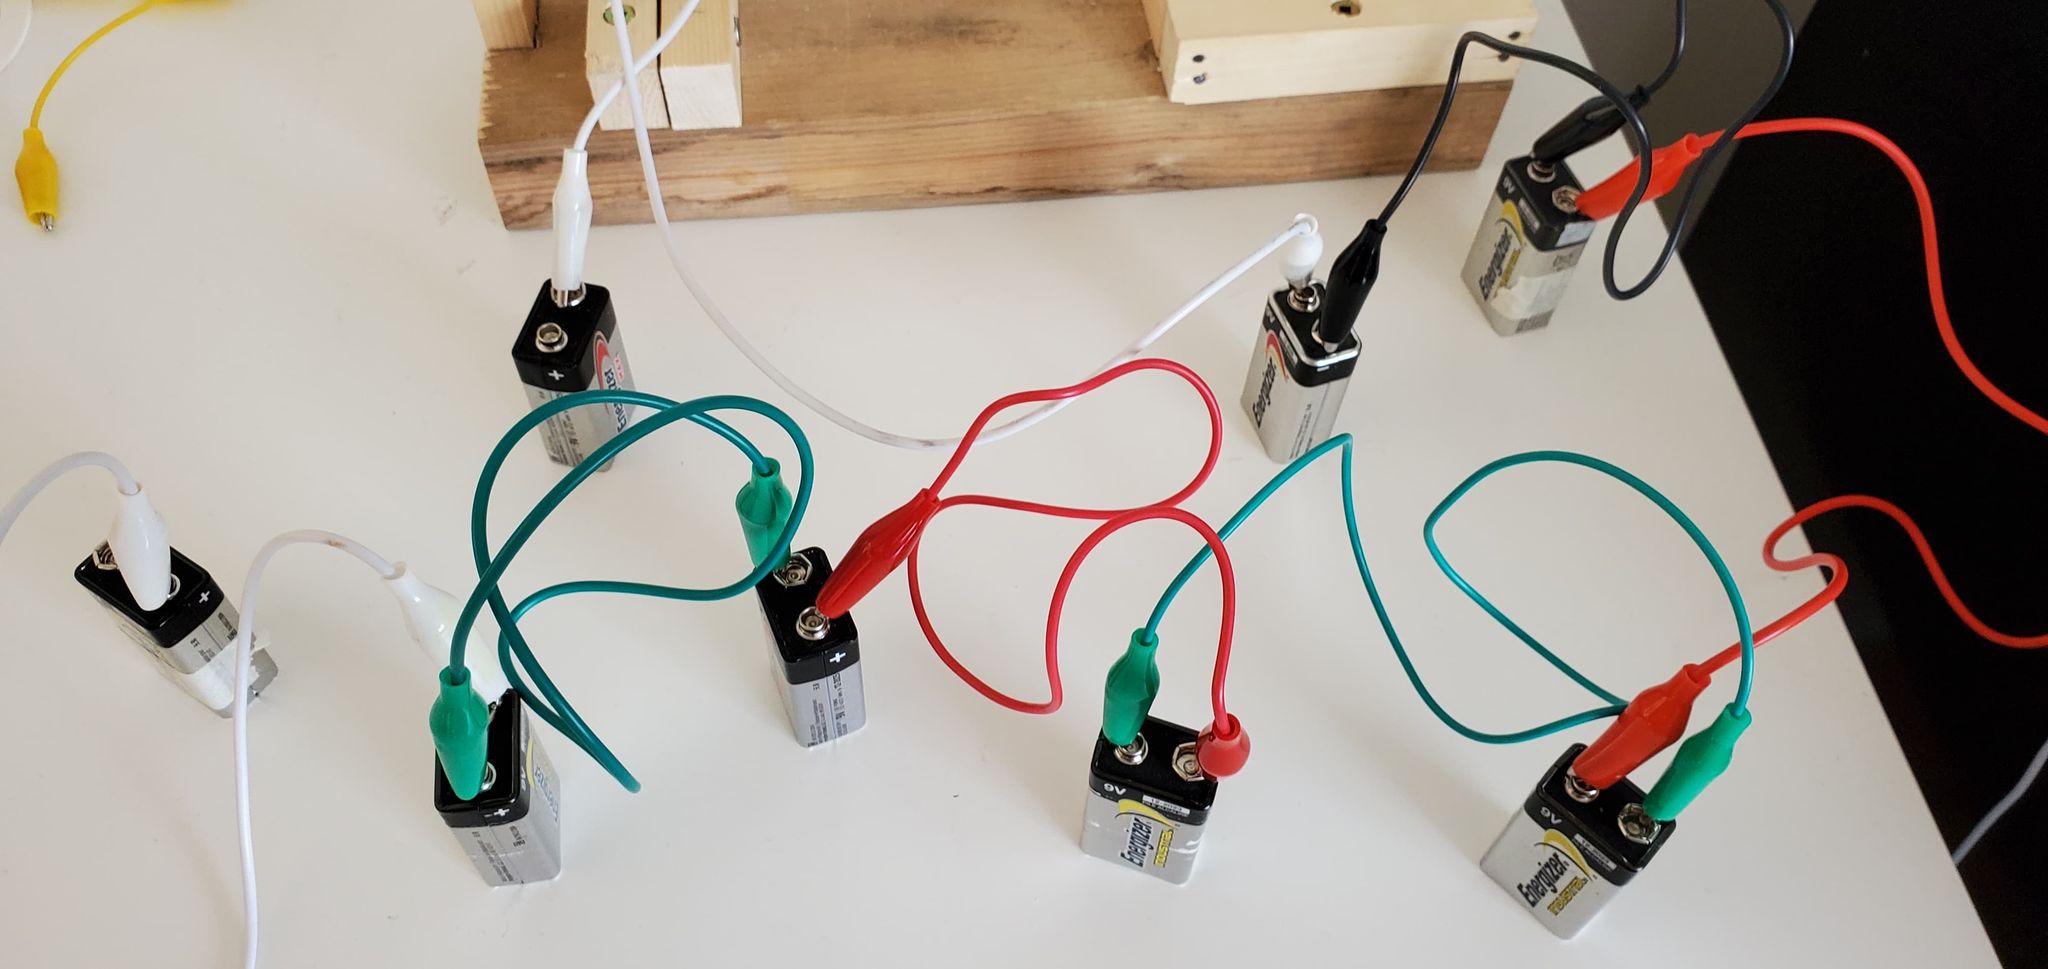
- Using Alligator clips, wire your 9V batteries in series making sure to leave the positive terminal from the first battery and negative terminal of the last battery unplugged (otherwise this would short your batteries and could cause a fire)
- Connect the open positive terminal of your batteries to the alligator clip that is connected to the copper plate
- Connect the open negative terminal to a new alligator clip with nothing connected to the other end
- We will use this later to complete the circuit with the copper plate
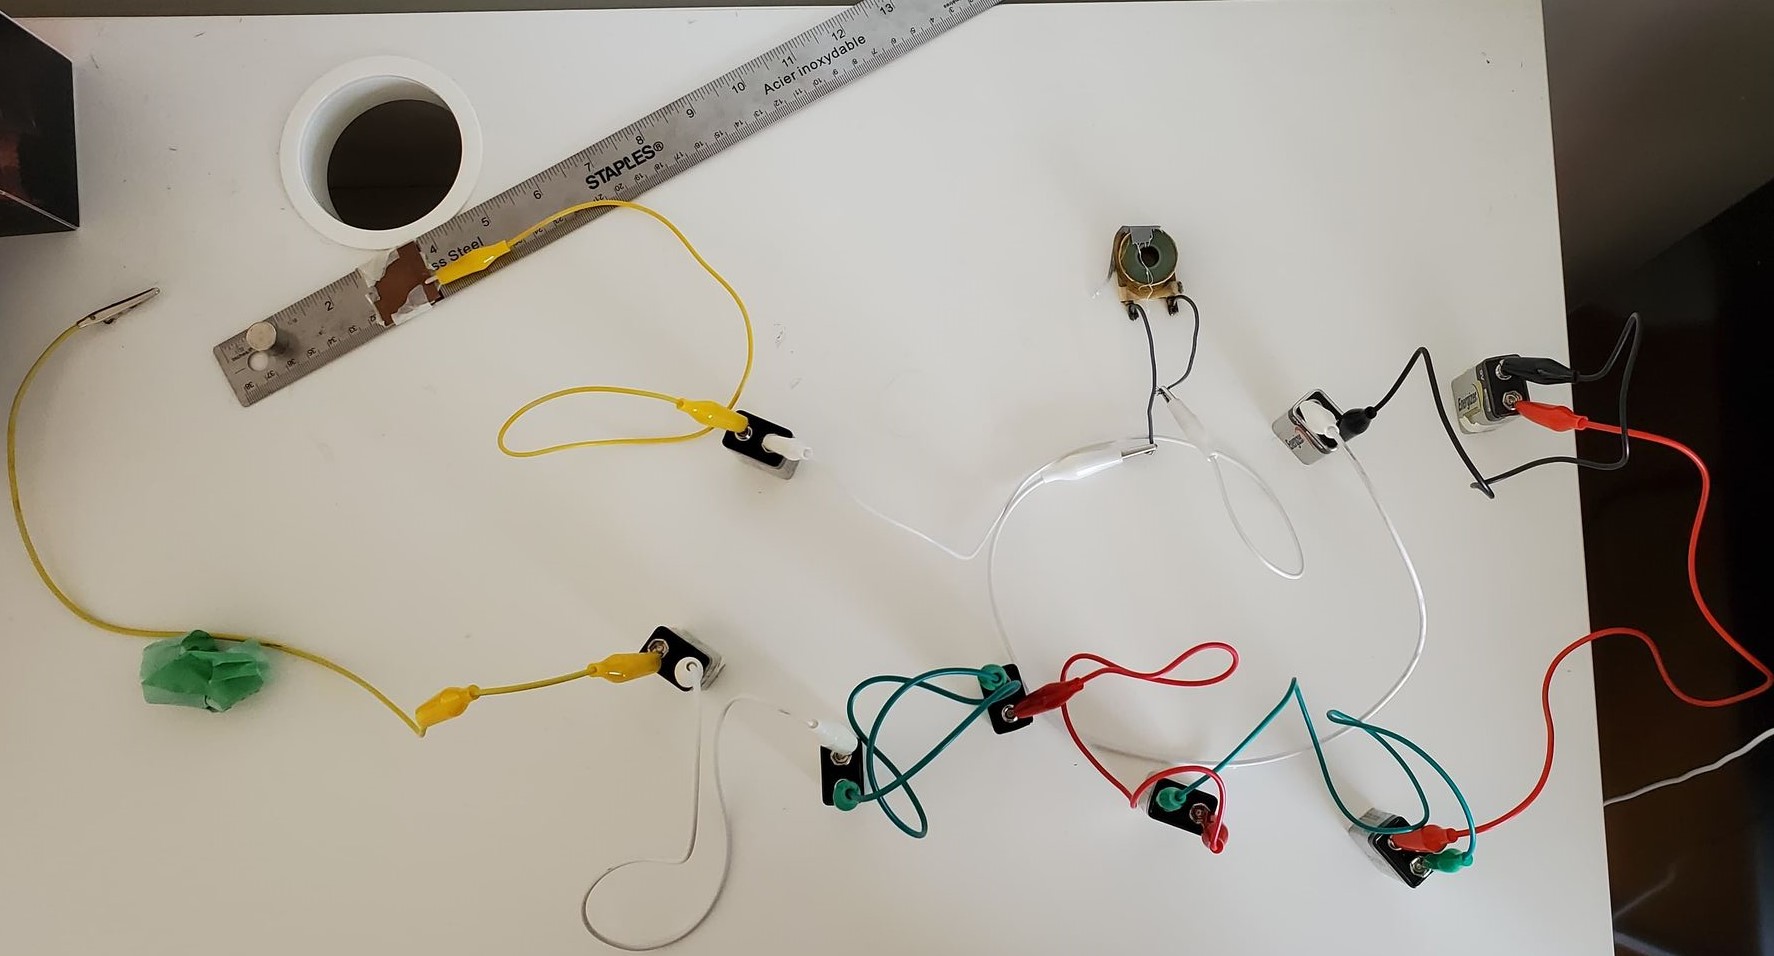
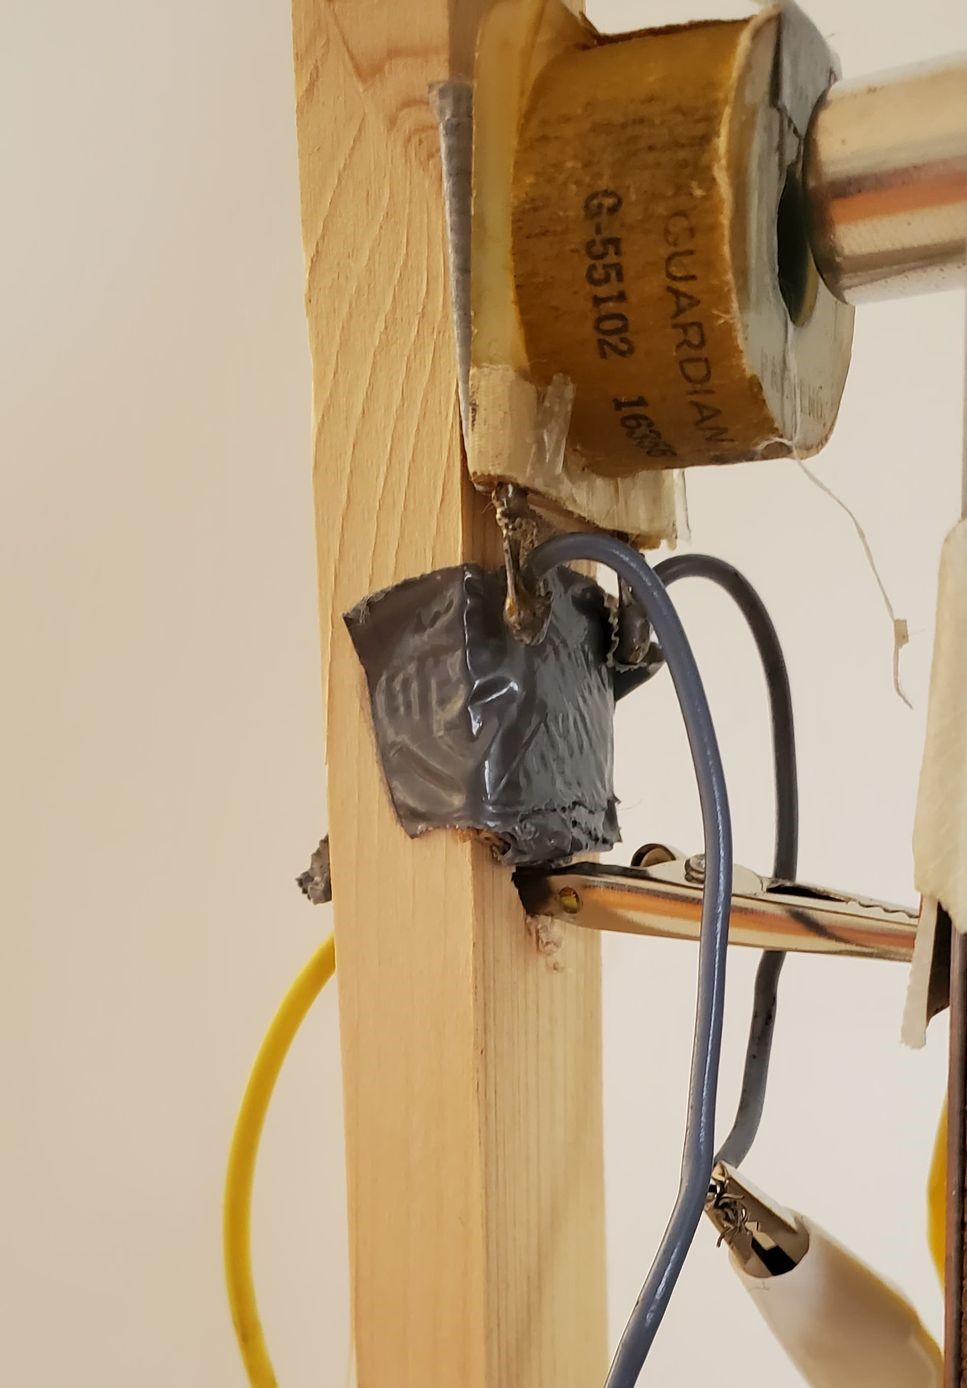
- Open the circuit at another battery in the circuit by disconnecting one of the alligator clips from one of its terminals and connect it to one end of the electromagnet
- Connect an alligator clip to the other end of the electromagnet then back to the now open terminal you just disconnected
- You can test that your circuit works by touching the open alligator clip to the copper plate and seeing if your electromagnet now repels the neodymium magnet. If not, check your connections with the alligator clips
Putting it Together
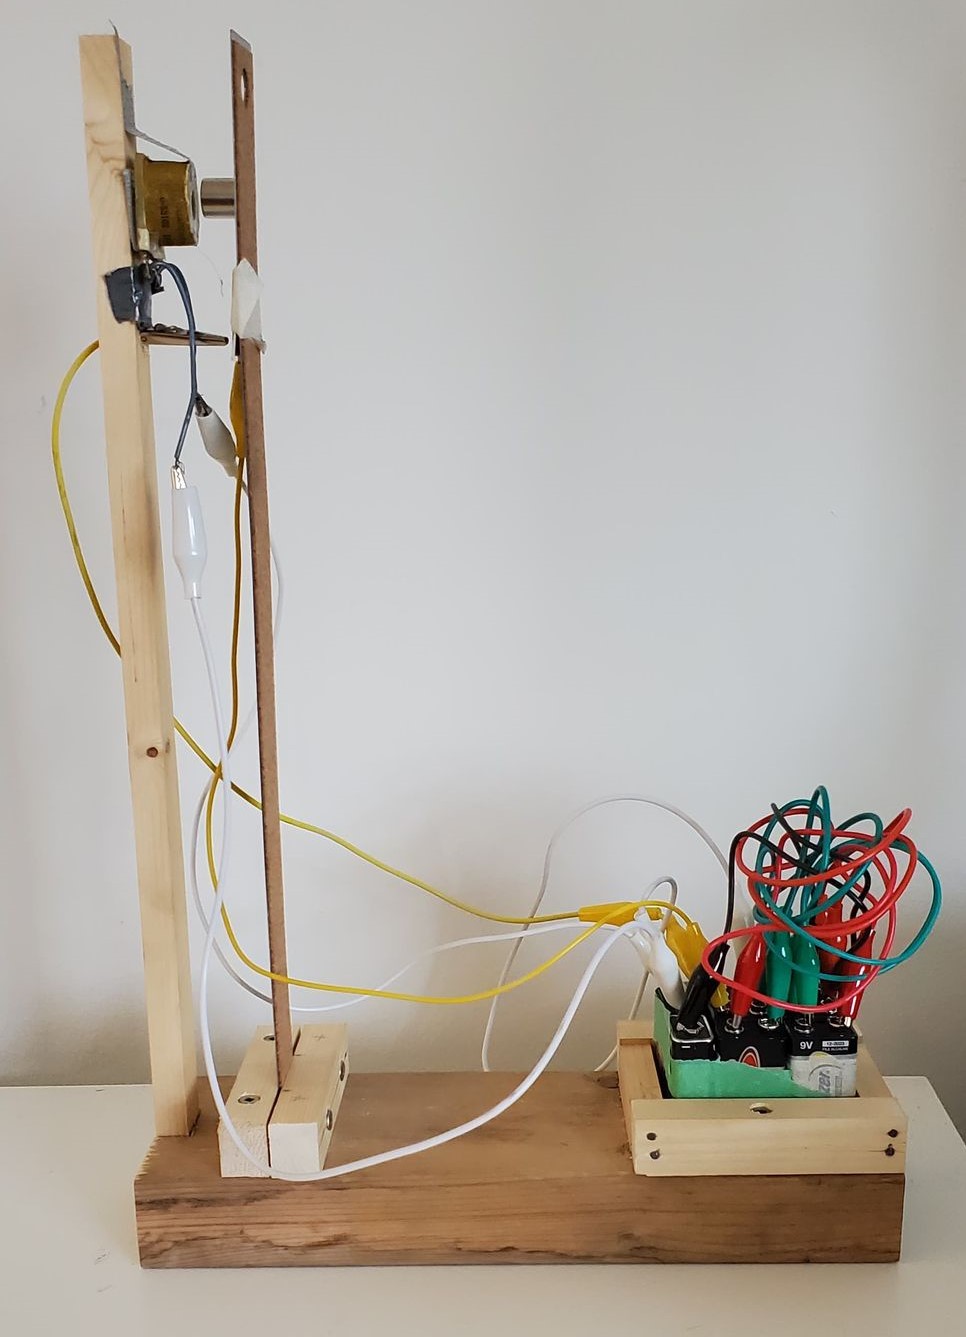
- Place one neodymium magnet above the copper plate on the ruler
- Next up, place the ruler into the slot that we created earlier in the stand and tighten the screws to keep it from sliding
- Feed the open alligator clip through the hole in the post on the stand such that it is pointing towards the copper plate on the ruler but is not quite touching it
- Affix the electromagnet to the wooden post using duct tape at the same height as the neodymium magnet is on the ruler so they would touch if you brought the ruler to the post
- Enable the circuit by touching the alligator clip to the copper plate and check that the electromagnet repels the neodymium magnet. If they attract, simply put the neodymium magnet on the ruler the opposite way
- Place the batteries into the square battery holder we created on the stand and you should be done and have something similar to the image below
- Place the completed apparatus at the front of the classroom such that all students can see it and so that the ruler is upright
- I recommend orienting the apparatus such that the thin edge of the ruler is facing the students
- If you are using the same setup from Demo 1, ensure that you have the batteries connected now so the circuit works as intended
- Pull back the ruler and let it swing back and forth, ensuring that on the forward swing, the open alligator clip makes contact with the copper plate on the ruler to complete the circuit
- You can also time this process with a stopwatch on your phone to compare the time it swings for against that of Demo 1
- Let the demo run for some time to illustrate the idea that it will continue to oscillate until the batteries run out, then you can either disable the circuit by disconnecting an alligator clip or allow it to continue running
- Discuss the idea of how the circuit works with the students
- I.e. discuss how after pulling the ruler back, it should swing forward, have contact between the alligator clip and copper plate, and activate the electromagnet which should then repel the neodymium magnet and thus the ruler
- Check with the students as to what they think will happen in this system (i.e. do they think it will stop like in Demo 1, if not why?)
- Discuss the periodicity of the ruler swinging back and forth
- You can make note of how the period remains relatively constant after the initial completion of the circuit
- Ask them why they think this might be and what things might change the period of the circuit
Running the Demo
Discussion Points
Powered by w3.css